
P01.40-2260-06
Shown on engine 272
1 Intermediate flange
2 Pulley
3 Coolant hose
5 Segmental disks
6 Central valves
7 Timing case cover
8 Power steering pump
9 Crankshaft radial sealing ring
12 Screw/bolts
13 Screw/bolts
A9 Refrigerant compressor
Modification notes
| Remove/install | ||
Danger! | Risk of injury caused by fingers being pinched or crushed when removing, installing or aligning hoods, doors, trunk lids, liftgates or sliding roof | Keep body parts and limbs well clear of moving parts. | |
Danger! | Risk of death caused by vehicle slipping or toppling off of the lifting platform. | Align vehicle between columns of vehicle lift and position four support plates at vehicle lift support points specified by vehicle manufacturer. | |
| Information on preventing damage to electronic components due to electrostatic discharge | ||
1 | Turn key in ignition lock to position "0" | Vehicles with code (889) Keyless-Go: Press Keyless-Go start/stop button repeatedly until ignition is switched off. | |
2 | Remove air filter housing with engine air intake ducts | ||
3 | Remove lower engine compartment paneling | ||
4 | Drain engine oil | ||
Danger! | Risk of injury to skin and eyes caused by scalding from contact with hot coolant spray. Risk of poisoning caused by swallowing coolant. | Do not open cooling system unless coolant temperature is below 90°C. Open cap slowly and release the pressure. Do not pour coolant into beverage containers. Wear protective gloves, protective clothing and safety glasses. | |
5 | Drain coolant at radiator | ||
| Notes on coolant | ||
6 | Disconnect coolant hose on coolant temperature regulator housing | ||
7 | Detach coolant hose (3) at coolant pump | ||
8 | Remove fan shroud | ||
9 | Attach guard plate for radiator/condenser | ||
| Guard plate for radiator/condenser | ||
10 | Remove poly-V-belt tensioning device | ||
11 | Detach guide pulley (2) | ||
12 | Remove air pump | ||
13 | Remove coolant temperature control housing | Installation: Install new O-ring and seal. | |
14 | Remove oil filter housing with oil-water heat exchanger | ||
15 | Remove left and right air shutoff valve | ||
16 | Remove intermediate flange (1) of air shutoff valve | | |
17 | Rotate engine at crankshaft center bolt in direction of rotation of engine to a 40° crankshaft angle after ignition TDC | | |
18 | Install retaining lock for crankshaft/starter ring gear | ||
19 | Remove belt pulley/vibration damper | ||
20 | Remove front cover at left cylinder head | Installation: After installing the front cover, check that the camshafts are positioned at 55° crank angle BTDC: | |
Check basic position of camshafts. | |||
21 | Remove front cover at the right cylinder head | Installation: After installing the front cover, check that the camshafts are positioned at 55° crank angle BTDC: | |
Check basic position of camshafts. | |||
22 | Remove chain tensioner | Installation: Install new chain tensioner. The previously installed chain tensioner must not be reinstalled because during removal, its pressure pin is pressed into the end position. The thrust pin latch prevents this return stroke. This would overstretch the timing chain on reinstalling. | |
23 | Remove camshaft adjuster for exhaust camshafts. | ||
24 | Remove camshaft adjuster for intake camshafts. | ||
25 | Remove alternator | ||
26 | Remove the oil dipstick guide tube | ||
27.1 | Detach power steering pump (8) from timing case cover (7) and put it on the side with connected line | Engine 272 without code (487) Active Body Control (ABC) | |
27.2 | Detach tandem pump from timing case cover (7) and place to one side with lines connected | Vehicles with code (487) Active Body Control (ABC) | |
28 | Detach refrigerant compressor (A9) and put it on the side with connected lines | | |
29 | Remove oil pan | If the oil pan cannot be released from the crankcase, warm oil pan in area of sealing surface with a hot air gun, then push mounting wedge between sealing surface to separate oil pan of oil pan. | |
30 | Remove screw/bolts (12, 13) | | |
31 | Detach timing case cover (7) | Installation: Observe different bolt lengths and diameters: | |
Bolt plan for timing case cover: | |||
Engine 272 | |||
Engine 273 | |||
Installation: Replace crankshaft radial sealing ring (9). Replace both sealing rings in timing case cover (7) and apply sealant to sealing surface of the timing case cover (7): | |||
| Notes on sealant path for timing case cover | ||
| |||
Loctite 5970 sealant | |||
| Clean | ||
32 | Clean oil pan sealing surfaces, oil pan bottom section and timing case cover (7) | Do not use any sharp-edged tools or abrasive paper. The sealing surfaces will be damaged otherwise. | |
Loctite 7200 | |||
Loctite 7063 cleaning spray (150 ml) | |||
33 | Install in the reverse order | ||
34 | Check engine oil level; correct if necessary | ||
Danger! | Risk of accident caused by vehicle starting off by itself when engine is running. Risk of injury caused by contusions and burns during starting procedure or when working near the engine as it is running | Secure vehicle to prevent it from moving by itself. | |
35 | Carry out an engine test run and check engine for leaks | ||
36 | Inspect cooling system for leaks |
Cylinder head
Number | Designation | Engine | Engine | |||
BA01.30-P-1003-01O | Cylinder head bolt on timing case | M8 | Nm | 20 | 20 | |
Crankcase, timing case cover, end cover
Number | Designation | Engine | ||
BA01.40-P-1001-01G | Screw/bolt, timing case cover to cylinder crankcase | M8 | Nm | 20 |
Crankcase, timing case cover, end cover
Number | Designation | Engine | ||
BA01.40-P-1001-01T | Screw/bolt, timing case cover to cylinder crankcase | M8 | Nm | 20 |
Air shutoff valve
Number | Designation | Engine | Engine | |
BA14.30-P-1004-02A | Screw/bolt, left air shutoff valve intermediate flange to cylinder head | Nm | 14 | 14 |
Refrigerant compressor
Number | Designation | Engine 272 | Engine 273 | ||
BA83.55-P-1001-01M | Screw/bolt, refrigerant compressor to timing case/crankcase/engine support | Nm | 20 | 20 | |
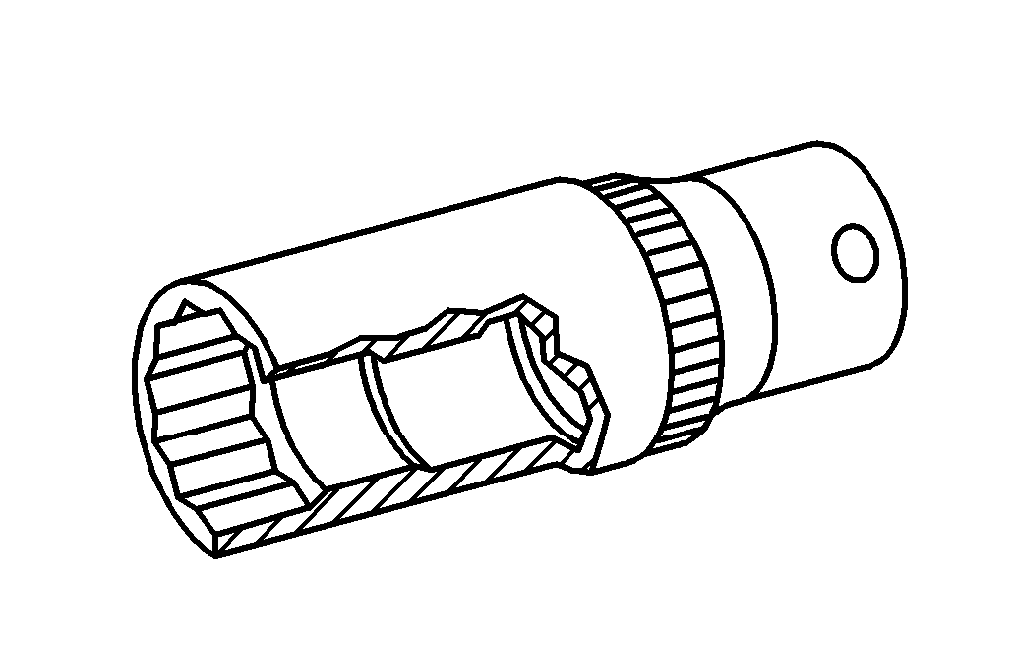

001 589 65 09 00
Wrench socket
Squeeze gun
112 589 00 25 00
Repair materials
Number | Designation | Order number |
BR00.45-Z-1013-01A | Loctite 5970 sealant | A 003 989 98 20 |
BR00.45-Z-1038-04A | Loctite 7200 | Henkel Loctite Deutschland GmbH |
BR00.45-Z-1046-04A | Loctite 7063 cleaning spray (150 ml) | A 001 986 71 71 10 |
참조 문서
- ah0140p100001va 컨트롤러 하우징 커버의 실런트 경로에 관한 지침
- ah2000n208001a 냉각수 지침
- ah5400p000101a 정전기 방전으로 인한 전자 부품 손상 방지 지침
- ap1800p0101rx 엔진 오일 교환 및 오일 필터 교체
- ar0100p005001a 실런트를 제거하십시오.
- ar0130p5700rx
- ar0130p5700ry
- ar0140p800001va 컨트롤러 하우징 커버 나사 조임 지침
- ar0145p7500rx 오일팬 탈, 장착
- ar0330p1600rx
- ar0330p5000rx
- ar0510p7800rx
- ar0520p6010rx
- ar0520p7201rx
- ar0520p7201ry
- ar0910p1150rx
- ar1321p3350rx
- ar1325p3200rx
- ar1430p7200rx
- ar1430p7251rx
- ar1540p5032rx
- ar1820p3471rx
- ar1840p3510rx
- ar2000p1010rx
- ar2000p1142rx
- ar2000p1142rx 냉각수 배출, 주입
- ar2010p2460rx
- ar2040p6800rx
- ar4630p0500rx
- ar4630p0500ry
- ar6120p1105r
- as0000z000501a 엔진이 작동 중인 상태에서 급발진에 의한 사고 위험 시동 또는 구동 중인 엔진 근처에서 작업할 때 차량에 부딪히거나 열에 의한 상해 위험
- as0000z001001a 리프터에서 차량이 미끄러지거나 틸팅 시 생명의 위험
- as0000z001101a 후드, 도어, 커버, 슬라이딩 루프 탈, 장착 및 설정작업 시 손가락이 끼이거나 눌려서 입을 수 있는 상해 위험
- as2000z000101a 뜨거운 냉각수 분출 시 입은 화상에 의한 피부와 안구의 상해 위험 냉각수의 음용으로 인한 중독 위험
- wf5850p011001a