AR26.40-P-2002E | Disassemble/assemble transmission housing | 19.11.09 |
TRANSMISSION 716.622 in MODEL 208.344 /444 with CODE (424) Sequentronic automated manual transmission (SEQ)
TRANSMISSION 716.662 in MODEL 208.348 /448 with CODE (424) Sequentronic automated manual transmission (SEQ)
TRANSMISSION 716.623 in MODEL 209.361 with CODE (424) Sequentronic automated manual transmission (SEQ)

P26.40-2026-09
1 Collar nut
2 Output flange
3 Reverse gear lock
4 Vent housing
5 Screw
6 Venting hose
7 Venting hose
16 Connector
17 Screw
18 Bracket
19 Wiring harness, electrical
20 Screw
21 Cover
X22/17 SEQ (ASG) connector, 18-pin
X22/18 SEQ (ASG) connector, 2-pin
8 Bracket
9 Screw
10 Central connector
11 Screw
12 Screw
13 Oil filler plug
14 Oil drain screw
Modification notes
| Removing | ||
Danger! | Risk of death caused by vehicle slipping or toppling off of the lifting platform. | Align vehicle between the columns of the lifting platform and position the four support plates at the lifting platform support points specified by the vehicle manufacturer. | |
Danger! | Risk of injury to skin or eyes caused by hydraulic fluid spraying out under high pressure. Risk of poisoning caused by swallowing hydraulic fluid | Depressurize the hydraulic system completely before starting any work on the system. Wear protective clothing and safety glasses. | |
1 | Detach cover (21) of electrical connectors on right of transmission | ||
2 | Unplug 2-pin SEQ connector (X22/18) | ||
3 | Switch on ignition and switch through the gears until the transmission is unpressurized | Read out hydraulic pressure with STAR DIAGNOSIS The transmission must be unpressurized. | |
STAR DIAGNOSIS diagnosis system | |||
4 | Drain hydraulic fluid | ||
| Clean | ||
5 | Clean the area around the oil drain screw (14) | Cleaner from package | |
6 | Remove oil drain screw (14) and drain transmission oil | ||
7 | Remove transmission | ||
| Disassemble | ||
8 | Fasten transmission on assembly stand | ||
9 | Remove output flange (2) | Pin wrench | |
Socket wrench bit | |||
10 | Remove pressure reservoir | ||
11 | Remove rpm sensor | ||
12 | Remove hydraulic pump | ||
13 | Remove sensor plate | ||
14 | Removing hydraulic module | ||
Screwdriver | |||
15 | Remove oil reservoir | ||
16 | Remove bleed hoses (6, 7) | ||
17 | Remove vent housing (4) | ||
18 | Remove reverse gear lock (3) | Impact extractor | |
Extraction claw | |||
19 | Remove bracket (8) | Unclip central connector (10) and plug (16). | |
20 | Remove electric cable harness (19) | Remove bolts (11, 12, 17) and expose lines. | |
21 | Remove bracket (18) | ||
22 | Remove central clutch release bearing | ||
23 | Disassemble transmission housing | ||
Retainer wrench | |||
Drift | |||
Pliers for external circlip | |||
24 | Remove main shaft and countershaft with shift unit | ||
Assembly plate | |||
Puller | |||
Jaw | |||
| Assemble | ||
25 | Install main shaft and countershaft with shift unit | ||
Assembly plate | |||
Insertion sleeves | |||
26 | Assemble transmission housing | ||
Collar nut, output flange to main shaft | |||
Countershaft bolt | |||
SEQ gearshift lever | |||
Screwdriver | |||
Drift | |||
Pin wrench | |||
Socket | |||
Drift | |||
Retainer wrench | |||
Drift | |||
Insertion tool | |||
Pliers for external circlip | |||
Sealant | |||
27 | Install bracket (18) | | |
28 | Mount electrical wiring harness (19) | Ground terminal point of wiring harness to transmission | |
Wiring harness to transmission bottom right | |||
Wiring harness to transmission bottom left | |||
29 | Install bracket (8) | | |
Clip in central connector (10) and plug (16). | |||
30 | Drive in reverse gear lock (3) as far as it will go | ||
31 | Install vent housing (4) | Grease contact surfaces of transmission housing. | |
| |||
32 | Install ventilation hoses (6, 7) | ||
33 | Install central clutch release bearing | ||
34 | Install oil reservoir | ||
35 | Install hydraulic unit | ||
Pressure line, hydraulic unit to hydraulic unit | |||
Pressure line, hydraulic pump to hydraulic unit | |||
Bolt, hydraulic unit to bottom of transmission | |||
Clutch line to hydraulic unit | |||
Bolt, connecting sleeve to central shift shaft | |||
Bolt, hydraulic unit to top of transmission | |||
Bracket, connection hose to hydraulic unit | |||
Bolt, solenoid displacement angle to connecting sleeve | |||
Screwdriver | |||
Sealant | |||
36 | Install sensor plate | ||
37 | Install hydraulic pump | ||
38 | Install rpm sensor | ||
39 | Tighten oil drain screw (14) | | |
40 | Remove oil filler screw (13) | ||
41 | Fill with transmission oil | The transmission must be in the installation position. | |
Correct oil level = 10 mm below bottom edge of filler opening. | |||
Carry out measurement e.g. with a slanted Allen wrench. | |||
| Filling capacity of transmission oil revised | ||
42 | Tighten oil filler screw (13) | | |
43 | Install pressure reservoir | ||
44 | Remove transmission from assembly stand | ||
| Install | ||
45 | Install transmission | ||
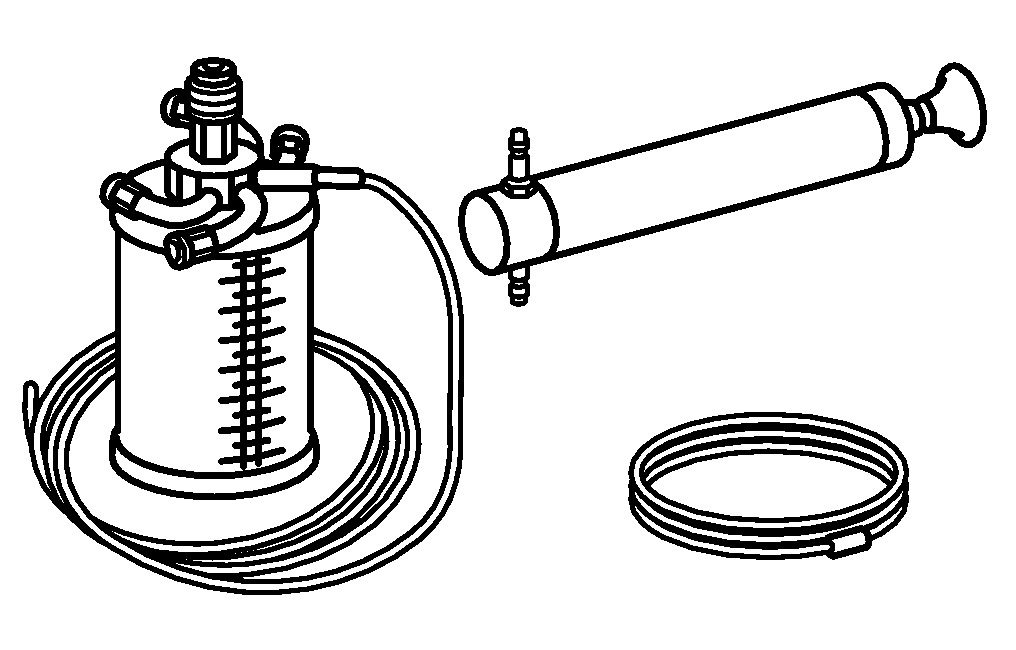
46 | Top up hydraulic oil | ||
| |||
Hand pump | |||
47 | Push on ASG connector, 2-pin (X22/18) until it latches | ||
48 | Mount cover (21) of electrical connectors on right of transmission | Insert journal (arrow) of cover (21) in bracket. | |
49 | Teach in turning angle sensors using STAR DIAGNOSIS |
Housing
Number | Designation | Trans-mission | |
BA26.40-P-1003-01C | Oil filler plug | Nm | 35 |
BA26.40-P-1004-01C | Oil drain screw | Nm | 30 |
Gear set, shafts
Number | Designation | Trans-mission | |||
BA26.50-N-1001-01D | Nut, output flange to main shaft | M121.5 | Nm | 110 | |
M241.5 | Stage 1 | Nm | - | ||
Stage 2 | Nm | - | |||
Stage 3 | Nm | - | |||
M261.5 | Stage 1 | Nm | - | ||
Stage 2 | Nm | - | |||
Stage 3 | Nm | - | |||
BA26.50-N-1005-01D | Bolt, countershaft to countershaft bearing | M141.5 | Nm | 75 | |
M181.5 | Nm | 100 | |||
Shift mechanism
Number | Designation | Trans-mission 716.622/ | Trans-mission 716.623 | ||
BA26.60-N-1010-01A | Pressure line, hydraulic unit to pressure reservoir | Nm | 16 | 16 | |
BA26.60-N-1011-01A | Pressure line hydraulic pump - hydraulic unit | Nm | 16 | 16 | |
BA26.60-N-1012-01A | Bolt at bottom of hydraulic unit to transmission | Nm | 9.5 | 9.5 | |
BA26.60-N-1013-01A | Clutch line to hydraulic unit | Nm | 16 | 16 | |
BA26.60-N-1014-01A | Bolt of connecting sleeve to central shift shaft | Nm | 11.5 | 11.5 | |
BA26.60-N-1017-01A | Bolt for hydraulic unit on top of transmission | Nm | 7.5 | 7.5 | |
BA26.60-N-1018-01A | Bolt, vent housing to transmission | Nm | 6 | 6 | |
BA26.60-N-1019-01A | Bracket of central connector to transmission | Nm | 10 | 10 | |
BA26.60-N-1020-01A | Ground terminal point, wiring harness to transmission | Nm | 10 | 10 | |
BA26.60-N-1021-01A | Wiring harness to bottom right of transmission | Nm | 10 | 10 | |
BA26.60-N-1022-01A | Wiring harness on transmission at lower left | Nm | 15 | 15 | |
BA26.60-N-1023-01A | Bracket, connector of turning angle sensors | Nm | 10 | 10 | |
BA26.60-N-1024-01A | Bracket of connection hose to hydraulic unit | Nm | 6 | 6 | |
BA26.60-N-1026-01A | Bolt, magnet displacement angle to coupling sleeve | Nm | 3 | 3 | |
Manual transmission
Number | Designation | Transmission | Transmission | ||
BF26.10-P-1001-01C | Gear oil | Filling capacity | Liters | 1.2 | 1.5 |
Specifications for Operating Fluids | Sheet | ||||
BF26.10-P-1002-01C | Hydraulic oil | Filling capacity | Liters | 0.5 | 0.5 |
Specifications for Operating Fluids | Sheet | ||||


126 589 02 09 00
Screwdriver
Wrench socket
Pin wrench
Impact extractor
129 589 01 07 00
716 589 00 11 00
602 589 00 33 00


716 589 00 09 00
Drift
Retainer wrench
Extraction claw
Assembly plate
716 589 03 33 00
711 589 04 15 00
716 589 00 31 00


000 589 87 33 00
Insertion sleeves
Jaws
Puller
Drift
000 589 65 33 00
716 589 00 33 00
210 589 03 15 00


210 589 04 15 00
Insertion tool
Drift
Drift
Hand pump
716 589 01 15 00
716 589 04 33 00
210 589 00 71 00

SEQ gearshift lever
000 589 85 63 00
Repair materials
Number | Designation | Order number |
BR00.45-Z-1032-04A | Cleaner from package | Würth GmbH |
BR00.45-Z-1017-01A | Loctite 5203 sealant | 002 989 71 20 10 |
참조 문서
- ar2610p0020e 변속기 탈, 장착
- ar2610p0036d 변속기를 조립 스탠드에 고정하기
- ar2619d0023a 속도 센서 탈, 장착
- ar2640d0345a 중앙 클러치의 탈, 장착
- ar2640d200201a 변속기 하우징을 분해
- ar2640d200202a 변속기 하우징 조립
- ar2650d400001a 메인 샤프트와 카운터 샤프트를 결속 장치와 함께 분해
- ar2650d400002a 메인 샤프트와 카운터 샤프트를 결속 장치와 함께 장착
- ar2660d0007a 변속기에서 유압펌프 탈, 장착
- ar2660d000801a 유압 오일 배출, 주입
- ar2660d0015a 축압기의 탈, 장착
- ar2660d0017b 센서판 탈, 장착
- ar2660d001901b 유압장치의 분리
- ar2660d001902b
- ar2660d001902b 유압 장치 장착
- ar2660d0020a 오일 탱크 탈, 장착
- as0000z001001a 리프터에서 차량이 미끄러지거나 틸팅 시 생명의 위험
- as0000z001301a 고압 상태에서 분출되는 유압유로 인한 피부 또는 안구의 상해 위험유압유의 음용으로 인한 중독 위험
- bt2600p000101a