SM01.40-W-0002A | Replace sealing ring of the screw plug on the front of the crankcase | 4.2.09 |
ENGINE 457.9 in MODEL 375, 940, 942, 943, 944, 958 with CODE (MZ5) Electromagnetic fan drive (Linnig clutch)

W20.40-1083-09
1 Radiator
2 Charge air cooler
3 Coolant expansion reservoir
4 Charge air hose (red)
5 Charge air hose (black)
6 Fan
12 Electromagnetic fan clutch
13 Radiator mounting
Arrows Screwdriving
7 Poly-V belt for fan
8 Poly-V belt tensioning device for fan
9 Poly-V belt for alternator
10 Coolant pump belt pulley
11 Bracket

W01.40-1071-09
14 Cover
15 Belt pulley for fan drive
18 Sealing ring
19 Splash ring
16 Belt pulley/vibration damper
17 Screw plug
Modification notes
| Remove/install | ||
| Notes on self-locking nuts and bolts | ||
1 | Switch off ignition | ||
Danger! | Risk of injury to skin and eyes caused by scalding from contact with hot coolant spray. Risk of poisoning caused by swallowing coolant. | Do not open cooling system unless coolant temperature is below 90°C. Open cap slowly and release the pressure. Do not pour coolant into beverage containers. Wear protective gloves, protective clothing and safety glasses. | |
2 | Only drain coolant at radiator (1) | ||
3 | Detach bottom coolant hose at radiator (1) | ||
Danger! | Risk of injury caused by body parts being pinched or crushed as cab is tilted | Ensure that no one is within the tilting range of the cab as it is being tilted. Always tilt the cab all the way to the end position and secure with the safety strut. | |
4 | Tilt cab | ||
| Notes on tilting the cab | ||
5 | Remove soundproofing on frame at top left, right and below | ||
6 | Detach charge air hoses (4, 5) at charge air cooler (2) | Installation: Check charge air hoses (4, 5) and clamps for condition, replace if necessary. | |
The charge air hoses (4, 5) must not be mixed up, only the charge air hose (red) (4) is temperature-resistant. | |||
| |||
7 | Detach upper coolant hoses at radiator (1) and at coolant expansion reservoir (3) | ||
8 | Unscrew bolts at the radiator mounting (13) on right and left and press radiator (1) to the front | ||
Danger! | Risk of injury caused by pinching or crushing when working on springs or spring bodies that are under load | Use only approved tensioning devices; shield off hazard area if necessary. | |
9 | Release the tension on the poly-V-belt of the fan (7) and take it off from the tensioner pulley of the poly-V-belt tensioning device of the fan (8) | Installation: Inspect condition of poly-V-belt of fan (7), replace if necessary. | |
Routing diagram of poly V-belt | |||
| Damage profiles for poly-V belt | ||
10 | Loosen bolts on the belt pulley of the coolant pump (10) | To do this, briefly release the tension on the poly-V belt of the alternator (9) and rotate the belt pulley of the coolant pump (10) again. | |
| |||
Danger! | Risk of injury caused by pinching or crushing when working on springs or spring bodies that are under load | Use only approved tensioning devices; shield off hazard area if necessary. | |
11 | Release the tension on the poly-V belt of the alternator (9) and take if off the belt pulley of the alternator | Installation: Inspect condition of poly-V-belt of generator (9), replace if necessary. | |
Routing diagram of poly V-belt | |||
| Damage profiles for poly-V belt | ||
12 | Disconnect the electrical connector of the electromagnetic fan clutch (12) | ||
13 | Remove the bracket (11) for the fan drive | Installation: Observe different bolt lengths (arrows). | |
| |||
14 | Remove belt pulley of coolant pump (10) | Installation: Only put the bolts of the belt pulley of the coolant pump (10). | |
15 | Remove fan (6) with the electromagnetic fan clutch (12) and the bracket (11) upwards | ||
16 | Detach oil filler line at oil pan and fan surround | ||
17 | Remove the cover (14) of the belt pulley of the fan drive (15) | ||
18 | Attach rotating device to timing case | ||
| |||
| |||
| |||
19 | Detach the belt pulley of the fan drive (15) from the belt pulley/vibration damper (16) | Installation: Check belt pulley of fan drive (15) for wear, replace if necessary. | |
| |||
20 | Take off belt pulley/vibration damper (16) | Use turning device to block the flywheel. | |
Installation: Check belt pulley/vibration damper (16) for wear, replace if necessary. | |||
| |||
21 | Remove the slinger (19) | Installation: The slinger (19) must be installed with the flat side towards the belt pulley/vibration damper (16). | |
22 | Remove screw plug (17) | Installation: Remove sealant on the screw plug (17) and on the thread in the crankcase. Replace sealing ring (18) and tighten screw plug (17) without sealant. | |
| |||
23 | Install in the reverse order | ||
Danger! | Risk of accident caused by vehicle starting off by itself when engine is running. Risk of injury caused by contusions and burns during starting procedure or when working near the engine as it is running | Secure vehicle to prevent it from moving by itself. Wear closed and snug-fitting work clothes. Do not touch hot or rotating parts. | |
24 | Start engine and carry out engine test run, check screw plug (17) for leaks | ||
25 | Turn off engine |
Crankcase, timing case cover, end cover
Number | Designation | Engine | |||
BA01.40-N-1008-01U | Screw plug, longitudinal oil duct to crankcase | M221.5 | Nm | 100 | |
Timing case
Number | Designation | Engine 457.9 | |
BA01.60-N-1001-01M | Bolt connecting inspection hole cover to timing case | Nm | 25 |
BA01.60-N-1003-01M | Bolt, turning device to timing case | Nm | 25 |
Flywheel, driven plate, vibration damper, starter ring gear
Number | Designation | Engine | ||
BA03.30-N-1002-01F | Bolt, vibration damper to crankshaft | Nm | 200 | |
BA03.30-N-1005-01F | Bolt, belt pulley of the fan drive to vibration damper | Nm | 30 | |
Charge air pipe/charge air cooling
Number | Designation | Engine | ||
BA09.41-N-1001-01K | Clamp, charge air hose to charge air housing/charge air pipe and charge air cooler | Nm | 7.5 | |
Coolant pump, coolant thermostat
Fan, fan clutch
Number | Designation | Engine | |
BA20.40-N-1004-01L | Bracket, fan drive to cover of camshaft sprocket/cylinder crankcase | Nm | 60 |
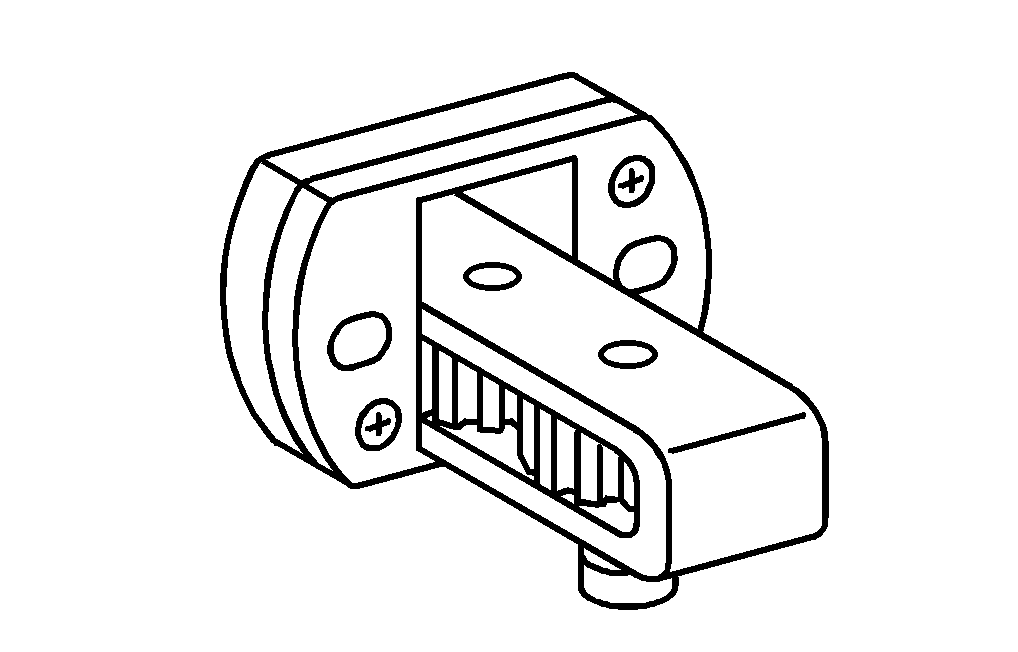
Cranking device
904 589 04 63 00