
W23.20-1061-08
1 | Oil separator | 7 | Compressed-air line engine brake | 13 | Output flange | ||
2 | Compressor resonator | 8 | Coolant line to compressor | 14 | Nut | ||
3 | Bracket | 9 | Bracket | 15 | Timing case | ||
4 | Compressor suction line | 10 | Bearing housing | 16 | Oil spray nozzle | ||
5 | Engine bleed line | 11 | Flange cover | Pfeil A | Screw | ||
6 | Compressed-air line constant throttle | 12 | Cover panel | Pfeil B | Hole |

10 | Bearing housing |
11 | Flange cover |
12 | Cover panel |
17 | Bolts |
18 | Radial shaft sealing ring |
19 | O-ring |
20 | Shim |
21 | O-ring |
22 | Drive gear |
23 | Nut |
W23.20-1062-06
| Remove | ||
Topical note | Notes on self-locking nuts and bolts | ||
1 | Open maintenance flap | ||
Warning | Risk of injury caused by body parts being pinched or crushed as cab is tilted | Ensure that no one is within the tilting range of the cab as it is being tilted. Always tilt the cab all the way to the end position and secure it with the safety strut. | |
2 | Tilt cab | ||
Topical note | Notes on tilting the cab | ||
3 | Remove soundproofing from frame at upper right, left and rear | ||
4 | Install cranking device for engine | ||
Bolt, turning device to timing case | |||
Turning device | |||
5 | Block engine with cranking device | ||
6 | Remove propeller shaft from output flange (13) and swivel to one side | ||
7 | Unscrew nut (14) from drive shaft | ||
8 | Remove output flange (13) and cover panel (12) | ||
9 | Remove engine bleed line (5) from oil separator (1), release from bracket (3) and swivel to one side | ||
10 | Remove compressor suction line (4) from compressor resonator box (2), release from brackets (3) and swivel to one side | ||
11 | Remove clamps of compressor coolant line (8), constant throttle compressed-air line (6) and engine brake compressed-air line (7) from bracket (9) | ||
12 | Remove screw (arrow A) of clamp from bracket (9) | ||
13 | Remove bracket (9) on bearing housing (10) | Bearing housing (10) may fall out. | |
14 | Pull out bearing housing (10) at timing case (15) | ||
15 | Remove flange cover (11) at bearing housing (10) | Collect escaping engine oil. | |
16 | Remove O-ring (19) from flange cover (11) | ||
17 | Remove shim (20) from flange cover (11) | ||
18 | Remove radial shaft sealing ring (18) from flange cover (11) | ||
19 | Remove oil spray nozzle (16) from cylinder crankcase | ||
| Check | ||
20 | Check bore (arrow B) in oil spray nozzle (16) for continuity | Clean oil spray nozzle (16) if necessary. | |
21 | Check race of radial shaft sealing ring (18) on drive shaft for galling | Replace race if necessary: | |
| |||
disassemble/assemble rear engine power take-off. | |||
22 | Check drive gear (22) for wear and damage | ||
Replace drive gear (22) if necessary. | |||
Nut (double hexagon), drive gear to drive shaft | |||
Socket wrench bit | |||
Blocking device | |||
| Install | ||
23 | Screw oil spray nozzle (16) down on cylinder crankcase | Replace sealing ring. | |
Oil spray nozzle for oil supply of engine power take-off to crankcase | |||
24 | Install new radial shaft sealing ring (18) with a suitable drift flush on flange cover (11) | ||
25.1 | Insert removed shim (20) into flange cover (11) | If rear engine power take-off has not been disassembled. | |
25.2 | Insert determined shim (20) into flange cover (11) | If rear engine power take-off has not been disassembled. | |
26 | Insert new O-ring (19) into flange cover (11) | Oil O-ring (19) with engine oil. | |
27 | Attach flange cover (11) to bearing housing (10) | Observe hole pattern of the flange cover (11) to the flange of the bearing housing (10). | |
28 | Coat first five threads on new bolts (17) with thread locking compound | Loctite 640 | |
29 | Tighten new bolts (17) for preload dimension test | ||
Observe flange cover tightening procedure (11) on rear engine power take-off. | |||
Bolt, flange cover to bearing housing for pretension checking | |||
30 | Check preload dimension on rear engine power take-off | ||
Preload value on rear engine power take-off | |||
31 | Screw down screw/bolts (17) tight | ||
Observe flange cover tightening procedure (11) on rear engine power take-off. | |||
Bolt, flange cover to bearing housing | |||
32 | Insert new O-ring (21) into bearing housing (10) | Oil O-ring (21) with engine oil. | |
33 | Install bearing housing (10) with bracket (9) on timing case (15) | Screw in bolt (arrow A) at clamp when positioning bracket (9). | |
Bolt, bearing housing to timing case | |||
34 | Attach compressor coolant line (8), constant throttle compressed-air line (6) and engine brake compressed-air line (7) | ||
35 | Attach compressor suction line (4) to compressor resonator box (2) and clip in at brackets (3) | Check sealing ring for wear and damage; replace compressor suction line (4) if necessary. | |
36 | Attach engine bleed line (5) to oil separator (1) and clip in at bracket (3) | Check sealing ring for wear and damage; replace engine bleed line (5) if necessary. | |
37 | Push cover panel (12) onto drive shaft | ||
38 | Install output flange (13) | ||
39 | Tighten new nut (14) and secure. | Nut, output flange to drive shaft | |
40 | Attach propeller shaft to output flange (13) | Nut, propeller shaft to output flange | |
41 | Remove cranking device for engine | ||
Bolt, inspection hole cap to timing case | |||
42 | Check engine oil level with oil dipstick or on display, add oil if necessary | ||
Notes on engine oil | |||
Observe engine oil grade set in maintenance system or Specifications for Operating Fluids. | |||
Warning | Risk of accident from vehicle starting off by itself when engine running. Risk of injury (bruises and burns) resulting from working on the engine while it is being started or when it is running. | Secure vehicle to prevent it from starting off by itself. Wear closed and snug-fitting work clothes. Do not touch hot or rotating parts. | |
43 | Start engine and allow to run in idle for approx. 10 s until oil pressure has built up and then run engine at varying rotational speeds | ||
44 | Switch off engine and check seal in area around engine power take-off | Visual inspection. | |
45 | Install soundproofing on frame at upper right, left and rear | ||
Warning | Risk of injury caused by body parts being pinched or crushed as cab is tilted | Ensure that no one is within the tilting range of the cab as it is being tilted. Always tilt the cab all the way to the end position and secure it with the safety strut. | |
46 | Tilt back cab | ||
Topical note | Notes on tilting the cab | ||
47 | Close maintenance flap |

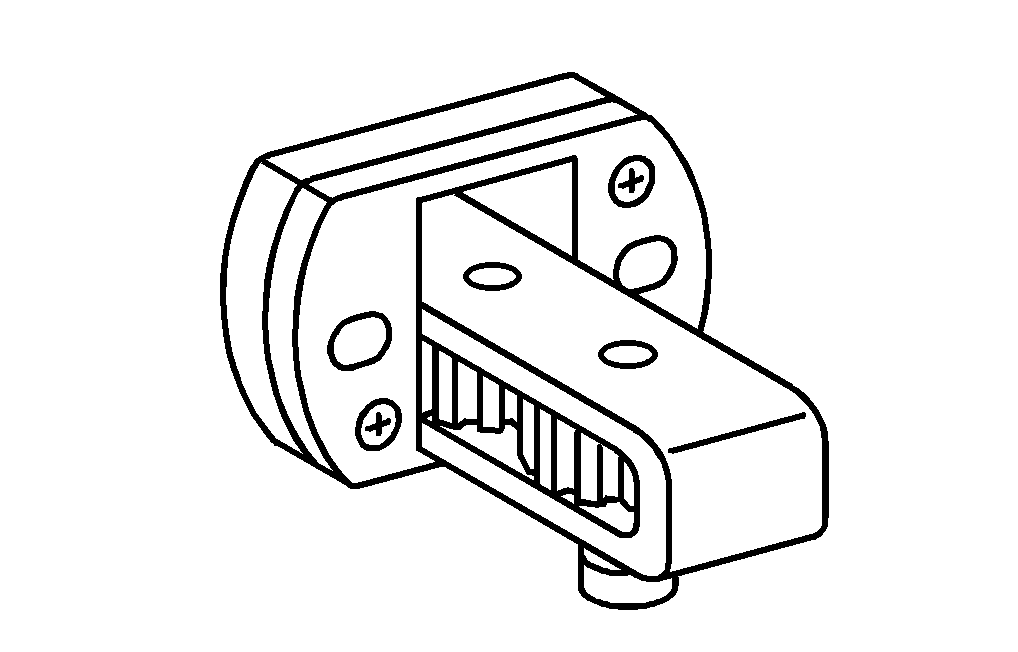

001 589 74 09 00
Socket wrench bit
904 589 04 63 00
Turning device
457 589 01 63 00
Blocking device