
W01.10-1025-09
Shown on model 944 |
1 | Engine wiring harness | 4 | Vent line | X2.2 | Cab-chassis connector | ||
1.1 | Electrical line (red) | 5 | Air intake line (compressor) | X2.3 | Cab-chassis connector | ||
2 | Cab-chassis connector plate | 6 | Air intake pipe | X29 | Transmission connector | ||
3 | Air intake hose | X2.1 | Cab-chassis connector |

W01.10-1024-09
1 | Engine wiring harness | 14 | Retarder coolant pipe clamps (only for vehicles with code BA1 (Performance-optimized Voith retarder) or code BA9 (Voith secondary retarder R 115)) | 20 | Fuel filter | ||
8 | Compressor-air line compressor | 15 | Retarder coolant pipes (only for vehicles with code BA1 (Performance-optimized Voith retarder) or code BA9 (Voith secondary retarder R 115)) | 21 | Filler pipe fitting | ||
9 | Compressed-air line engine brake | 16 | Holder (only for vehicles with code BA1 (Performance-optimized Voith retarder) or code BA9 (Voith secondary retarder R 115)) | 22 | Poly-V-belt (only for vehicles with code H03 (Air conditioning system in front-end assembly)) | ||
10 | Compressor control compressed-air line | 17 | Hand pump | 23 | Oil hose (only for code N55 (transmission oil cooling) | ||
11 | Compressed-air line constant throttle | 18 | Fuel feed line | 24 | Refrigerant compressor (only for vehicles with code H03 (Air conditioning system in front-end assembly)) | ||
12 | Power steering pump | 19 | Return fuel line | 25 | Filler pipe | ||
13 | Retarder coolant hoses (only for vehicles with code BA1 (Performance-optimized Voith retarder) or code BA9 (Voith secondary retarder R 115)) |

Shown on vehicle with code GS1 ("Manual" gearshift) |
27 | Clip |
28 | Front muffler |
29 | Tensioning strap |
30 | Clip |
31 | Exhaust flex pipe |
32 | Exhaust pipe |
33 | Telescopic rod (only for code GS1 ("mechanical" gearshift)) |
34 | Relay lever (only for code GS1 ("mechanical" gearshift)) |
35 | Support rod gate (only for code GS1 ("mechanical" gearshift)) |
W49.10-1025-11

50 | Clutch booster |
51 | Electrical connector |
52 | Hydraulic line |
53 | Banjo union with line |
54 | Compressed-air line |
55 | Banjo bolt |
W25.20-1040-11
Danger | Risk of explosion caused by fuel igniting, risk of poisoning caused by inhaling and swallowing fuel as well as risk of injury to eyes and skin caused by contactwith fuel. | No fires, sparks, open flames or smoking. Pour fuels into suitable and appropriately marked containers only. | |
Caution | Risk of injury to skin and eyes due to handling of engine oil. Risk of poisoning caused by swallowing engine oil | Wear protective gloves, protective clothing and safety glasses. | |
Warning | Risk of accident from vehicle starting off by itself when engine running. Risk of injury (bruises and burns) resulting from working on the engine while it is being started or when it is running. | Secure vehicle to prevent it from starting off by itself. Wear closed and snug-fitting work clothes. Do not touch hot or rotating parts. | |
Warning | Risk of burn injuries and scalding when working at AdBlue lines and the components attached to them. Risk of injury to skin and eyes when handling AdBlue. Risk of poisoning caused by swallowing AdBlue | Pour AdBlue into suitable containers only. Wait until the pressure is released before starting any work on the exhaust aftertreatment system. | |
Warning | Risk of injury to skin and eyes suffering scalding from contact with hot coolantspray. Risk of poisoning from swallowing coolant. | Do not open cooling system unless coolant temperature is below 90 °C. Open cap slowly and release the pressure. Do not pour coolant into beverage containers. | |
Warning | Risk of injury caused by body parts being pinched or crushed as cab is tilted | Ensure that no one is within the tilting range of the cab as it is being tilted. Always tilt the cab all the way to the end position and secure it with the safety strut. | |
Topical note | Notes on self-locking nuts and bolts | ||
Topical note | Notes on coolant | ||
Topical note | Notes on tilting the cab | ||
Note on calculation of tightening torque when using insertion or socket tools with various effective lengths | |||
Notes on use, material properties and handling of AdBlue® | |||
Notes on engine oil | |||
| Remove/install | ||
1 | Switch off ignition | ||
2 | Disconnect battery ground line | ||
3 | Open maintenance flap | ||
4 | Remove trim element | ||
5 | Remove cover of cab-chassis connector plate (2). | Installation: Check seal in the cover for damage. | |
If seal in the cover is damaged. | |||
| |||
Replace cover. | |||
6 | Detach electrical line (red) (1.1) and cab-chassis connectors (X2.1, X2.2, X2.3) from cab-chassis connector plate (2) | ||
7 | Unclip engine wiring harness (1) and place in bottom | ||
8 | Tilt cab | ||
9 | Open cap on fuel tank | ||
10 | Remove engine wiring harness (1) from bracket and frame and tie to engine | ||
11 | Remove lines of hydropneumatic gearshift (HPS) on engine | Only for vehicles with code GS3 ("hydraulic" gearshift) | |
12 | Remove charge air pipe of charge air cooler from charge air distributor | ||
13 | Remove telescopic bar (33) on relay lever (34) and at gate support rod (35), push together and tie on cab | Only for vehicles with code GS1 ("mechanical" gearshift) | |
Ball head for telescopic shift rod to relay lever | |||
Ball head for selector rod on gate | |||
14 | Close off hose and line connections on exhaust aftertreatment system | Only for vehicles with code MS4 (BlueTec 4 (Euro IV)) or code MS5 (BlueTec 5) | |
Clamp | |||
15 | Remove radiator | ||
16 | Disconnect vent line (4) on air intake hose (3) and remove air intake hose (3) | Air intake hose clamp on air intake pipe | |
Clamp, air intake hose to turbocharger | |||
Clamp, air intake hose to crankcase breather line | |||
17 | Remove compressor air intake line (5) on air intake pipe (6) | Installation: Check sealing ring on compressor air intake line (5) for damage. | |
If the sealing ring on the compressor air intake line (5) is damaged. | |||
| |||
Replace sealing ring on compressor air intake line (5). | |||
18 | Detach connector for transmission (X29) at bracket | ||
19 | Remove premuffler (28) on flanged manifold and on holder | Screw, premuffler clamp to flanged manifold/brake module of turbobrake | |
Screw, premuffler tensioning strap to holder | |||
20 | Remove exhaust pipe (32) on rear lifting eye and on rear muffler and take out premuffler (28) with exhaust pipe (32) | Bolt, clamp to premuffler, exhaust pipe, rear muffler and flexible exhaust pipe | |
Bolt, clamp to bracket | |||
21 | Disconnect compressor control compressed-air line (10), constant throttle compressed-air line (11) and engine brake compressed-air line (9) at connecting points | ||
22 | Remove compressor compressed-air line (8) at compressor, at brackets and at connecting point in frame and check for signs of carbonization | Counterhold the fitting on compressor. | |
If the compressor compressed-air line (8) is carbonized. | |||
| |||
Replace compressor compressed-air line (8). In addition, check compressed-air lines between compressor, compressed-air dryer and four-circuit protection valve. | |||
If compressed-air lines between compressor, compressed-air dryer and four-circuit protection valve are carbonized. | |||
| |||
Replace respective compressed-air line. | |||
23 | Release feed fuel line (18) on hand pump (17), disconnect it and then remove from bracket | Collect escaping fuel. | |
24 | Release return fuel line (19) on fuel filter (20), detach it and then remove from bracket | Collect escaping fuel. | |
25 | Remove power-steering pump (12) on compressor and tie onto frame | Do not disconnect steering gear oil lines. | |
Bolt, power steering pump to compressor | |||
26 | Remove cross plate on power-steering pump (12) or on compressor | Installation: Insert cross-staff head in compressor and secure against slipping with high-temperature grease. | |
High-temperature grease | |||
27 | Remove holders of oil hose (23) on oil pan and on timing case and tie oil hose (23) to frame | Only for vehicles with code N55 (transmission cooling) | |
28 | Remove filler pipe (25) on filler pipe fitting (21) | Close off filler pipe fitting (21). | |
Installation: Check the sealing ring on the filler pipe (25) for damage. | |||
If the sealing ring on the filler pipe (25) is damaged. | |||
| |||
Replace sealing ring on filler pipe (25). | |||
29 | Release tension of poly-V-belt (22) and remove from belt pulley of refrigerant compressor (24) | Only for vehicles with code H03 (air conditioning system in front-end assembly) | |
Routing diagram for poly-V belt | |||
| Damage profiles for a poly-V belt | ||
Installation: Check condition of poly-V-belt (22). | |||
If the poly-V-belt (22) is damaged. | |||
| |||
Replace poly-V-belt (22). | |||
30 | Disconnect electrical connector on refrigerant compressor (24) | Only for vehicles with code H03 (air conditioning system in front-end assembly) | |
31 | Remove refrigerant compressor (24) on carrier and tie to frame | Only for vehicles with code H03 (air conditioning system in front-end assembly) | |
Do not separate refrigerant lines. | |||
Screw/bolt, A/C compressor to carrier | |||
32 | Disconnect battery line from starter and remove from timing case | Nut, circuit 30 line to starter/solenoid switch | |
33 | Remove engine wiring harness (1) on transmission and on timing case | ||
34 | Disconnect ground cable from timing case | ||
35 | Disconnect electrical connector (51) from clutch booster (50) | ||
36 | Remove clamp for compressed-air line (54) on transmission | ||
37 | Disconnect compressed-air line (54) from clutch booster (50) | Counterhold banjo bolt (55). | |
Union nut (compressed air line) to clutch actuator/clutch booster | |||
38 | Remove banjo bolt (55) and banjo union with line (53) on clutch booster (50) | Banjo bolt (compressed air line) to clutch actuator/clutch booster | |
39 | Detach clutch booster (50) at the transmission and pull out | Do not disconnect hydraulic line (52) on clutch booster (50). | |
Bolt, clutch booster to transmission | |||
40 | Completely drain coolant at retarder | Only for vehicles with code BA1 (Performance-optimized Voith retarder) or code BA9 (Voith secondary retarder R 115) | |
41 | Loosen retarder coolant hoses (13) and push back onto retarder coolant pipes (15) | Only for vehicles with code BA1 (Performance-optimized Voith retarder) or code BA9 (Voith secondary retarder R 115) | |
Collect escaping coolant in a clean vessel. | |||
42 | Remove retarder coolant pipe clamps (14) and holder (16) | Only for vehicles with code BA1 (Performance-optimized Voith retarder) or code BA9 (Voith secondary retarder R 115) | |
Collect escaping coolant in a clean vessel. | |||
43 | Connect the retarder coolant pipes (15) to the frame | Only for vehicles with code BA1 (Performance-optimized Voith retarder) or code BA9 (Voith secondary retarder R 115) | |
44 | Remove screws on the right and left engine mounts | Screw/bolt, engine support to engine mount | |
45 | Support transmission from below with a telescopic lifter | ||
46 | Remove engine with load tilter | ||
Bolt, inspection hole cap to timing case | |||
Bolt, turning device to timing case | |||
Transmission 710.5, 715.5Transmission to engine | |||
Transmission 715.3Transmission to engine | |||
Turning device | |||
47 | Check both front engine mounts for wear | If the engine mounts are worn. | |
| |||
Replace engine mounts. | |||
48 | Install in the reverse order | ||
49 | Teach in all transponder keys (also replacement keys) again | Only when installing a reconditioned engine or a new engine control unit (MR). | |
MODEL 374, 375, 940, 942, 943, 944 | |||
Model 958 | |||
50 | Check engine oil level with oil dipstick or on display, add oil if necessary | Observe engine oil quality set in maintenance system or Specifications for Operating Fluids. | |
51 | Start engine and allow to run in idle; oil pressure must have built up after approx. 10 s; then run the engine at varying rpms | The fuel system is bled automatically. | |
If engine fails to start or only runs for a brief period. | |||
| |||
Bleed fuel system manually. | |||
52 | Switch off engine and check for leaktightness | Visual inspection. | |
53 | Synchronize time on tachograph between tachograph disk and display | ||
54 | Update Vehicle Documentation (VeDoc) | Only if a remanufactured engine is installed. | |
Enter engine number in screen 1111. |

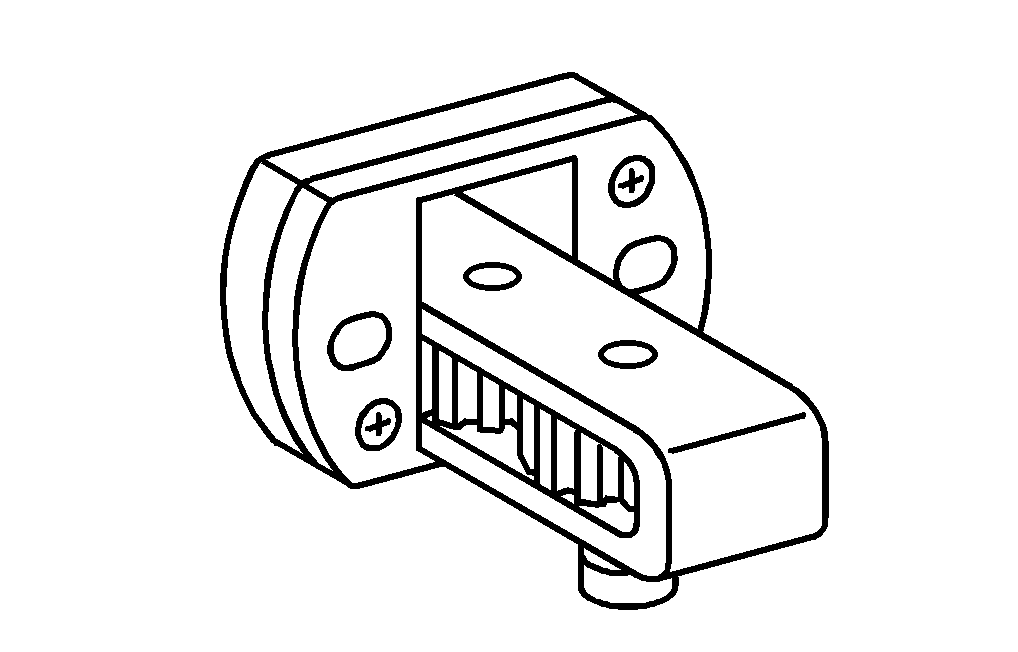
000 589 54 37 00
Clamp
904 589 04 63 00
Turning device
เอกสารที่อ้างถึง
- ah0000n000101a
- ah0000p001501cw
- ah1440n000101a
- ah1800n010101ha
- ah2000n208001a
- ah6080n000301a
- ap1322d135101a
- ar0110w240001c
- ar0941w1311f
- ar1322w390202c
- ar1440w201001c
- ar2000w1142b
- ar2020w3865e
- ar2210w4330c
- ar2660w726001a
- ar4700w1720c
- ar5410w0003a
- ar8057w0010c
- as0000z000501a
- as1440z000101a
- as1800z000101a
- as2000z000101a
- as4700z000101a
- as6080z000101a