AR33.10-P-0100I | Remove/install front axle | 3.5.12 |
MODEL 220 (except 220.08 /18)
except CODE (487) Active Body Control (ABC)
except CODE (979) Special protection version
except CODE (Z07) Top protection

P33.10-2057-09
1 Front axle carrier
1f Screw
1g Screw
3 Speed-sensitive power steering plug
5 Steering knuckle
6 Upper transverse control arm
8 Follower joint
25 Steering coupling
25a Screw
S10/1x1 Left front brake pad contact sensor connector
S10/2x1 Right front brake pad contact sensor connector
X62/6 Right front axle multiple circuit junction connector, major assembly compartment
X62/7 Left front axle multiple circuit junction connector, major assembly compartment
25f Locking plate
30f Return flow pipe
30i High pressure expansion hose
39 Brake hose
40 Suspension strut
40a Residual pressure valve
80a Lower steering shaft
a Drift
Modification notes
| Remove/install | ||
Danger! | Risk of death caused by vehicle slipping or toppling off of the lifting platform | Align vehicle between columns of vehicle lift and position four support plates at vehicle lift support points specified by vehicle manufacturer. | |
Danger! | Risk of injury to skin or eyes caused by hydraulic fluid spraying out under high pressure. Risk of poisoning caused by swallowing hydraulic fluid | Depressurize hydraulic system completely before starting any work on system. Wear protective clothing and safety glasses. | |
| When working on the front-end assembly, be careful not to scratch, mark or notch the surfaces of aluminum parts. Otherwise the service life of the parts will be affected | ||
| Notes on self-locking nuts and bolts | ||
Installation | Only tighten nuts and bolts of chassis components when vehicle is in a ready-to-drive condition | ||
| If there is visible damage, e.g. crack formation or deformation of the front axle carrier (1), these parts must be replaced | ||
1 | Deactivate easy entry/exit function | Vehicles with memory package (driver seat, steering column, mirrors) code 275 | |
Otherwise the driver seat and steering wheel move into a different position if the driver door is opened or closed for example. Damage to the upper frame can occur when the holding device is installed. | |||
Deactivation is done using the buttons on the steering wheel in the "comfort" menu of the multifunction display; see operator's manual. | |||
2 | Turn front wheels to straight-ahead position and secure steering wheel with holding device | Swivel sun visor to side and insert retainer. | |
On a disengaged steering coupling (25) the steering wheel should not be turned because the spiral contact coil will be destroyed. | |||
| |||
3 | Relieve pressure in the front suspension struts (40) using STAR DIAGNOSIS | The wheels must not touch the ground while filling because the air bellows in the suspension strut (40) will be destroyed if filled with the suspension compressed. | |
Installation: Recharge to 5 bar. | |||
4 | Suction off oil from expansion reservoir of power steering | | |
5 | Remove the front wheels | ||
| Remove/install wheels | ||
6 | Installing protective washers to protect brake disk dust shields | ||
| |||
7 | Disconnect right front axle multiple circuit junction connector, major assembly compartment (X62/6) and left front axle multiple circuit junction connector, major assembly compartment (X62/7) | Detach connectors for damping valve unit and rpm sensor. | |
8 | Disconnect left front brake pad contact sensor connector (S10/1x1) and right front brake pad contact sensor connector (S10/2x1) | ||
Danger! | Risk of poisoning caused by swallowing brake fluid. Risk of injury caused by brake fluid coming into contact with skin and eyes | Only pour brake fluid into suitable and appropriately marked containers. Wear protective clothing and eye protection when handling brake fluid. | |
9 | Unscrew brake lines on the left and right from the brake hoses (39) and seal openings | Seal off line terminals immediately with stop plugs. The brake fluid expansion reservoir must not be allowed to run completely empty. | |
When loosening or tightening the brake line on the brake hose (39), take care not to twist its bracket. When slackening off and tightening, counterhold with open end wrench on dual flat of brake hose (39). | |||
| |||
| |||
| Brake fluid notes | ||
| Notes on installing brake hoses | ||
| |||
10.1 | Remove bottom engine compartment paneling | Vehicles with gasoline engine | |
Vehicles with fire extinguishing system: Detach pipes in the area of the paneling. | |||
10.2 | Remove bottom section of soundproofing | Vehicles with diesel engine | |
Vehicles with fire extinguishing system: Detach pipes in the area of the paneling. | |||
11 | Press follower joints (8) out of steering knuckles (5) | ||
| |||
| |||
| |||
| |||
12 | Remove bolt (25a) from the steering coupling (25) at the lower steering shaft (80a) | Installation: Replace locking plate (25f) with self-locking nut. | |
| |||
13 | Insert suitable tool in the bore of the steering coupling (25) or in the bore of the lower steering shaft (80a) and pull lower steering shaft (80a) upwards out of the steering coupling (25) | Do not counterhold at the rubber boot or at the plastic temperature protection disk for the lower steering shaft (80a). Do not use force (hammer blows, excessive leverage) as the lower steering shaft is sensitive to lateral forces. | |
Installation: Insert lower steering shaft (80a) all the way into the steering coupling (25); pay attention to the studs of the steering coupling (25) while doing so and the groove of the lower steering shaft (80a) (arrows). | |||
14 | Disconnect plug of speed-sensitive power steering (3) from the steering | ||
15 | Detach pressure lines at the residual pressure valves (40a) of the suspension struts (40) | Residual pressure in suspension strut (40) up to 3.5 bar. If the residual pressure valve (40a) is damaged, replace suspension strut (40). | |
Seal off pressure lines during repair work using stop plugs. If pressure line connections or pressure lines are damaged: | |||
AIRmatic compressed-air line. | |||
| |||
| |||
| |||
| |||
| |||
Leak detection spray | |||
for USA | |||
16 | Detach suspension struts (40) from front end | Installation: Tighten the fixing nuts in the curb condition. | |
| |||
| |||
To replace suspension struts (40): | |||
Remove/install front suspension strut (40). | |||
17 | Mount the engine support frame and raise the engine until the front engine mounts are completely relieved of load | Model 220 except 220.028 /128 | |
Model 220.028 /128 | |||
18 | Remove bolts (1g) of the front engine mounts on the front axle carrier (1) | | |
19 | Support front subframe (1) | ||
20 | Remove bolts (1f) on front axle carrier (1) | The bolts (1f) are self-tapping, so the following points must be observed: Never recut the thread in the longitudinal member Replace screw/bolts Use only original screw/bolts (4 x) Do not attach bolts at an angle Do not use an impact bolt tightener Observe tightening torque | |
Installation: Before tightening the bolts (1f) center the front axle carrier (1) with a drift (a, 14.8 mm dia.) on the right and left. After this, insert rubber plugs. | |||
Installation: Model 220.8 Observe spacer plates between the front axle carrier (1) and frame. | |||
| |||
| |||
| Notes on bolted connections with self tapping screws | ||
21 | Detach high-pressure stretch hose (30i) and return pipe (30f) at steering gear | If necessary lower the front axle slightly, in the process do not tension the lines in order to preclude irreparable damage. | |
Seal off line connections using plugs. | |||
| |||
| |||
| |||
22 | Remove heat shield from front axle carrier (1) | ||
23 | Lower front axle carrier (1) | Installation: Model 220.8 Note installation position of spacer plates (large plate on front on front-axle carrier (1), small plate to the rear). | |
24 | Remove upper transverse control arm (6) | If necessary | |
| Checking | ||
25 | Check front axle carrier (1) for signs of damage and if damage determined replace parts | ||
26 | Install in the reverse order | ||
27 | Fill power steering pump and bleed | ||
Danger! | Risk of accident when commissioning the vehicle due to a lack of braking effect when the service brake is operated for the first time after repair work | Depress brake pedal several times before operating vehicle until pressure is built up and maintained in the brake system. | |
28 | Bleed brake system | ||
29 | Perform wheel alignment check | Model 215, 220 except 220.875/878 | |
Model 220.875/878 |
Engine mount, engine support (engine side)
Suspension struts
Number | Designation | Model | ||
BA32.25-P-1001-04B | Nut, front suspension strut to front end | Nm | 20 | |
BA32.25-P-1003-04B | Air suspension pressure line to front suspension strut | Nm | 5 | |
Suspension struts
Number | Designation | Model 220.875/ | |
BA32.25-P-1001-04C | Nut, front suspension strut to front end | Nm | 20 |
BA32.25-P-1002-04C | Air suspension pressure line to front suspension strut | Nm | 5 |
Front axle carrier
Brake lines, brake hoses
Wheel control, hub
Number | Designation | Model | Model 220.875/ | ||
BA33.20-P-1007-01F | Self-locking nut, upper ball joint out of upper transverse control arm to steering knuckle | Stage 1 | Nm | 20 | 20 |
Stage 2 | ° | 90 | 90 | ||
Steering shaft
Number | Designation | Model | ||
BA46.10-P-1001-01E | Bolt, steering coupling to steering shaft | Stage 1 | Nm | 30 |
Stage 2 | ° | - | ||
Steering gear
Number | Designation | Model | ||
BA46.20-P-1001-01E | Return pipe to rack-and-pinion steering | Nm | 45 | |
BA46.20-P-1002-01E | High-pressure stretch hose to rack-and-pinion steering | Nm | 40 | |


220 589 01 31 00
Box wrench bit
Guard plate
Holding device
Thrust washer M 10x1.5
129 589 01 21 00
000 589 75 03 00
210 589 04 63 00


211 589 00 09 00
Puller
Wrench socket
Slitting knife
000 589 12 28 00
140 589 00 33 00
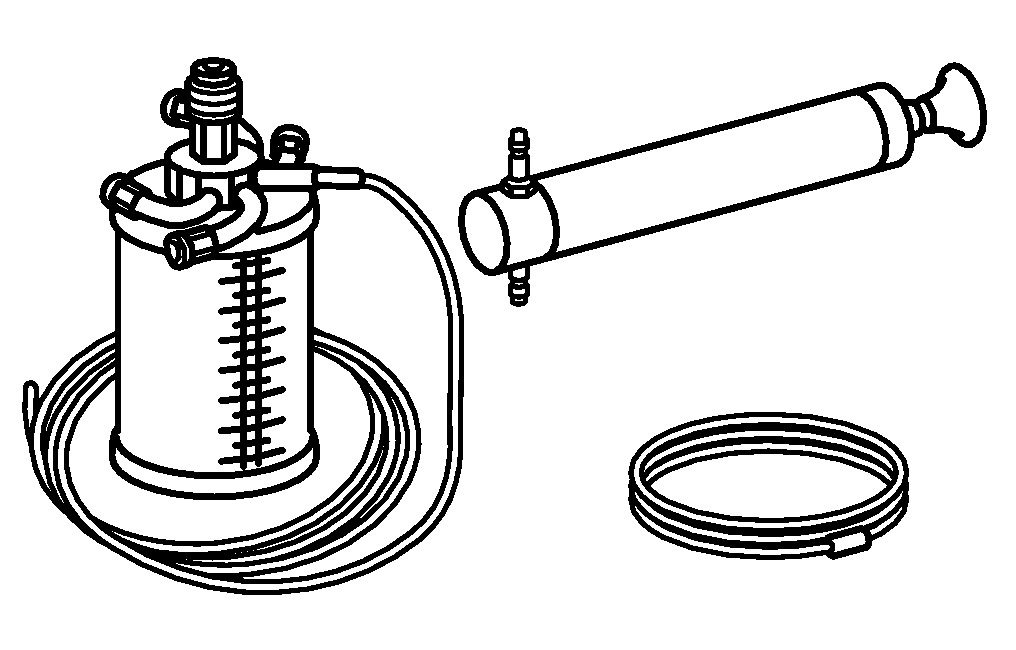


210 589 00 71 00
Set of stop plugs
Hand pump
Puller
Drift set
202 589 02 33 00
129 589 00 91 00
220 589 00 15 00
Repair materials
Number | Designation | Order number |
BR00.45-Z-1002-03A | Leak detection spray | Christof Fischer GmbH, |
BR00.45-Z-1004-03A | Leakage spray for USA | LIQUI MOLY Long Beach, CA 90815 Fax + 1 562 5975269 |
Odkazované dokumenty
- ah0000n000101a Upozornění k samopojistným šroubům a maticím
- ah0000p000701sf Upozornění ke šroubovým spojům se samotvarovatelnými šrouby
- ah4210p940601a Pokyny k montáži brzdových hadic
- ah4250p000101a Upozornění k brzdové kapalině
- ap4010p4050z Demontáž, montáž hnaných kol, v případě nutnosti přesazení
- ar0110p750003m
- ar3222p200102i Oprava přípojky tlakového potrubí AIRmatic
- ar3225p1017i
- ar3310p010001r
- ar3310p010003i
- ar3320p050001n Odtlačení, montáž vodicího kloubu z čepu nápravy
- ar3320p0500i
- ar4020p0200i
- ar4020p0200i
- ar4020p0200mp
- ar4200p010001a Namontovat ochranné desky na ochranu krycích plechů brzdových kotoučů
- ar4210p0010i
- ar4630p0010b
- ar6120p1105m
- ar9430p5300m
- as0000z001001a Nebezpečí ohrožení života v případě sesunutí nebo překlopení vozu z dílenského zvedáku
- as0000z001301a Nebezpečí poranění kůže a očí hydraulickou kapalinou vystřikující vlivem vysokého tlaku. Nebezpečí otravy při požití hydraulické kapaliny
- as4250z000101a Nebezpečí otravy při požití brzdové kapaliny. Nebezpečí poranění při kontaktu brzdové kapaliny s kůží a očima
- as4250z000201a Nebezpečí úrazu při uvádění vozidla do provozu kvůli chybějícímu brzdnému účinkupři prvním sešlápnutí provozní brzdy po servisních pracích