
G01.10-3159-79
1 | Air intake pipe | 8 | Nut | |
2 | Air cleaner housing | 9 | Nut | |
3 | Charge air pipe | 10 | Electrical connector | |
4 | Charge air pipe | 11 | Nut | |
5 | Charge air pipe | A31 | Intake air preheating control unit (grid heater) with an integral heater flange (with code M89 (Intake air preheating)) | |
6 | Hydraulic pump (with code H19 (Hydraulic system without oil supply) or with code HH3 (Hydraulic system with oil supply)) | G2 | Alternator | |
7 | Bolts | M1 | Starter |

G01.10-3157-79
12 | A/C compressor (with code M25 (A/C compressor reinforced)) | 19 | Cross plate | |
13 | Coolant pipe | 20 | Fuel line | |
14 | Coolant expansion reservoir | 21 | Fuel line | |
15 | Steering shaft intermediate bearing | 22 | Fuel line | |
16 | Steering shaft | 23 | Fuel line | |
17 | Compressor | 24 | Electrical line | |
18 | Power steering pump | G3 | Additional alternator |


G27.45-3101-71
G01.10-3158-01
G01.10-3127-71
25 | Electrical connection (with code NU4 (PTO of A/T, 8 o'clock, N-rotational speed, pump)) |
26 | Power take-off (with code NU4 (PTO of A/T, 8 o'clock, N-rotational speed, pump)) |
27 | Union nut |
28 | Engine supporting arm |
29 | Screw |

G01.10-3160-78
1 | Air intake pipe | 37 | Cross strut | |
30 | Turn signal lamp | 38 | Bracket | |
31 | Bracket | 39 | Bracket | |
32 | Fluid reservoir (with code M25 (A/C compressor reinforced)) | 40 | Compressed-air line | |
33 | Compressed-air line | 41 | Bracket | |
34 | Bracket | 42 | Compressed-air line | |
35 | Bracket | 43 | Heat shield | |
36 | Compressed air lines | 44 | Exhaust pipe |

G01.10-3161-78
45 | Load lifter | 47 | Screw | |
45.1 | Chain link | 48 | Electrical wiring harness | |
45.2 | Chain link | 49 | Electrical connector | |
46 | Transmission carrier |
Warning | Risk of accident from vehicle starting off by itself when engine running. Risk of injury (bruises and burns) resulting from working on the engine while it is being started or when it is running. | Secure vehicle to prevent it from starting off by itself. Wear closed and snug-fitting work clothes. Do not touch hot or rotating parts. | |
Danger | Risk of explosion caused by fuel igniting, risk of poisoning caused by inhaling and swallowing fuel as well as risk of injury to eyes and skin caused by contactwith fuel. | No fires, sparks, open flames or smoking. Pour fuels into suitable and appropriately marked containers only. | |
Danger | Risk of explosion caused by welding or soldering work on closed air conditioning system. Risk of poisoning caused by inhaling overheated refrigerant vapors. Risk of injury to skin and eyes caused by contact with liquid refrigerant. | Never perform welding work on or near a closed air conditioning system. No smoking or open flames. Wear safety glasses and protective gloves. Work only in well ventilated areas. Carry out repair work on the air conditioning system circuit only after the system has been drained. | |
Topical note | Notes on self-locking nuts and bolts | ||
| Remove/install | ||
Danger | Risk of explosion from explosive gas. Risk of poisoning and caustic burns from swallowing battery electrolyte. Risk of injury through burns to skin and eyes from battery acid or when handling damaged lead-acid batteries | No fires, sparks, open flames or smoking. Wear acid-resistant gloves, clothing and glasses. Only pour battery acid into suitable and appropriately marked containers. | |
1 | Disconnect battery ground line | ||
Topical note | Notes on battery | ||
See information from vehicle manufacturer. | |||
2 | Remove body | See information from vehicle manufacturer. | |
3 | Drain air conditioning system | With code M25 (A/C compressor reinforced) | |
See information from vehicle manufacturer. | |||
4 | Remove radiator unit | ||
5 | Remove refrigerant lines on A/C compressor (12) | With code M25 (A/C compressor reinforced) | |
See information from vehicle manufacturer. | |||
6 | Disconnect electrical connection at refrigerant compressor (12) | With code M25 (A/C compressor reinforced) | |
7 | Mark installation position of fuel lines (20, 21, 22, 23) | ||
8 | Disconnect fuel lines (20, 21, 22, 23) and collect escaping fuel | Installation: Observe markings. | |
9 | Attach fuel lines (20, 21, 22, 23) to frame | ||
10 | Remove electrical line (24) on additional alternator (G3) and expose up to the frame | Nut, electrical line to alternator terminal B+ | |
11 | Remove coolant pipe (13) completely | ||
12 | Remove steering shaft intermediate bearing (15) from frame | Steering shaft intermediate bearing to frame | |
13 | Tie steering shaft (16) to the frame | ||
14 | Remove power steering pump (18) from compressor (17) and collect escaping fuel | Do not disconnect hydraulic lines on the power steering pump (18). | |
Installation: Replace sealing ring on power steering pump (18). | |||
Bolt, power steering pump to compressor | |||
15 | Fasten power steering pump (18) to frame | ||
16 | Attach turning device for engine | ||
Installation: Coat sealing surface between timing case and cap with the sealant Loctite 5970. | |||
Inspection hole cap to timing case | |||
Sealant, Loctite 5970, 50 ml | |||
Turning device | |||
17 | Remove cross plate (19) | Installation: Turn flywheel with cranking device until the guides on the cross-plate (19) on the compressor crankshaft (17) are horizontal. Secure cross plate (19) against sliding with high-temperature grease. | |
High-temperature grease | |||
18 | Mark installation position of the coolant hoses between coolant expansion reservoir (14) and engine | ||
19 | Disconnect all coolant hoses between coolant expansion reservoir (14) and engine | Installation: Observe marked installation position. | |
20 | Mark installation position of the coolant hoses between auxiliary heater and engine | With code F43 (Auxiliary heater with engine preheating) | |
21 | Disconnect all coolant hoses between auxiliary heater and engine | With code F43 (Auxiliary heater with engine preheating) | |
Installation: Observe marked installation position. | |||
22 | Remove exhaust pipe for auxiliary heater from engine | With code F43 (Auxiliary heater with engine preheating) | |
23 | Remove air intake pipe (1) | ||
24 | Remove air filter housing (2) | ||
25 | Disconnect electrical connections on intake air preheating control unit (grid heater) together with the integral heater flange (A31) and expose electrical lines up to the frame | With code M89 (Intake air preheating) | |
26 | Remove charge air pipe (5) | ||
27 | Remove charge air pipes (3, 4) | ||
28 | Expose electrical connection (10) and electrical wiring harness to the engine | ||
29 | Unscrew nut (8) on alternator (G2) and expose electrical line up to the frame | Nut, electrical line to alternator terminal B+ | |
30 | Disconnect air line (42) for valve fitting of the engine brake | ||
31 | Remove bracket (41) for air line (40) from engine | ||
32 | Remove air line (40) from bracket (34) and expose up to the frame | Installation: Secure air line (40) with electrical wiring harness (48) to bracket (34). | |
33 | Remove exhaust pipe (44) completely | ||
34 | Remove heat shield (43) on valve fitting for engine brake | ||
35 | Unscrew nut (9) on starter (M1) and expose electrical line up to the frame | Nut, circuit 30 to starter | |
36 | Unscrew nut (11) and expose ground line up to the frame | ||
37 | Remove underride guard below the hydraulic pump (6) | With code H19 (Hydraulic system without oil supply) or with code HH3 (Hydraulic system with oil supply) | |
38 | Remove poly-V belt for hydraulic pump (6) | With code H19 (Hydraulic system without oil supply) or with code HH3 (Hydraulic system with oil supply) | |
39 | Remove hydraulic pump (6) from engine | With code H19 (Hydraulic system without oil supply) or with code HH3 (Hydraulic system with oil supply) | |
Bolt, poly-V belt tensioning device to bracket of hydraulic pump | |||
Bolt, hydraulic pump bracket to crankcase | |||
40 | Detach electrical connection (25) from power take-off (26) | With code NU4 (PTO automatic transmission, 8 o'clock, N-rotational speed, pump) | |
41 | Remove adaptation or connections from power take-off (26) | With code NU4 (PTO automatic transmission, 8 o'clock, N-rotational speed, pump) | |
See information from vehicle manufacturer. | |||
42 | Unscrew union nut (27) from compressed air line | ||
| Check | ||
43 | Check air line at the union nut (27) for carbonization | If there are complaints: | |
| |||
Likewise check the compressed-air line on the compressor (17) and the compressed-air line on the four-circuit protection valve for carbonization and replace any carbonized parts. | |||
44 | Disconnect electrical connection of the turn signal lamp (30) | ||
45 | Completely remove bracket (31) from the fender liner | ||
46 | Mark air line (33) and remove from valve block | Installation: Observe marking. | |
47 | Expose air line (33) up to the frame | ||
48 | Remove refrigerant lines from fluid reservoir (32) | With code M25 (A/C compressor reinforced) | |
See information from vehicle manufacturer. | |||
49 | Remove bracket (38) from bracket (39) | ||
50 | Remove bracket (39) from cross strut (37) and from frame | ||
51 | Remove bracket (39) with attached detachable parts and air lines (36) from frame and fasten to left fender liner | ||
52 | Remove bracket (35) together with cross strut (37) | ||
53 | Remove propeller shaft between transmission and transfer case | Nut, propeller shaft to output flange | |
54 | Disconnect electrical connection (49) at transmission | ||
55 | Remove screw/bolts (47) from left and right on transmission | Front transmission carrier to engine mount | |
56 | Remove screw/bolt (29) on engine support arm (28) | Screw/bolt, engine support to engine mount | |
57 | Attach crane with the load lifter (45) to the engine and to the transmission carrier (46) | The electrical wiring harness (48) must be located behind the chain links (45.2). | |
58 | Remove engine with transmission | | |
Installation: When lowering the engine with the transmission, put on screw/bolts (29, 47). | |||
59 | Remove transmission from engine | If required. | |
| Guide pin used to install the transmission | ||
Loctite 5203 sealant | |||
Sealant, Loctite 5970, 50 ml | |||
Long-life grease | |||
Bolt, transmission to timing case | |||
Bolt, torque converter to drive plate | |||
Center transmission carrier to rear transmission carrier | |||
Front transmission carrier to engine timing case | |||
Transmission bracket | |||
Turning device | |||
60 | Install in the reverse order | ||
61 | Evacuate air conditioning system, charge it, and then check system to make sure that it functions correctly and leaktightness | With code M25 (A/C compressor reinforced) | |
See information from vehicle manufacturer. | |||
| Check | ||
62 | Start engine and run at idle speed for about 1 minutes | | |
Oil pressure | |||
63 | Switch off engine and check for leaktightness | ||
64 | Check engine oil level at electric display | See owner's manual. | |
65 | Check coolant level | ||
| |||
66 | Check transmission oil level | ||
| |||
67 | Read out fault memory and clear | ||
| |||
Stored faults, which may result from lines being disconnected or from simulation during assembly or testing, have to be processed and cleared in the fault memories after completing the work. | |||
Update Vehicle Documentation (VeDoc) | |||
68 | Document engine number in VeDoc | Only if a remanufactured engine is installed. |

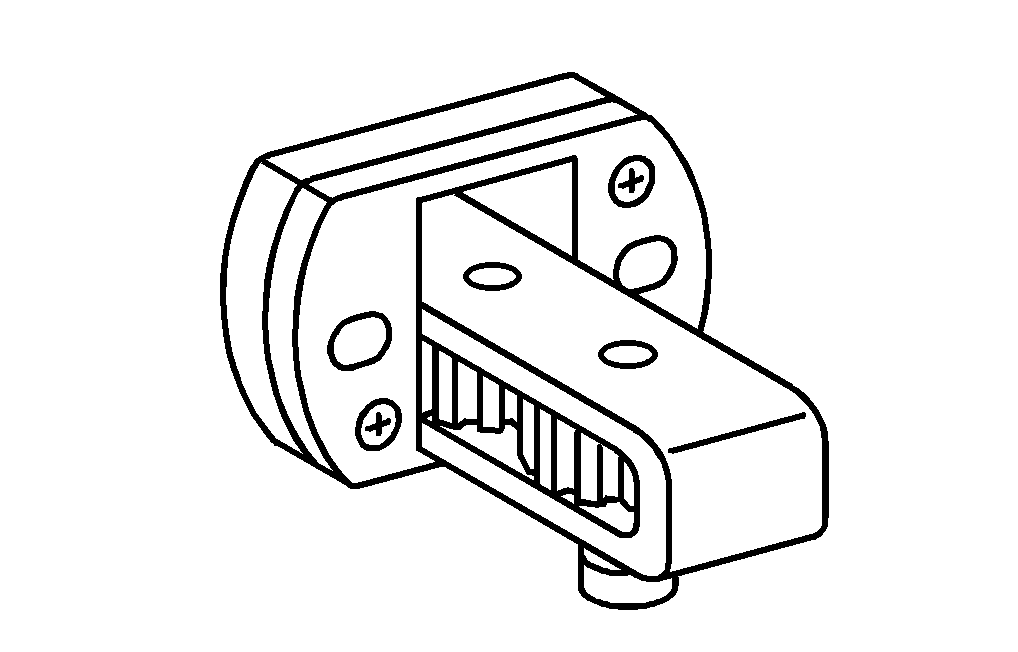
437 589 00 40 00
Transmission bracket
904 589 04 63 00
Turning device