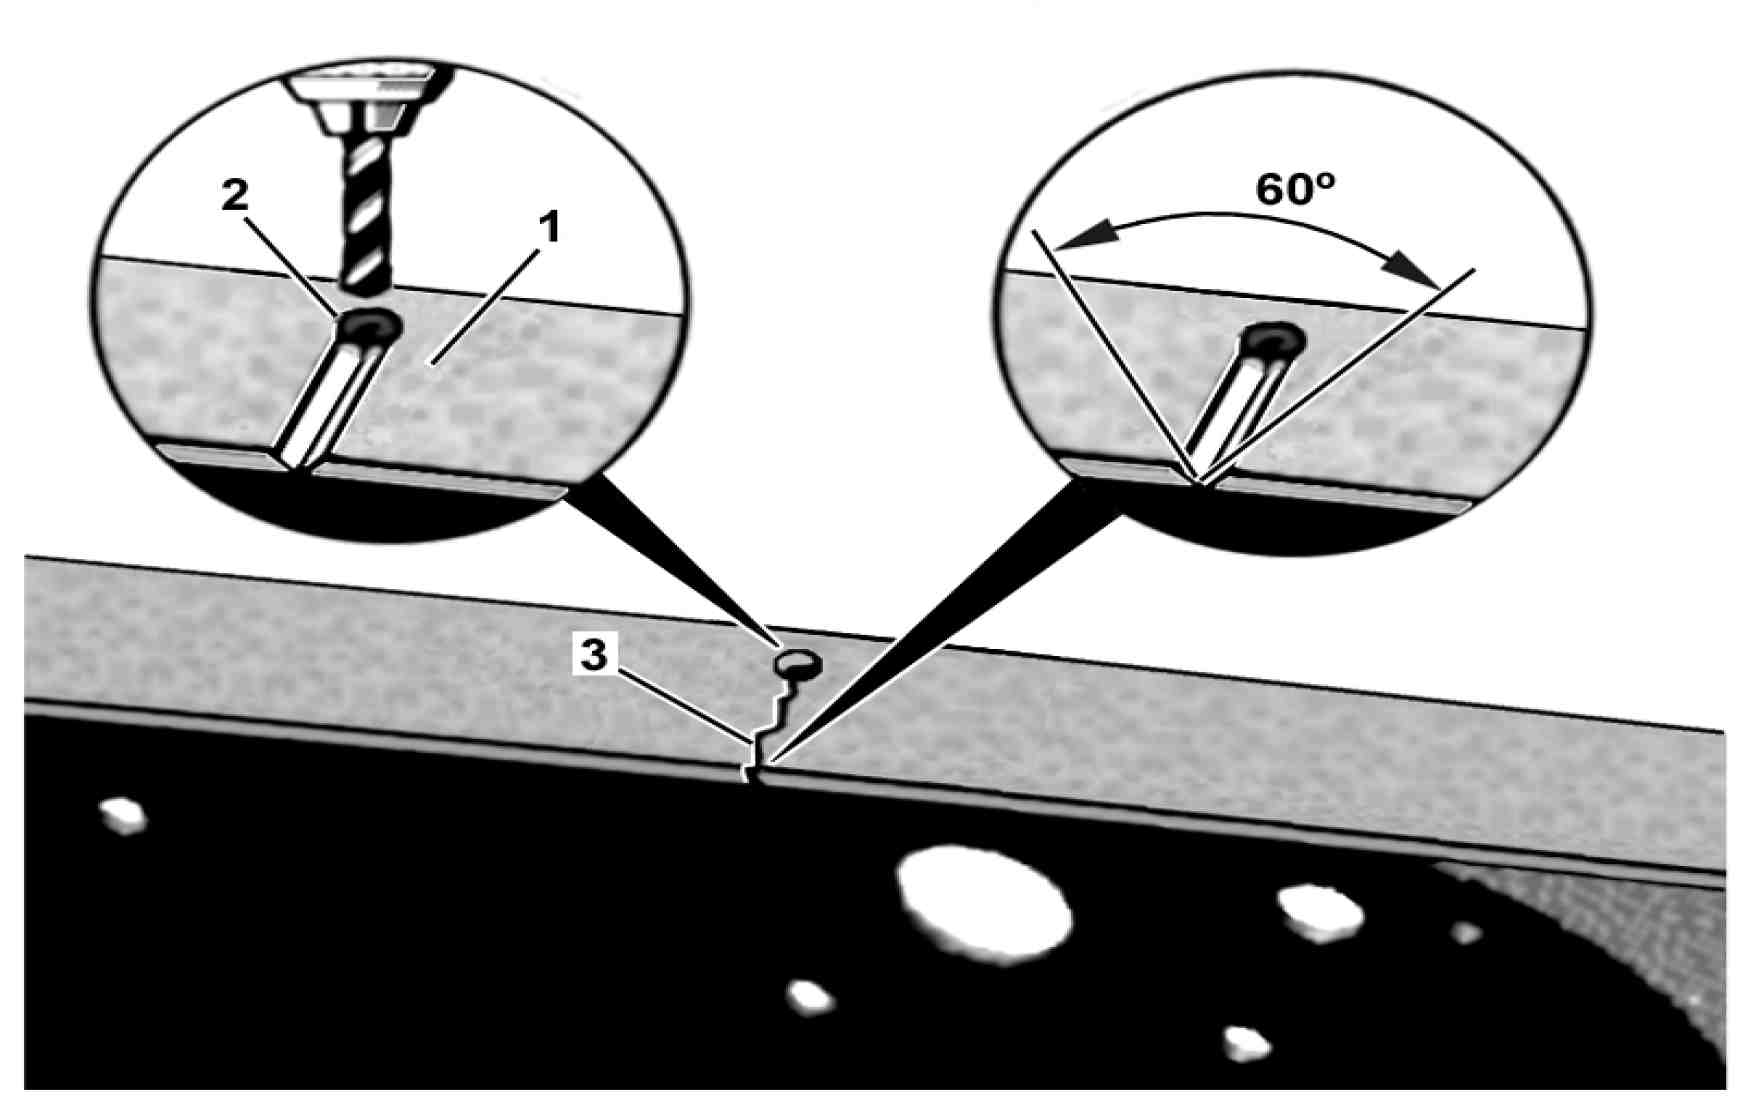
1 | Clean the crack area to be welded |
When cleaning, remove the protective paint from the vehicle. Do not use sander to remove the paint, this procedure helps in visualizing the crack extension |
Drilling scheme: |
- (1) Side member flap |
- (2) Ø Bore > 6 mm |
- (3) Crack start |
2 | Drill the end of the crack (3) |
The drilling (2) is important to prevent the crack from advancing. Use a drill bit with a minimum diameter of 6 mm and a maximum diameter equal to the width of the "V" opening |
3 | Grind the crack in its entire length in the form of "V" with an angle of approximately 60° |
4 | Heat the region to be welded to approximately 180 - 200ºC |
B31.30-0007-11

5 | Weld the "V" opening in several steps (4, 5 and 6) |
Before carrying out welding work, turn off the vehicle's main switch, alternator, starter and control units. Protect electrical cables and oil and fuel lines, if necessary, dismantle |
Attach the end piece ("alligator" claw) of the welding equipment ground strap directly to the part to be welded. The end play must not be attached to the aggregates (engine, transmission, axles etc.) |
Weld the side member flap from the inside out. When welding the cover layer (6), move the electrode back and forth to the right, left and back. Stay with the electrode for approximately 2 seconds in each position in order to have enough brazing and to avoid penetration erosion. Completely weld the hole (2). After welding, special attention must be paid to the cooling process, which must be slow and homogeneous |
6 | Grind or sand the weld seam (7) leaving the surface level on both sides of the side member flap |
This procedure will avoid points of tension build-up |
Weld layers: |
- (4) Root layer |
- (5) Central layer |
- (6) Top layer |
7 | Paint the affected areas. |
B31.30-0008-11