AR97.00-P-1002F | Eliminate bodyshell complaints concerning window frame (repair stage 2) | 15.11.11 |
MODEL 202, 203, 210

P97.00-2168-11
Cross section of window frame (2)
1 Door frame seal
2 Window frame
A Visible area
B Non-visible area
C Non-visible area
D Cut
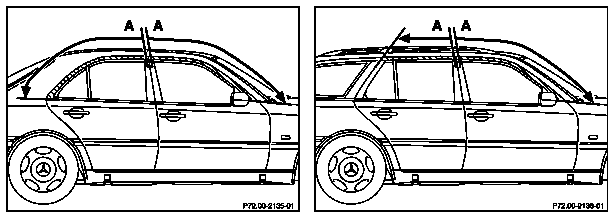
P72.00-2137-04
Illustrated on model 202
Window frame (2) on front and rear door to window channel strip
A Visible area

P97.00-2167-01
Sealant on window frame (2)
1 Door frame seal
2 Window frame
| Removing | ||
Danger! | Risk of injury caused by scraping or cutting body parts on sharp vehicle parts | Always wear protective gloves when working on or near sharp and non-deburred vehicle parts. Deburr repair panels. | |
Danger! | Risk of explosion caused by paint vapors igniting. Risk of poisoning caused by inhaling paint vapors. | No smoking! No open fire! Use respiratory protection, protective clothing, gloves, safety glasses and skin cream. Ensure that the area is well ventilated. | |
1 | Lower crank window | ||
2 | Loosen door frame seal (1) from window frame (2) | ||
3 | Remove cover from inner window frame (2) | ||
4 | Cover door | Tarp (fire-resistant) | |
5 | Mask inner window frame (2) with adhesive tape | ||
6 | Separate bead from window frame (2) | Completely separate bead on cut (D) over entire length of window frame (2). | |
Device | |||
Spacer | |||
Cutting wheel | |||
Guard hood | |||
Drill | |||
Wet/dry vacuum cleaner | |||
7 | Deburr window frame (2) | Completely deburr window frame (2) inside and outside on cut. | |
Use triangular scraper or pull scraper | |||
| Check | ||
8 | Check window frame (2) for remaining corrosion effect. | Grind all damaged areas down to bare metal if corrosion effects are present. | |
Carbide pencil grinder | |||
Round wire brush, braided, dia. 70 mm | |||
9 | Clean damaged area and door frame seal (1) | Cleaner | |
10 | Install masking paper and adhesive tape on vehicle | ||
11 | Coat primer filler | Use EP/thermal filler | |
Observe manufacturer's specifications for setting and processing time of EP/thermal filler | |||
12 | Paint damaged point in shaded visible area (A). | Repaint. | |
| Service Information: Post-repair refinishing | ||
13 | Remove masking paper and adhesive tape from vehicle and inner window frame (2). | ||
| Install | ||
14 | Install cover on inner window frame (2) | ||
15 | Fasten door frame seal (1) on window frame (2) | ||
16 | Mask window frame (2) twice outside with adhesive tape | Mask window frame (2) twice in visible area (A) up to approx. 1 mm below door frame seal (1). | |
17 | Apply sealant | To ensure proper adhesion, there must be no cleaning agent residues. | |
Lift door frame seal (1) on outer window frame (2) and install sealant in free area of separated bead. | |||
Observe manufacturer's specifications for setting and processing time for sealant. | |||
Seal set | |||
1-component sealant cartridge 310 ml | |||
Accelerant | |||
18 | Close door | ||
19 | Remove first adhesive tape from outer window frame (2). | Carefully remove adhesive tape from visible area (A) | |
20 | Clean visible area (A). | Cleaner | |
21 | Remove second adhesive tape from outer window frame (2). | Carefully remove adhesive tape from visible area (A) |


210 589 00 66 01
Cutting wheel
Spacer
Device
Guard hood
210 589 00 66 00
210 589 00 66 02
210 589 00 66 03
Repair materials
Number | Designation | Order number |
BR00.45-Z-1078-01A | Door corrosion protection accelerator | A 009 989 59 71 |
BR00.45-Z-1076-01A | Door corrosion protection seal set | A 009 989 57 71 |
BR00.45-Z-1077-01A | 1-component sealant cartridge 310 ml | - |
BR00.45-Z-1025-04A | Cleaner | A 005 989 19 71 |
Referenced documents
- ar9700p100001f Separate bead in window frame
- ar9800p0200a Covering, masking and aids when painting
- ar9800p0200a
- as0000z001701a Risk of injury caused by scraping or cutting body parts on sharp vehicle parts
- as9800z000201a Risk of explosion caused by paint vapors igniting. Risk of poisoning caused by inhaling paint vapors.
- si9800p0002a Service Information: Refinishing paint