D67.30-0089-09
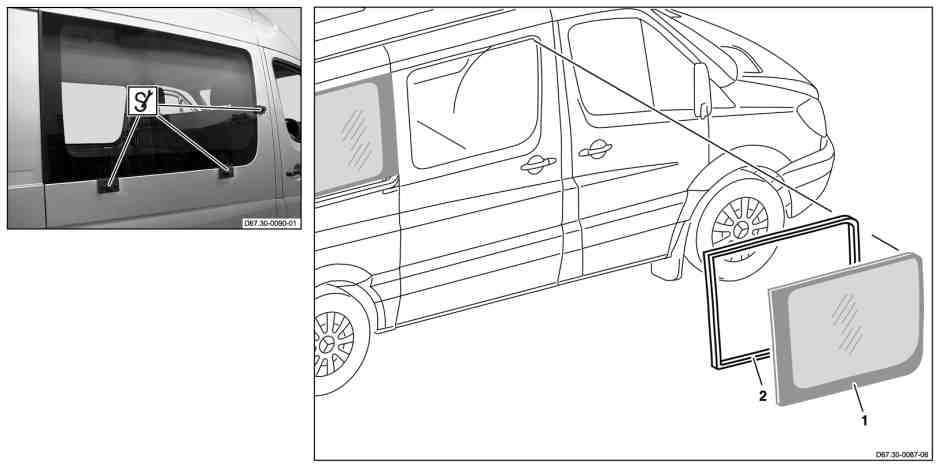
1 | Side window(s) | 2 | Seal |
Topical note | Notes on carrying out repair work in the vehicle interior | ||
| Remove | ||
1 | Check adjustment of sliding door, correct | When removing side window (1) in sliding door. | |
Vehicles with CODE T16 (Right sliding door) or code T19 (Left sliding door) | |||
2 | Prepare adhesive for side window (1) | When using 1-component adhesive | |
Repair kit for installing windshields, 1-component adhesive | |||
Adapter | |||
3 | Remove curtain with curtain rails |
| |
4 | Remove seal (2) from body flange | ||
5 | Fix two cup suction tools in side window (1) | ||
Warning | Risk of injury from cutting wire tearing or becoming hot and from splinters of glass when cutting out bonded windows | Wear protective gloves and safety glasses. | |
6 | Install cutting wire on sliding window for removal |
| |
Warning | Risk of injury from cutting wire tearing or becoming hot and from splinters of glass when cutting out bonded windows | Wear protective gloves and safety glasses. | |
7 | Cut out side window (1) and remove with cup suction tools | ||
8 | Vacuum off glass splinters and contamination | ||
Preparation | |||
9 | Prepare side window cutout (1) for installation | ||
Ensure that nor more than 1 mm of adhesive bead remains. Pull off loose adhesive material (remaining pieces which are not completely cut off). Repair paint damage not covered by glue with primer. | |||
Repair kit for installing windshields, 1-component adhesive | |||
Glazing repair kit 500662 01/03/05/07/09/11 | |||
10 | Prepare adhesive for side window (1) | When using 2-component adhesive. | |
Glazing repair kit 500662 01/03/05/07/09/11 | |||
11 | Prepare adhesive for side window (1) | When using 1-component adhesive | |
Repair kit for installing windshields, 1-component adhesive | |||
12 | Prepare side window (1) for installation | ||
Repair kit for installing windshields, 1-component adhesive | |||
Glazing repair kit 500662 01/03/05/07/09/11 | |||
Adapter | |||
13 | Install seal (2) in body flange | ||
14 | Install spacers on window cutout | To ensure that the side window (1) does not lower, install 2 spacers at bottom of window cutout. One spacer on the outside is sufficient for correct side alignment. | |
Spacer | |||
15 | Open side window in driver door | | |
| Install | ||
16 | Install side window (1) | ||
| |||
| |||
Observe curing time: | |||
Repair kit for installing windshields, 1-component adhesive | |||
Glazing repair kit 500662 01/03/05/07/09/11 | |||
17 | Completely empty adhesive cartridge before disposal | Glue residues not required can be disposed of in the household refuse. | |
18 | Remove spacers after curing time | Spacer | |
19 | Clean side window (1) | ||
20 | Install certain with curtain rails |
| |
21 | Glue label and warning sticker to side window (1) | Only when replacing side window (1) as emergency exit. |


906 589 06 63 00
Spacer
000 589 86 63 00
Adapter
Henviste dokumenter
- ah6800n000101s Oplysninger om udførelse af reparationsarbejde i kabinen
- ar6710d100007a
- ar6710d100012h
- ar6710p100011sx
- ar6730d230501h
- ar6730d230502h
- ar6730d230503h
- ar6730d230505h
- ar6850d5601a
- ar7216d1023f
- as6700z000401a Fare for personskade på grund af rivning eller opvarmning af skæretråd og på grund af glasskår ved udskæring af indklæbede ruder