
G26.10-3255-09
1 | Compressed-air line | 13 | Shift unit | 25 | Bearing pin | ||
2 | Splitter group cylinder | 14 | Reverse gear | 26 | Tapered roller bearing outer race | ||
3 | Splitter group shift rod | 15 | Center section of transmission housing | 27 | Tapered roller bearing outer race | ||
4 | Front section of transmission housing | 16 | Shim | 28 | Countershaft brake | ||
5 | Screw plug | 17 | Tapered roller bearing outer race | 29 | Drive shaft bearing cap | ||
6 | Springs | 18 | Range group | 30 | Reverse idler shaft | ||
7 | Catch bolt | 19 | Main shaft | 33 | Retaining ring | ||
8 | Sliding blocks | 20 | Synchronizer cone with synchronizer ring and annular spring | B501 | Main shaft rpm sensor | ||
9 | Oil pipe | 21 | Sliding sleeve | B502 | Countershaft rpm sensor | ||
10 | Shift fork for splitter group | 22 | Drive shaft | B505 | Transmission oil temperature sensor | ||
11 | Countershaft | 23 | Electric line | D | Position of reverse idler gear | ||
12 | Tapered roller bearing outer race | 24 | Shift |

9 | Oil pipe |
11 | Countershaft |
13 | Shift unit |
15 | Center section of transmission housing |
19 | Main shaft |
50 | Holding device |
W26.50-1170-06

40 | Holding device |
41 | Shaft |
42 | Scale |
W26.50-1171-11

15 | Center section of transmission housing |
45 | Holding device |
W26.50-1172-11

Installation diagram for screws securing transmission housing center section (15) to transmission housing front section (4) |
A | Screw (screw length 62 mm) |
B | Bolt (bolt length 83 mm) |
C | Screw (screw length 94 mm) |
W26.40-1048-11

19 | Main shaft |
69 | Oil restrictor |
W26.50-1218-06

72 | Transmission |
73 | Assembly device |
W26.50-1216-12
Caution | Risk of injury to skin and eyes due to handling of transmission oil. Health risk caused by swallowing transmission oil | Wear protective gloves, protective clothing and safety glasses. | |
Warning | Risk of injury. Moving parts can pinch, crush or, in extreme cases even sever extremities. | No parts of the body or limbs should be within the operating area of mechanical components when moving components. | |
Topical note | Notes on self-locking nuts and bolts | ||
Topical note | Information on preventing damage to electronic components due to electrostatic discharge | ||
Notes on compressed air connection systems | |||
| Assemble | ||
1 | Assemble countershaft (11). | ||
2 | Assemble drive shaft (22). | ||
3 | Assemble main shaft (19). | ||
4 | Attach holding device (45) for shift unit (13) to transmission housing center section (15). | Holding fixture | |
5 | Attach assembly device (73) to transmission housing center section (15) and move to vertical position. | ||
Assembly device | |||
6 | Grease contact surface of tapered roller bearing outer race (17), push spacer disk (16) onto tapered roller bearing outer race (17) and install in transmission housing center section (15) from inside up to contact using a suitable drift. | Grease, silicone-based, 100 g | |
7 | Grease contact surface of tapered roller bearing outer race (12) and install in transmission housing center section (15) from inside up to contact using a suitable drift. | Grease, silicone-based, 100 g | |
8 | Oil needle bearing, install reverse idler gear (14) with needle bearing and bushing in transmission housing center section (15) and push to one side (arrow D). | ||
9 | Install main shaft (19), countershaft (11), shift unit (13) and oil pipe (9) with holding device (50) in transmission housing center section (15). | ||
When installing the shift unit (13), the reverse idler gear (14) must be pushed to one side (arrow D). | |||
Clamping device | |||
Retaining device | |||
Holding fixture | |||
10 | Remove holding device (50) from main shaft (19), countershaft (11), shift unit (13) and oil pipe (9). | ||
11 | Oil synchronizer cone and fit on main shaft (19) with synchronizer ring and annular spring (20). | ||
12 | Install sliding sleeve (21). | The long collar must point towards the output. | |
13 | Grease tapered roller bearing of drive shaft (22), push countershaft (11) to one side and install drive shaft (22). | Grease, silicone-based, 100 g | |
14 | Center reverse idler gear (14) and insert reverse idler shaft (30). | Bolt, reverse idler shaft retaining plate to transmission housing | |
15 | Grease radial shaft sealing ring and install in transmission housing front section (4) together with pilot bushing for splitter box shift rod (3). | ||
Synthetic grease 50 g | |||
Drift | |||
16 | Clean sealing surfaces on transmission housing front section (4) and on transmission housing center section (15), and coat with sealant. | Loctite 5203 sealant | |
17 | Install transmission housing front section (4). | ||
| Assembly tool for installing shift rod of splitter group | ||
Shift fork bearing pin at transmission housing | |||
Loctite 5203 sealant | |||
Drift | |||
Alignment punch | |||
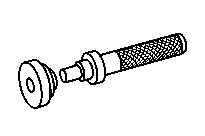
Puller | |||
Retaining device | |||
Holding device | |||
18 | Tighten screws (A, B, C) around the circumference of the transmission housing center section (15). | Pay attention to different lengths of bolts. | |
Bolt, transmission housing front section to transmission housing center section | |||
19 | Remove centering drift from oil pipe (9) and install retaining ring (33) on oil pipe (9). | ||
20 | Grease contact surface of tapered roller bearing outer races (26, 27) and install these up to contact using a suitable drift. | Grease, silicone-based, 100 g | |
21 | Coat screw plug (5) with sealant and install catch bolt (7) with springs (6) and screw plug (5). | Splitter group shift rod lock to transmission housing | |
Loctite 5203 sealant | |||
22 | Use holding device (40) to fix shift rails of shift unit (13) in neutral position. | The shaft (41) on the holding device (40) must be at zero degrees on the scale (42). | |
Drift | |||
Holding device | |||
23 | Pull out splitter box shift rod (3) using assembly tool. | ||
| |||
24 | Determine shims of drive shaft (22) and countershaft (11). | ||
| |||
Drive shaft bearing pretension | |||
Setting tolerance of bearings on countershaft | |||
Preload of bushings on drive shaft and countershaft for determining shims | |||
Torque wrench | |||
Pliers | |||
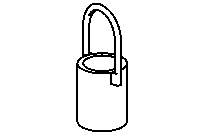
Clamping plates | |||
25 | Install countershaft brake (28) with determined shim. | ||
The oil grooves of brake disks must be aligned. | |||
26 | Install drive shaft bearing cap (29) with determined shim. | ||
27 | Detach transmission (72) from assembly device (73) and place transmission (72) horizontally. | ||
28 | Detach holding device (45) for shift unit (13) from transmission housing center section (15). | ||
29 | Press in splitter box shift rod (3) using assembly tool. | ||
| |||
30 | Install shift piston of splitter box. | ||
31 | Install splitter box cylinder (2). | ||
32 | Install transmission oil temperature sensor (B505). | Transmission oil temperature sensor to transmission housing | |
33 | Install countershaft rpm sensor (B502). | Bolt, countershaft rpm sensor to transmission housing | |
34 | Install main shaft rpm sensor (B501). | Bolt, main shaft rpm sensor to transmission housing | |
35 | Install gearshift system (24). | ||
36 | Install transmission positioner (Y900). |
| |
Transmission positioner from the company Wabco | |||
37 | Install oil restrictor (69) on main shaft (19). | ||
38 | Install range group (18). | ||
39 | Attach compressed-air lines and electrical lines (23) with brackets to transmission (72). | Screw/bolt, bracket to transmission | |
40 | Reconnect electrical connectors to transmission control unit (TCM) (A5), pneumatic central clutch release bearing, transmission oil temperature sensor (B505), main shaft rpm sensor (B501) and countershaft rpm sensor (B502). | ||
41 | Attach compressed-air lines to transmission positioner (Y900), range group cylinder and power take-off. | ||
42 | Install pneumatic central clutch release bearing. | Transmission 715.366 in model 800 | |
43 | Install transmission (72). | Choose procedure according to accessibility and design. |


715 589 08 31 00
Assembly device
715 589 03 15 00
Alignment punch
000 589 67 21 00
Torque wrench
715 589 01 37 00
Pliers



715 589 08 33 00
Puller
714 589 05 15 00
Drift
715 589 06 31 00
Holding fixture
715 589 24 63 00
Holding device


315 589 02 31 00
Clamping device
715 589 09 15 00
Drift
715 589 07 31 00
Holding device
715 589 01 31 00
Retaining device

715 589 15 63 00
Clamping plates
715 589 05 31 00
Retaining device
Odkazované dokumenty
- ah0000n000101a Upozornění k samopojistným šroubům a maticím
- ah0018n000101a Pokyny k systémům konektorových spojů tlakového vzduchu
- ah5400p000101a Upozornění k zamezení poškozením elektronických součástí elektrostatickým výbojem
- ar2520g0182n
- ar2610w000101he Montáž a demontáž montážního přípravku převodovky
- ar2618g1001ad
- ar2621g0006ad
- ar2621g0006adb
- ar2630g1020ad
- ar2631g3100ad
- ar2635g0001ad
- ar2635w000201ha
- ar2635w000201ha Demontáž, montáž radiálního kroužku těsnění hřídele a vodicího pouzdra tyče řazení skupiny půlení
- ar2640w247008ha
- ar2640w247008ha Montáž předního dílu skříně převodovky
- ar2650g0004ad
- ar2650g0428ad
- ar2650g4744ad
- ar2650g4775ad
- ar2650g6000ad
- ar2650w041003ha Určení vymezovacích podložek hnacího hřídele a předlohového hřídele
- ar2650w041003ha
- ar2650w400002ha Montáž hlavního a předlohového hřídele s jednotkou řazení
- ar2650w400002ha
- ar2660g0001ad
- as0000z000901a Nebezpečí poranění přivřením nebo přiskřípnutím, v extrémním případě amputací končetin při zásazích do mechaniky
- as0040z000101a Nebezpečí poranění kůže a očí při manipulaci s převodovým olejem. Nebezpečí ohrožení zdraví při požití převodového oleje
- wf5850n263502a