
1 | Transmission |
2 | Ground cable |
4 | Exhaust bracket |
5 | Shield |
7a | Rear engine cross member |
7b | Rear engine mount |
14a | Retaining clamp |
14b | Fuse |
15 | Shift rod |
16 | Range selector lever |
P27.10-2333-06

1 | Transmission |
8 | Screw |
9 | Torque converter |
P27.10-2336-11
| Remove/install | ||
Danger | Risk of death caused by vehicle slipping or toppling off of the lifting platform. | Align vehicle between vehicle lift columns and position the four support plates at the vehicle lift support points specified by the vehicle manufacturer. | |
1 | Move selector lever into position "N" | ||
2 | Release parking brake | ||
3 | Detach ground line from battery | ||
Topical note | Notes on battery | ||
4 | Secure vehicle on vehicle lift | ||
5 | Remove lower engine compartment paneling or bottom sections of soundproofing |
| |
Vehicles with diesel engine | |||
6 | Remove shield (5) and detach electrical connection from electric controller unit | ||
Bolt, heat shield to transmission housing | |||
7 | Remove oil filler pipe | ||
| |||
Bolt, automatic transmission to engine | |||
Bolt, oil filler pipe to cylinder head | |||
Bolt, oil filler pipe to transmission housing | |||
8 | Remove diesel particulate filter bracket to transmission (1) | Bolt/nut, bracket of diesel particulate filter to lower diesel particulate filter | |
Bolt, bracket to transmission | |||
9 | Detach ground line (2) from transmission (1) | ||
10 | Detach shift rod (15) at range selector lever (16) of transmission (1) | Installation: Replace retaining clamp (14a). | |
11 | Detach oil cooling lines from transmission (1) and engine oil pan, and place to one side | ||
| |||
Seal connections on transmission (1) and at the oil cooling lines using stop plugs. | |||
Record plug | |||
12 | Detach torque converter (9) from driven plate and pry off driven plate uniformly using long wedge | ||
| |||
Bolt, torque converter to driver spider | |||
Counterholder | |||
Socket wrench bit | |||
Long wedge | |||
13 | Support and lash down transmission (1) | ||
14 | Remove rear engine cross member (7a) with rear engine mount (7b) |
| |
Topical note | Notes on bolted connections with self tapping screws | ||
15 | Remove front flexible coupling from transmission (1) | ||
16 | Remove bolts (8) and remove transmission (1) downwards | | |
Installation: Align the threaded holes of the torque converter (9) and holes of the driven plate with each other. | |||
Bolt, automatic transmission to engine | |||
17 | Remove torque converter (9) | Installation: Grease crankshaft bearing journals with multipurpose paste. | |
Multi-purpose paste | |||
Handles | |||
| Check | ||
18 | Check tapped holes in torque converter (9) | Check tapped holes for damage and replace torque converter (9) if necessary. | |
19 | Install in the reverse order | ||
20 | Perform basic programming | ||
21 | Check oil level in transmission(1) and correct, if necessary | ||
22 | Read out fault memory with STAR DIAGNOSIS and erase if necessary | ||
23 | Perform transmission adaptation with STAR DIAGNOSIS | A transmission adaptation must be carried out after exchanging or repairing the transmission (1). | |
Warning | Risk of accident from vehicle starting off by itself when engine running. Risk of injury (bruises and burns) resulting from working on the engine while it is being started or when it is running. | Secure vehicle to prevent it from starting off by itself. Wear closed and snug-fitting work clothes. Do not touch hot or rotating parts. | |
24 | Perform engine test run and check transmission (1) for proper operation and leak tightness |


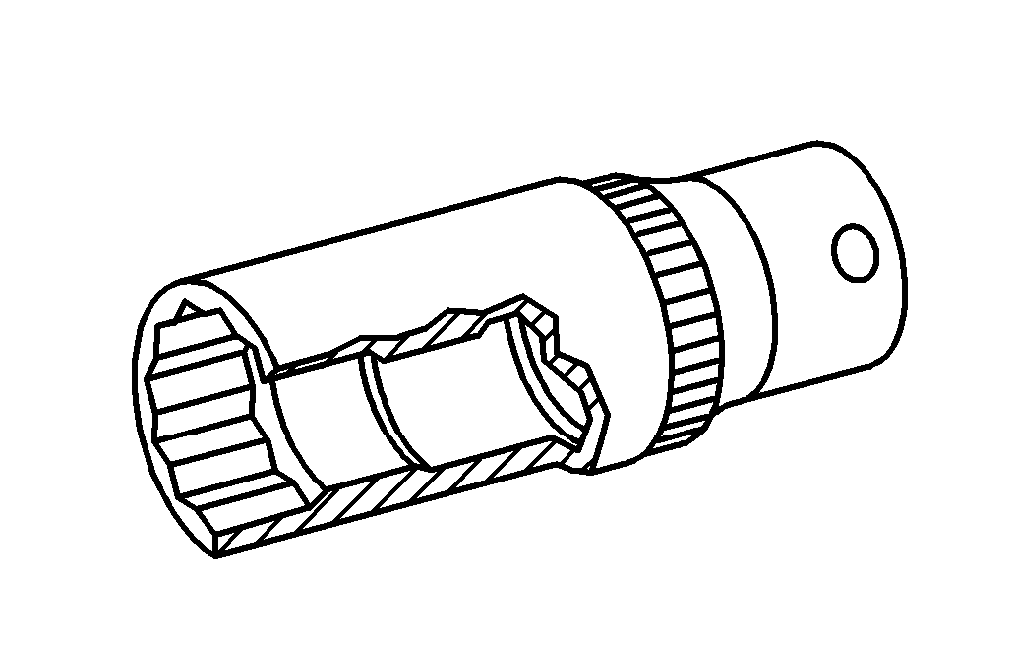
115 589 03 59 00
Long wedge
168 589 00 62 00
Handles
129 589 00 91 00
Record plug
001 589 65 09 00
Socket wrench bit
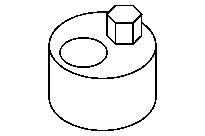
651 589 00 40 00
Counterholder