
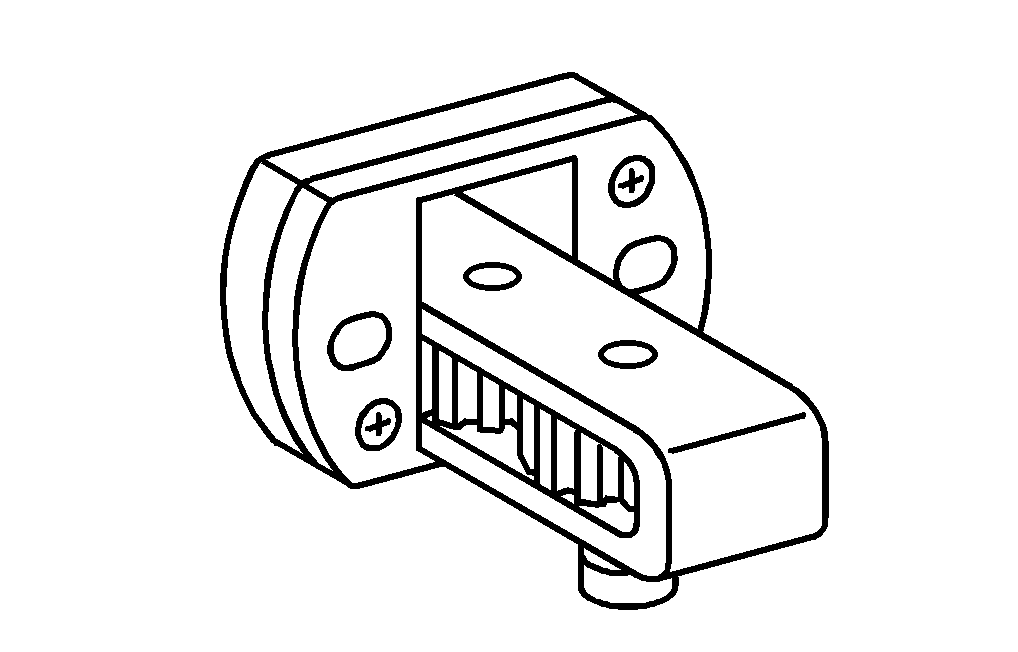

457 589 01 14 00
Assembly sleeve
904 589 04 63 00
Turning device
422 589 02 09 00
Socket wrench bit

1 | Place connecting rod (7) and piston (1) with piston crown on an even base. |
2 | Lightly lubricate piston (1) and piston rings (2, 3, 4) with engine oil and offset piston ring end gaps of the piston rings (2, 3, 4) one after the other by 120°. |
The joint (arrow A) of the piston ring (4) must point in the direction of the long side of the big end. Ensure that the garter spring is installed in the piston ring (4). |
3 | Lightly lubricate inside of assembly sleeve (arrow 5) and outside on collar (B) with engine oil. |
4 | Place assembly sleeve (5) over piston rings (2, 3, 4) and piston (1) and screw together at knurled screw (6). |
The collar (arrow B) of the assembly sleeve (5) must be pointing in the direction of the connecting rod (7). The long side of the big end must point in the direction of the handle of the assembly sleeve (5). |
W03.10-1095-12

5 | Clean inside of the cylinder liner (8) and the cutout for the oil scraper ring. |
6 | Insert connecting rod and piston (1) into cylinder liner (8) until the collar of the assembly sleeve (5) sits in the cutout of the oil scraper ring and the assembly sleeve (5) makes contact with the cylinder liner (8). |
Note installation location and installation position of the piston (1): |
7 | Press piston (1) into the cylinder liner (8). |
8 | Remove assembly sleeve (5). |
W03.10-1097-12

9 | Lightly lubricate contact surface of connecting rod bearing shell (9) and connecting rod journal of crankshaft (10) with engine oil. |
10 | Push piston into cylinder liner until connecting rod (7) is almost touching crankshaft connecting rod journal (10). |
If necessary, turn crankshaft (10). |
11 | Insert or slide connecting rod bearing shell (9) into connecting rod (7). |
In the case of a used connecting rod bearing shell (9), observe the marking made on the connecting rod (7). Different connecting rod bearing shells (9) are installed in the connecting rod bearing cap and in the connecting rod (7). The lug (C) on the connecting rod bearing shell (9) must sit in the groove (arrow) of the connecting rod (7). |
W03.10-1098-02

12 | Lightly lubricate contact surface of the connecting rod bearing shell (11) with engine oil. |
13 | Insert connecting rod bearing shell (11) into connecting rod bearing cap (12). |
Note marking: The lug (arrow) on the connecting rod bearing shell (11) must sit in the groove (arrow) of the connecting rod bearing cap (12). |
W03.10-1099-12

14 | Slightly lubricate connecting rod bolts (13) on the thread with engine oil. |
15 | Place connecting rod bearing cap (12) on connecting rod (7), press onto connecting rod journal by hand and tighten connecting rod bolts (13). |
The key figures (arrows) on the connecting rod (7) and on the connecting rod bearing cap (12) must match and be positioned on the same side. The connecting rod (7) and connecting rod bearing cap (12) must be custom-fit exactly on the crankshaft connecting rod journal. |
W03.10-1100-12

16 | Insert oil scraper ring (14) in the cylinder liner (8) and reposition if necessary by means of light blows with a plastic mallet. |
If the piston (1) and cylinder liner (8) were replaced, a new oil scraper ring (14) must also be installed. If a used oil scraper ring (14) is reused, it must be cleaned beforehand. |
W03.10-1110-11