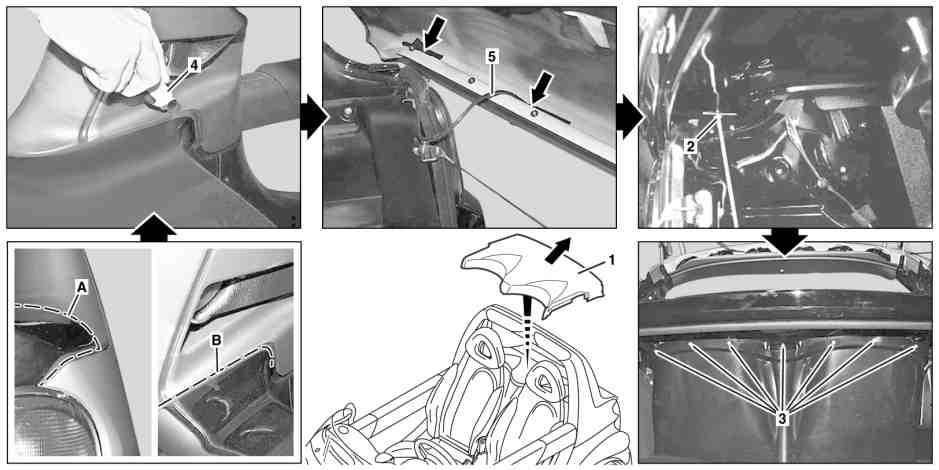
P68.30-2879-09
1 Trunk cover
2 Bolt
3 Bolts
A Cutting line
B Cutting line
4 Carpet knife
5 Antenna cable
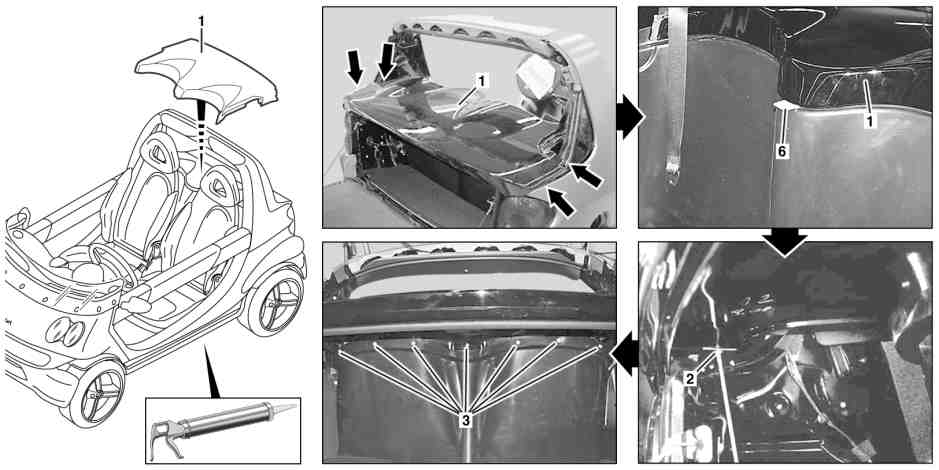
P68.30-2878-09
1 Trunk cover
2 Bolt
6 Spacer
3 Bolts
| Remove | ||
1 | Remove striker plate for door beam | ||
2 | Remove seat console | ||
3 | Remove head collision pad | ||
4 | Remove spoiler from roll bar | ||
5 | Remove belt entrance paneling | ||
6 | Cut silicon joint on trunk cover (1) along marked cutting lines (A, B) in V-shape with a carpet knife and remove filler material | Danger of damaging detachable body components When cutting out observe visible edges, if necessary leave a part of the silicon joint on the detachable body component and remove later. Cutting depth should only be in the area of the silicon joint | |
7 | Unclip antenna cable (5) from trunk cover (1) | Shown on removed trunk cover (1). | |
8 | Unscrew screws (2) on both sides | ||
9 | Remove bolts (3) | ||
10 | Remove trunk cover (1) upward toward rear | Carefully remove trunk cover (1); can break | |
Carefully remove joint residues to which trunk cover (1) is attached | |||
| Install | ||
11 | Insert trunk cover (1) and position | Ensure that gap dimensions are correct, if necessary insert suitable spacer (6). | |
12 | Screw in bolt (2) on both sides | Screw in bolt (2) hand-tight | |
13 | Screw in screws (3) | Tighten bolts (3) hand-tight. | |
14 | Install belt entrance paneling | ||
15 | Install spoiler on roll bar | ||
16 | Install head collision pad | ||
17 | Fill detachable body components | The two application guns listed above can be used optionally. | |
Druckfix Compressed air application gun for bag sealants | |||
Pressfix manual application gun for bag sealants | |||
| General notes on filling detachable body components | Model 450.418 | |
18 | Install seat console | ||
19 | Install striker plate for door beam |
Commercially available tools
Powiązane dokumenty
- ah8800p100002cr Ogólne wskazówki dotyczące spajania elementów do zabudowy
- ar6800p0500cr
- ar6830p4650cr
- ar7210p2505cr
- ar8800p1260cr
- ar9110p3000sm