The following operation steps are shown on model 907.633 with code D03 (Roof and rear-end doors, high version) on the right side of vehicle and must be performed analogously on the left side of vehicle if damaged.
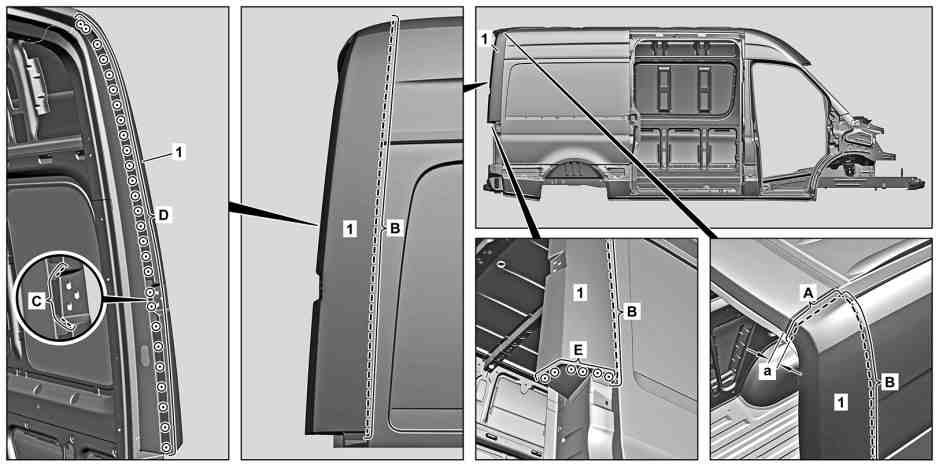
D64.30-1227-09
a | Dimension (approx. 20 mm) |
1 | Mark separating point on outer corner pillar paneling upper section (1) (area A). |
Observe dimension (A). |
2 | Cut separating point at outer corner pillar paneling upper section (1) (area A). |
Do not cut too deeply. |
Commercially available devices/tools |
3 | Mark separating point on outer corner pillar paneling upper section (1) (area B). |
Mark separating point along edge (area B). |
4 | Cut separating point at outer corner pillar paneling upper section (1) (area B). |
Do not cut too deeply. |
Commercially available devices/tools |
5 | Expose weld seams at outer corner pillar paneling upper section (1) (area C). |
Commercially available devices/tools |
6 | Cut weld seams at outer corner pillar paneling upper section (1) (area C). |
Commercially available devices/tools |
7 | Expose spot welds at outer corner pillar paneling upper section (1) (areas D and E). |
Commercially available devices/tools |
8 | Cut off spot welds at outer corner pillar paneling upper section (1) (areas D and E). |
Commercially available devices/tools |
9 | Remove damaged upper section of outer corner pillar paneling (1). |

10 | Mark separating points at outer corner pillar paneling upper section (1) (areas F1, F2 and F3). |
Mark separating points as shown (areas F1, F2 and F3). |
11 | Cut separating points at outer corner pillar paneling upper section (1) (areas F1, F2 and F3). |
Do not make the cuts too deep. |
Commercially available devices/tools |
D64.30-1228-05
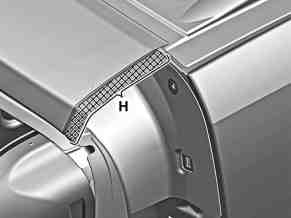
12 | Joggle outer corner pillar paneling upper section (1) in hatched area (area H) approx. 10 mm. |
Commercially available devices/tools |
13 | Grind mating surface in hatched area (area H) down to bare metal. |
Commercially available devices/tools |
D64.30-1229-01
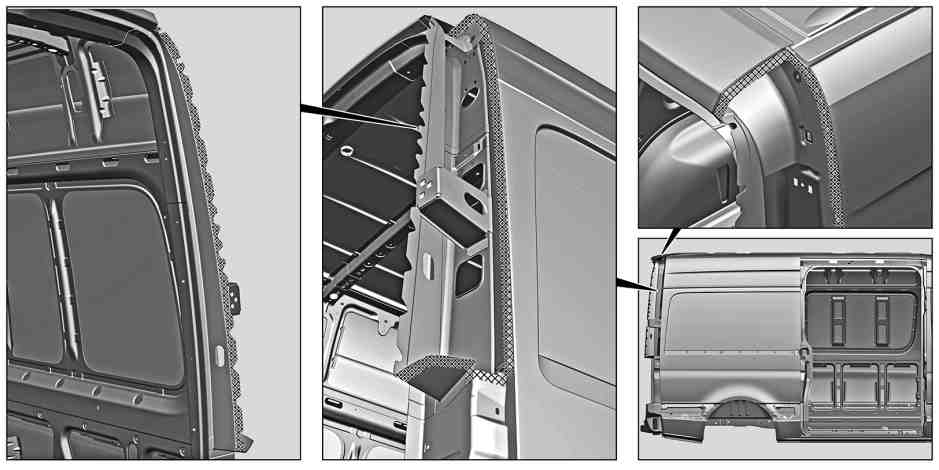
D64.30-1230-09
14 | Grind down mating surfaces to bare metal in cross-hatched areas. |
Commercially available devices/tools |
15 | Remove shavings and milling chips. |
Commercially available devices/tools |
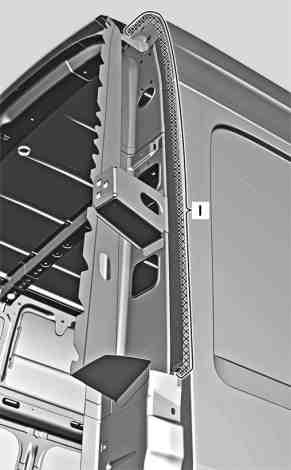
16 | Bend up remaining sections in cross-hatched area (area I). |
Commercially available devices/tools |
D64.30-1234-03
Powiązane dokumenty
- as0000z001701a Niebezpieczeństwo obrażeńo elementy pojazdu o ostrych krawędziach.