AR09.41-B-1311F | Remove/install charge air pipe | 12.02.16 |
Cumbustion engine 376.922 with Vehicle 382.068
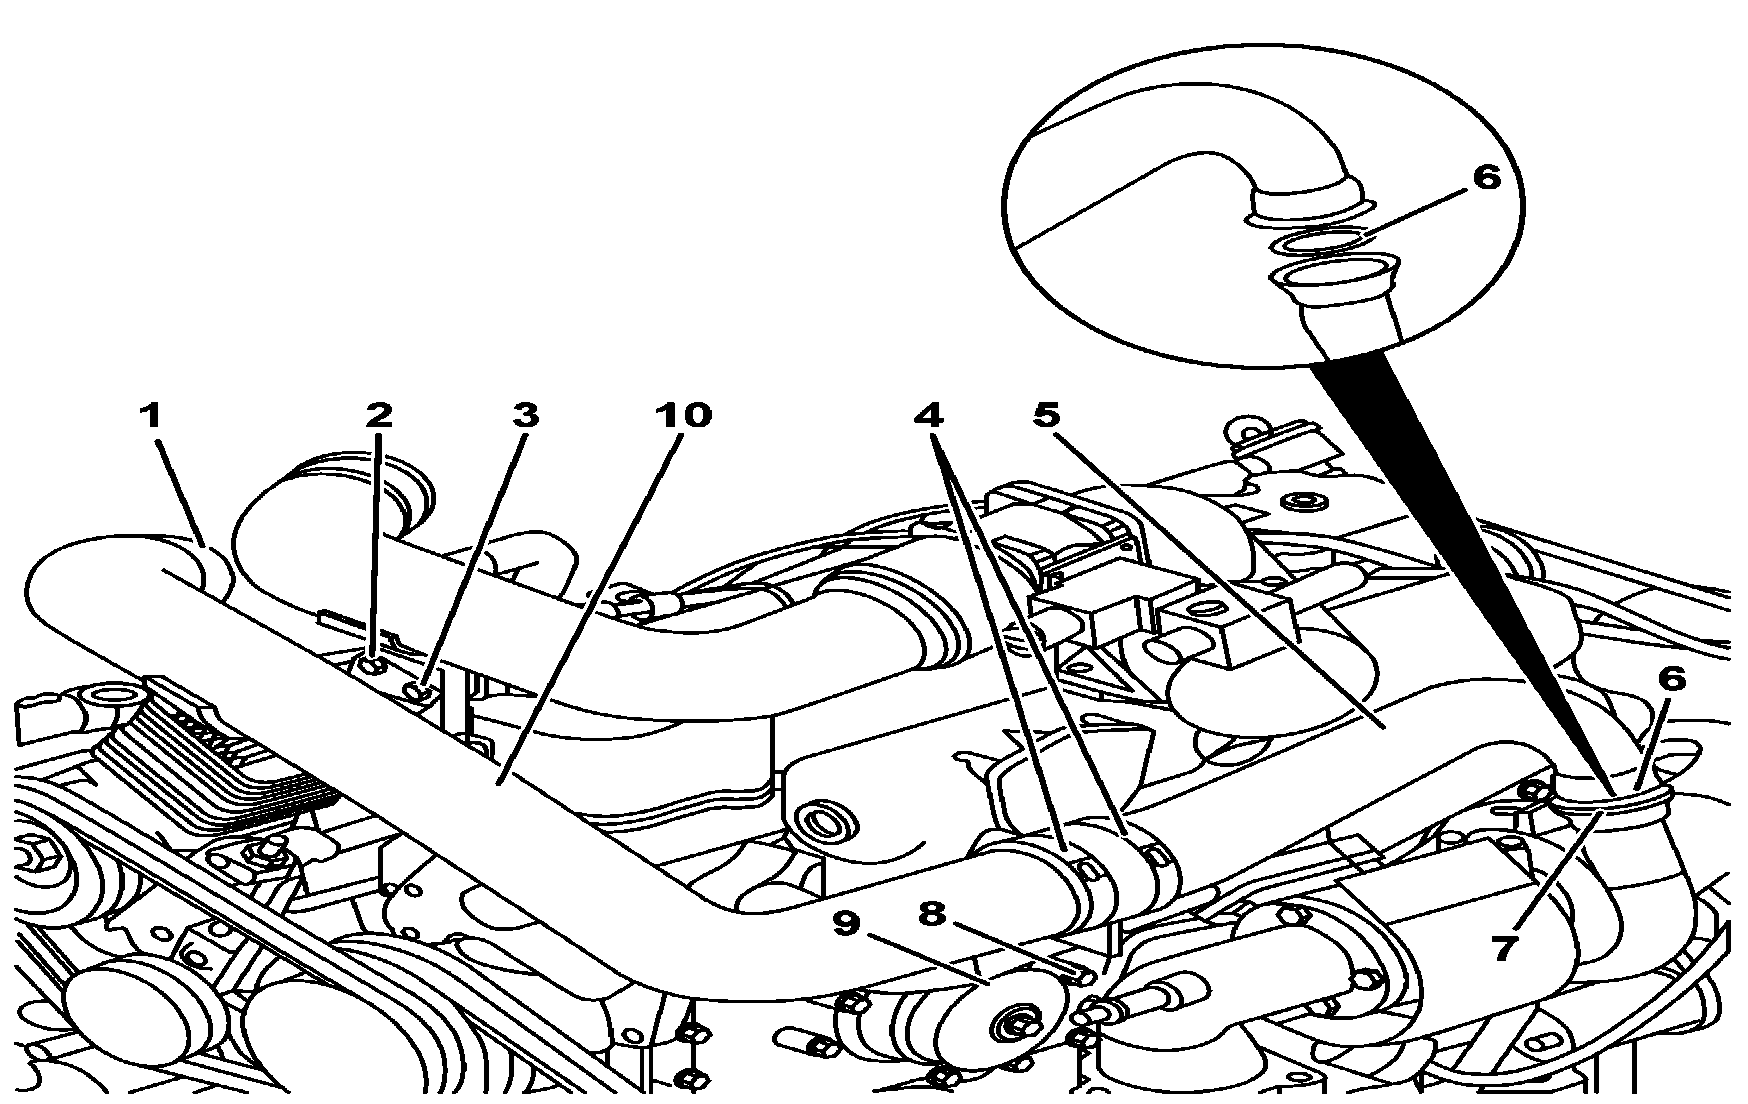
B09.41-0020-12
1 Clamp
2 Nut
3 Screw
4 Clamp
5 Charge air tube on turbocharger
6 Sealing ring
7 Clamp
8 Screw
9 Support
10 Charge air tube
| Remove and install | ||
Danger! | Safety measures for maintenance work on natural gas powered engines. | ||
Danger! | Safety measures while engine is running. | ||
1 | Turn off the main switch or disconnect the negative battery cable. | ||
2 | Remove fastening screws (8) from air tube (5). | | |
3 | Loosen clamps (4) and remove hose. | Installation: Check clamps and hose for damage, replace as necessary. | |
| |||
4 | Loosen clamp (7) and remove charge air tube (5) together with sealing ring (6). | Installation: Mount a new neutral vaseline-lubricated sealing ring. | |
Close turbocharger connection to prevent dirt penetration. | |||
5 | Loosen clamp (1) and disconnect connecting hose (red) to after-cooler. | Installation: Check condition of hose and clamp, replace as necessary. | |
6 | Remove screws (3), loosen nuts (2) and remove charge air tube (10). | ||
7 | Install in reverse order. | Installation: All tubings must be clean inside and out. | |
8 | Start engine and verify leak tightness. |
Charge air pipe/charge air cooling