


168 589 02 37 00
Flange crimping pliers
215 589 01 23 00
Gauge adapter
129 589 03 21 00
Feeler gauge
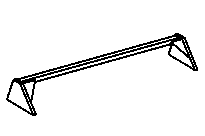
220 589 05 23 00
Inspection and welding gage

P63.50-2154-09
1 | Replace damaged foam parts and apply body sealant to the foam parts. |
2 | Apply adhesive to the prepared rivet flanges. |
3 | Position rear fender with 2 people and screw in screws. |

4 | Fasten rear fender with collets and manual temporary fasteners. |
To do this, use inspection and welding gauge. |
5 | Check gap dimensions on the rear fender. |
6 | Draw in blind rivets as follows: |
Area A, B, and C with aluminum-steel flat-head rivets with a diameter of 6.4 x 14 mm.
In area E with aluminum-steel flat-head rivets with a diameter of 4.0 x 10 mm.
In area F only wheel arch with countersunk-head rivets with a diameter of 4.0 x 10 mm.
In area J and K with aluminum-steel flat-head rivets with a diameter of 6.4 x 14 mm.
P63.50-2130-06
7 | In area D, rear fender on rear-end center section . |
Do
not weld the existing spot welds again.
8 | Spread protruding adhesive with a brush. |
9 | Reposition rivet flange on the wheel arch during several cycles |
Risk of the aluminum paneling |
Referenced documents
- ah6000p000801sx Pretreatment of bonding surfaces