
P33.10-2211-09
Shown on model 219 with steel suspension
1 Front axle carrier
1a Bolts
1b Bolts
5 Steering knuckle
7 Spring struts
13 Screw
30f Oil line
30i Oil line
Y10 SPS [PML] solenoid valve
8 Upper transverse control arm
9 Steering coupling
10 Rack-and-pinion steering
11 Front engine mount
12 Retaining plate

P33.10-2202-06
Shown on model 219 with steel suspension
5 Steering knuckle
5a Scuff protection
6a Screw
10a Electrical feed line
51 Brake hose
51a Bracket
52 Brake line
L6/1 Left front rpm sensor
L6/2 Right front rpm sensor
S10/1 Left front brake pad contact sensor
S10/2 Right front brake pad contact sensor
Modification notes
| Remove/install | ||
Danger! | Risk of injury caused by body parts being jammed or crushed. Risk of injury to skin and eyes caused by brake fluid spraying out at high pressure when working on the SBC brake system | Deactivate SBC brake system using STAR DIAGNOSIS. | |
| Notes on self-locking nuts and bolts | ||
| Notes on AIRmatic | ||
| Before opening the SBC system, thoroughly clean the surrounding area of the separation point. Even minute particles of dirt, introduced into the hydraulic components, can result in malfunctions and a total failure of the SBC system | ||
| When working on the front-end assembly, be careful not to scratch, mark or notch the surfaces of aluminum parts. Otherwise the service life of the parts will be affected | ||
Installation | Only tighten nuts and bolts of chassis components when vehicle is in a ready-to-drive condition. | ||
1 | Deactivate easy entry/exit function | Vehicles with memory package (driver seat, steering column, mirrors) code 275 | |
Otherwise the driver seat and steering wheel move to a different position, e.g. when the driver door is opened/closed. The upper frame may be damaged when the holding device is installed. | |||
It is switched off using the buttons on the steering wheel in the "Comfort" menu on the multifunction display, see vehicle owner's manual. | |||
2 | Turn front wheels to straight-ahead position and secure steering wheel with holding device | On a disengaged steering coupling (9) the steering wheel should not be turned because the spiral contact coil will be destroyed. | |
Swivel the sun visor to the side and insert the holding device. | |||
| |||
3 | Deactivate SBC brake system using STAR DIAGNOSIS. | Vehicles with Sensotronic Brake Control (SBC) | |
The following steps should be run through in STAR DIAGNOSIS: Select the menu item "SBC-Sensotronic Brake Control"/"Initial startup after repair"/"Deactivate 'SBC' system". Then process all the individual steps from top to bottom. | |||
| Connect STAR DIAGNOSIS and read out fault memory | ||
4 | Empty front suspension struts (7) using STAR DIAGNOSIS | Vehicles with AIRmatic (semi-active air suspension), code 489 | |
5 | Remove air filter housing with air ducts | Model 219.377 | |
Model 219.354 /356 /357 /372 | |||
Model 219.375 | |||
Model 219.376 | |||
Model 219.322 | |||
6 | Suction off oil from power steering expansion reservoir using hand pump | | |
7 | Mount engine support frame and raise engine | ||
| |||
8 | Remove the front wheels | ||
| Remove/install wheels | ||
9 | Installing protective washers to protect brake disk dust shields | ||
| |||
10 | Remove left front rpm sensor (L6/1) and right front rpm sensor (L6/2) from steering knuckles (5) and hang to one side | Vehicles without AIRmatic | |
To do so undo bolt (6a) and unclip electrical feed lines of left front rpm sensor (L6/1) and right front rpm sensor (L6/2) from retaining clamps. | |||
Installation: Observe correct observe installation position, the chafe protection (5a) must be screwed to the rpm sensor (L6/1, L6/2) as shown. It must not be assembled between the rpm sensor (L6/1, L6/2) and steering knuckle (5). | |||
| |||
11 | Disconnect left front brake pad contact sensor (S10/1) and right front brake pad contact sensor (S10/2) at connectors. | Vehicles without AIRmatic | |
12 | Detach electrical feed lines (10a) of left front brake pad contact sensor (S10/1) and right front brake pad contact sensor (S10/2) from brake calipers | Vehicles without AIRmatic | |
| |||
Danger! | Risk of poisoning caused by swallowing brake fluid. Risk of injury caused by brake fluid coming into contact with skin and eyes. | Only pour brake fluid into suitable and appropriately marked containers. Wear protective clothing and eye protection when handling brake fluid. | |
13 | Unscrew brake lines (52) from brake hoses (51) and seal openings | Seal off line connections immediately with plugs. The brake fluid expansion reservoir must not be allowed to run completely empty. | |
When loosening and tightening the brake line (52) on the brake hose (51), take care not to twist the bracket (51a). Counterhold open wrench on two flats of brake hose (51) using an open-end wrench. | |||
Installation: The brake hose (51) must not be twisted after tightening (risk of cracking). | |||
| |||
| |||
| |||
| Brake fluid notes | ||
| Notes on installing brake hoses | ||
14 | Remove front suspension struts (7). | Vehicles without AIRmatic | |
Vehicles with AIRmatic (semi-active air suspension), code 489 | |||
15 | Detach electrical connectors of left front brake pad contact sensor (S10/1), right front brake pad contact sensor (S10/2), left front rpm sensor (L6/1) and right front rpm sensor (L6/2) | Vehicles with AIRmatic (semi-active air suspension), code 489 | |
16 | Detach upper transverse control arm (8) from front end | ||
17.1 | Remove bottom engine compartment paneling | Vehicles with gasoline engine | |
Installation: Only install the engine compartment paneling after the leak check on the rack-and-pinion steering (10). | |||
17.2 | Remove bottom section of soundproofing | Vehicles with diesel engine | |
Installation: Do not install bottom section of soundproofing until after rack-and-pinion steering (10) has been checked for leaks. | |||
18 | Pull steering coupling (9) off rack-and-pinion steering (10). | ||
19 | Detach left and right front engine mount (11) from front axle carrier (1). | Vehicles with gasoline engine | |
Vehicles with diesel engines | |||
20 | Separate electrical connector from SPS [PML] solenoid valve (Y10) | ||
21 | Remove cable tie (arrow) and place electric feed line of SPS [PML] solenoid valve (Y10) to the side | ||
22 | Detach retaining plate (12) and bolt (13) from rack-and-pinion steering (10) and pull oil lines (30i, 30f) out of rack-and-pinion steering (10) and put down to one side | See Remove/install rack-and-pinion steering (10). | |
Before opening the hydraulic circuit of the rack-and-pinion steering (10) the area around the separation point should be cleaned thoroughly. Even minute particles of dirt, introduced into the hydraulic components, can result in malfunctions of the rack-and-pinion steering (10). | |||
Collect escaping hydraulic fluid in a container and seal line connections with stop plugs. | |||
Installation: Replace O-rings. | |||
| |||
23 | Detach bracket of power steering return line from the front axle carrier (1) | ||
24 | Prop front axle carrier (1) with transmission jack and transmission plate | ||
25 | Remove bolts (1a, 1b) | | |
26 | Lower front axle carrier (1) | ||
27 | Check front axle for damage and replace damaged parts | ||
28 | Install in the reverse order | ||
29 | Fill power steering pump and bleed | Model 219.354 /356 /357 /372 /322 | |
Model 219.375 /376/ 377 | |||
30 | Check steering for function and leaks | ||
31.1 | Bleed brake system with STAR DIAGNOSIS | Vehicles with Sensotronic Brake Control (SBC) | |
The following steps should be run through in STAR DIAGNOSIS: Select menu item "initial startup after repair"/"after opening or replacing one or several brake hoses". Then process all the individual steps from top to bottom. | |||
When performing the bleeding operation always observe the instructions in the document "Bleeding brake system using STAR DIAGNOSIS". | |||
| Connect STAR DIAGNOSIS and read out fault memory | ||
31.2 | Bleed brake system | Vehicles with Adaptive Brake (ABR) | |
32 | Perform a wheel alignment check |
Engine suspension, engine mounts, engine supports
Number | Designation | Engine | Engine | ||
BA22.10-P-1001-01S | Bolt, front engine mount to front axle carrier | Nm | 35 | 35 | |
Engine suspension, engine mounts, engine supports
Number | Designation | Engine | ||
BA22.10-P-1001-01D | Bolt, front engine mount to front axle carrier | Nm | 35 | |
Engine suspension, engine mounts, engine supports
Number | Designation | Engine | ||
BA22.10-P-1001-01S | Bolt, front engine mount to front axle carrier | Nm | 35 | |
Front axle carrier
Number | Designation | Model | |
BA33.10-P-1002-01J | Bolt, front axle carrier to longitudinal member | Nm | 100 |
Front axle brake caliper
Number | Designation | Model | Model | ||
BA42.10-P-1003-10B | Bolt, brake pad contact sensor to brake caliper | Nm | 8 | 8 | |
Brake lines, brake hoses
Number | Designation | Model | Model | ||
BA42.10-P-1001-04I | Union nut, brake line to brake hose | Nm | 18 | 18 | |
Front axle rpm sensor
Number | Designation | Model | |
BA42.30-P-1001-01H | Self-locking bolt, front axle rpm sensor to steering knuckle | Nm | 25 |
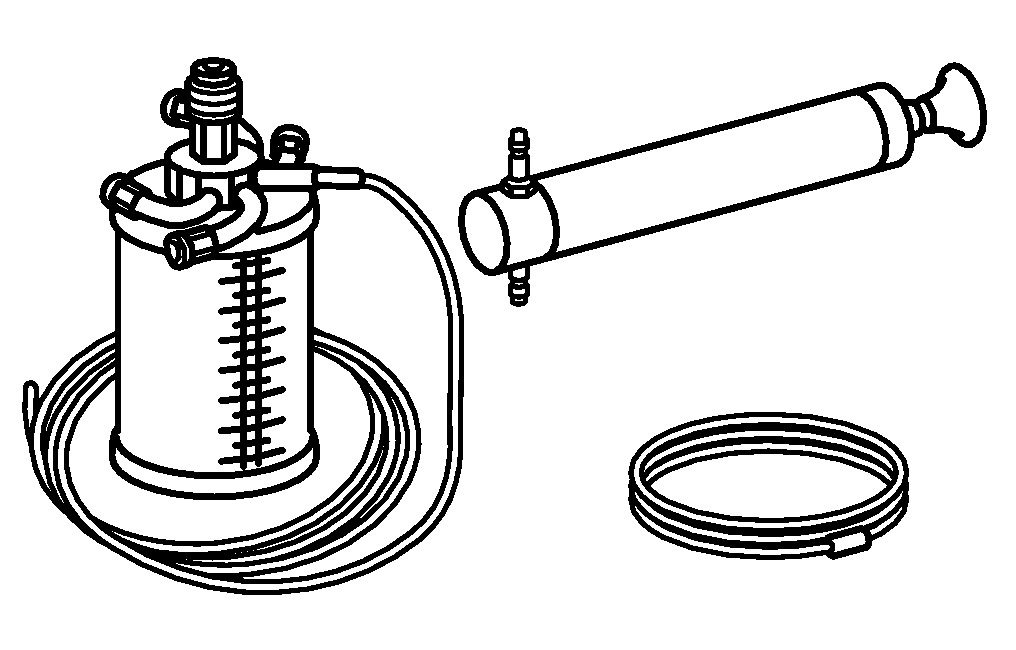


210 589 00 71 00
Hand pump
Holding device
Set of stop plugs
129 589 01 21 00
129 589 00 91 00
Box wrench bit
000 589 75 03 00


220 589 01 31 00
Guard plate
Engine lifting fixture
240 589 00 61 00
Referenced documents
- ad0000p200004a Connect STAR DIAGNOSIS and read out fault memory
- ad0000p200004a
- ah0000n000101a Notes on self-locking nuts and bolts
- ah3222p100002t Notes on AIRmatic
- ah4210p940601a Notes on installing brake hoses
- ah4250p000101a Brake fluid notes
- ap4010p4050tx Remove/install wheels, rotate if necessary
- ar0910p1150tmg Remove/install air filter housing
- ar0910p1150tq Remove/install air filter housing
- ar0910p1150ts Remove/install air filter housing
- ar0910p1150ty Remove/install air cleaner housing
- ar0910p1150tz Removing/installing the air cleaner housing
- ar3225p1017tx Remove/install the suspension strut
- ar3225p1017ty Remove/install suspension strut
- ar3310p010001tx Attaching engine supporting frame and lifting engine
- ar3310p010003tx Prop front axle carrier with inspection pit lift or assembly lift
- ar3320p0500tx Remove/install upper control arm
- ar4020p0200tx Perform chassis alignment
- ar4200p010001tx Installing protective washers to protect brake disk dust shields
- ar4210p0010t Bleed brake system
- ar4210p0012tx Bleed brake system with STAR DIAGNOSIS
- ar4210p104004tx Disconnect electrical connector
- ar4610p8000tx Remove/install steering coupling
- ar4620p0600tx Remove/install rack-and-pinion steering
- ar4630p0010tx Fill power steering pump and bleed
- ar4630p0010ty Fill power steering pump and bleed
- ar6120p1105tx Remove and install bottom engine compartment paneling
- ar9430p5300tx Remove/install bottom parts of noise encapsulation
- as4246z000101a Risk of injury caused by body parts being jammed or crushed. Risk of injury to skin and eyes caused by brake fluid spraying out at high pressure when working on the SBC brake system
- as4250z000101a Risk of poisoning from swallowing brake fluid. Risk of injury from skin and eye contact with brake fluid