49-100 Removing, installing exhaust system
Operation no. of operation texts and work units or standard texts and flat rates 49-0018 |
Model 124.020/080

1493-16551
Riveting nut in manifold (1) | replace - special tool: caulking screw 103 589 01 39 00, insert riveting nut in manifold and tighten caulking screw to 30 Nm (steps 4 - 6). |
Front exhaust pipe with front silencer (2) | tighten flanged joint to manifold evenly. |
Front exhaust pipe with pre- and underfloor catalytic converter (2a) |
tighten flanged joint to manifold evenly. |
Oxygen sensor (2b) | install, pay attention to routing of lines. Test lambda control (07.3-100). |
Cover (2c) | pay attention to installed position. |
Self-locking hex nut (3) | replace, 20 Nm. |
Hex bolt (4) | replace, 25 Nm. |
Sintered seal (5) | check for signs of damage, ensure if correctly located. |
Retaining clamp (6) | check suitability for re-use. |
Centre silencer (7) | check for signs of damage. |
Hex bolt (8) | replace. |
Rear silencer (9) | check for signs of damage. |
Side support (10) with hex bolt (11), washer (12) |
install, 20 Nm (step 14). |
Rubber buffer (13) | check for signs of wear. |
Self-locking hex nut (16) | replace, 7 Nm. |
Belle ville spring washer (17) | replace, pay attention to installed position (step 14). |
Rubber ring (18) | check for signs of damage and wear. |
Hex bolt (19), washer (20) and pipe clamp (21) |
check suitability for re-use, replace if necessary. |
Spring lock washer (22) | replace. |
Hex nut (23) | 20 Nm. |
Hex bolt (24), suspension plate (25) and tensioning plate (26) |
check for signs of damage and wear. |
Model 201.023

1493-16553
Riveting nut in manifold (1) | replace - special tool: caulking screw 103 589 01 39 00, insert riveting nut into manifold and tighten caulking screw to 30 Nm (steps 4 - 6). |
Front exhaust pipe with front silencer (2) | tighten flanged joint at manifold evenly. |
Front exhaust pipe with pre- and underfloor catalytic converter (2a) |
tighten flanged joint at manifold evenly. |
Oxygen sensor (2b) | install, pay attention to line routing. Test lambda control (07.3-100). |
Cover (2c) | pay attention to installed position. |
Self-locking hex nut (3) | replace, 20 Nm. |
Hex bolt (4) | replace, 25 Nm. |
Sintered seal (5) | check for signs of damage, ensure correctly located. |
Flange (5a) | check suitability for re-use, replace if necessary. |
Graphite seal (5b) | replace. |
Retaining clamp (6) | check suitability for re-use. |
Centre silencer (7) | check for signs of wear. |
Hex bolt (8) | replace. |
Rear silencer (9) | check for signs of damage. |
Side support (10) with hex bolt (11), washer (12) and rubber washer (14) |
install, 20 Nm (step 14). |
Rubber buffer (13) | check for signs of wear. |
Self-locking hex nut (16) | replace, 7 Nm. |
Belle-ville spring washer (17) | replace, pay attention to installed position (refer to instruction, step 14). |
Rubber ring (18) | check for signs of damage and wear. |
Hex bolt (19), washer (20) and pipe clamp (21) |
check suitability for re-use, replace if necessary. |
Spring lock washer (22) | replace. |
Hex nut (23) | 20 Nm. |
Hex bolt (24), suspension plate (25) and tensioning plate (26) |
check for signs of damage and wear. |
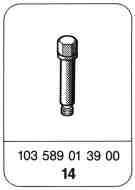

Special tools
Removal and installation of the exhaust system is not explained in full, but reference is made only to particular important points which require to be observed when removing and installing or when replacing a part, e. g. of the rear silencer with push-fit joint.
Removal, installation
-------------------------------
1 Check suspension parts to ensure they are suitable for re-use, replace if necessary.
2 Before installing the exhaust system, it is important to ensure that the flanges to the exhaust manifold are not twisted; straighten flanges, if necessary.

3 Clean combustion residues or corrosion of tapered connection pieces of pipes (2 and 22) and sintered seal (5), if necessary, with emery cloth.
2 Front exhaust pipe
5 Sintered seal
6 Self-locking hex nut
7 Hex bolt
18 Flange
22 Centre exhaust pipe
1494-11141
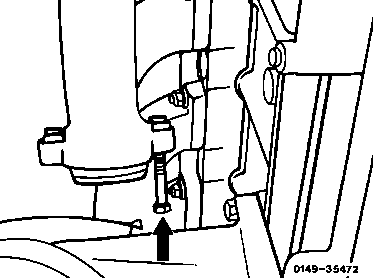
4 Knock out riveting nuts from the hose in the exhaust manifold using a suitable hexagon bolt. Screw the hexagon bolt in by hand only, for performing the step.
0149-35472

5 Insert new riveting nut into hole of exhaust manifold. Screw in caulking screw and tighten to a torque of 30 Nm.
6 Remove caulking screw.
0149-35473

Replacing rear silencer
7 Place new rear silencer with push-fit joint precisely over removed part and mark pipe length of new rear silencer at removed system (except for model 124.080)
Cut through the pipe 80 mm from the mark
(tolerance -10 mm) in direction of rear silencer
(broken line) to ensure a push-fit depth of
70 - 80 mm.
0149-35469

8 Tighten the flanged joint to the manifold
evenly, resting the front exhaust system on the
side support at the transmission. Tightening
torque of hexagon bolts 30 Nm.
0149-36164
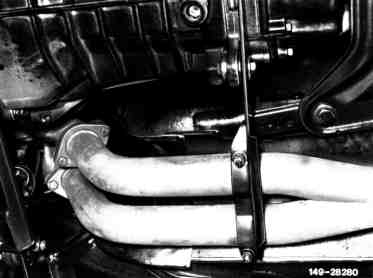
Location of front exhaust pipe RÜF
149-28280

Arrangement of front exhaust pipe KAT
149-26295
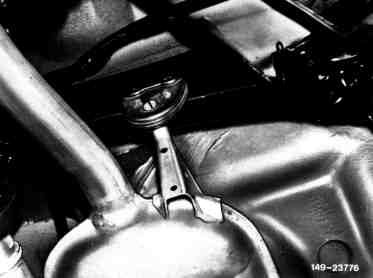
9 Install centre exhaust system with centre silencer, at the same time attaching exhaust system to rubber hanger on rear axial carrier.
149-23776
10 Install sintered seal (5) at flanged joint and ensure it is correctly located. Tightening torque of self-locking hex nuts 20 Nm.
2 Front exhaust pipe
5 Sintered seal
6 Self-locking hex nut
7 Hex bolt
18 Flange
22 Rear exhaust pipe
1494-11141
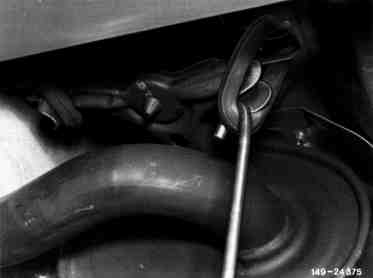
11 Attach rubber rings to rear silencer with a suitable hook.
149-24375

12 Install rear silencer so that the remaining clamps of the rear silencer are positioned approx. 10 mm ahead of the brackets on the frame floor to ensure that the silencer is correctly installed when the exhaust system expands (arrows).
Note
This relates only to repair version of silencer and for model 124.080 with push-fit joint between centre and rear silencers.
0149-35468

13 Position exhaust pipe clamp in middle between centre and rear silencers and tighten hex nut to 20 Nm (arrow).
0149-35467

14 Install exhaust side support (10a) free of tension.
Tightening torques:
Self-locking hexagon nuts on clamping bar:
7 Nm
Hexagon bolts of side support at transmission: 20 Nm
149-31052
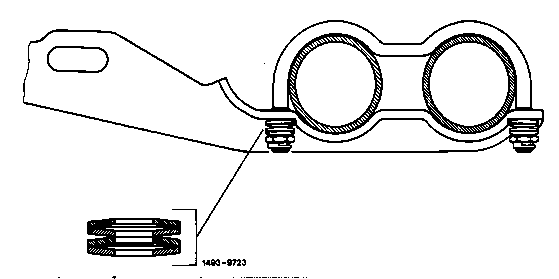
Note
Install 4 Belle-ville spring washers on each side of retaining clamp so that the curved faces are pointing away from each other (as shown in ill.).
1493-9723
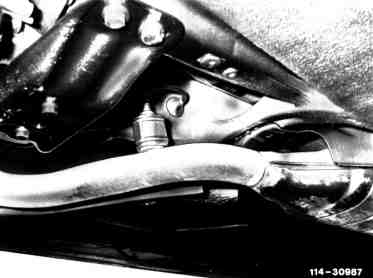
15 Install oxygen sensor with shield on cars fitted with catalytic converter. Coat thread with paste 000 989 88 51.
16 Run engine and check exhaust system for signs of leaks.
114-30987