AR33.10-P-0001V | Remove/install front axle carrier | 23.4.12 |
MODEL 171
MODEL 172 with ENGINE 152, 271, 276, 651

P33.10-2225-09
Shown on model 171.442 with code (213) Speed-sensitive power steering
1 Front axle carrier
2 Screw
3 Diagonal struts
4 Underbody paneling
5 Guide
6 Oil line bracket
7 Engine mount
8 Steering coupling
Y10 SPS solenoid valve
(Model 171 with code (213) Speed-sensitive power steering) or
Direct steering solenoid valve
(Model 172 with code (213) Direct steering)
9 Tie rod
10 Screw
11 Screw
12 Retaining plate
13 Torque strut
14 Cross strut
15 Rack-and-pinion steering

P33.10-2220-01
Model 171.473, 172.457
16 Heat shield
17 Bolts
| Remove/install | ||
Danger! | Risk of injury to skin or eyes caused by hydraulic fluid spraying out under high pressure. Risk of poisoning caused by swallowing hydraulic fluid | Depressurize hydraulic system completely before starting any work on system. Wear protective clothing and safety glasses. | |
| Notes on self-locking nuts and bolts | ||
Installation: Bolts and nuts on suspension components must not be tightened until the vehicle and its wheels are on the ground, and it is in a ready-to-drive condition. | |||
1 | Deactivate easy entry/exit function for driver seat and steering wheel | Model 171 with code (275) Memory package (driver seat, steering column, mirrors) | |
Model 172 with code (275) Memory package for electrically adjustable front seats | |||
Easy entry/exit function for driver seat and steering wheel must be deactivated. Otherwise the steering wheel moves to a different position if, e.g. the driver door is opened or closed. The headliner or windshield may then be damaged when the holding device is installed. | |||
2 | Turn steering wheel to center position (front wheels in straight-ahead position) and fix in place with clamping device | The steering wheel | |
Holding device | |||
3 | Open engine hood and move to vertical position | Model 171.4, 172.4 | |
4 | Remove front upper engine cover | Model 171 with engine 113, 272 Model 172 with engine 276, 651 | |
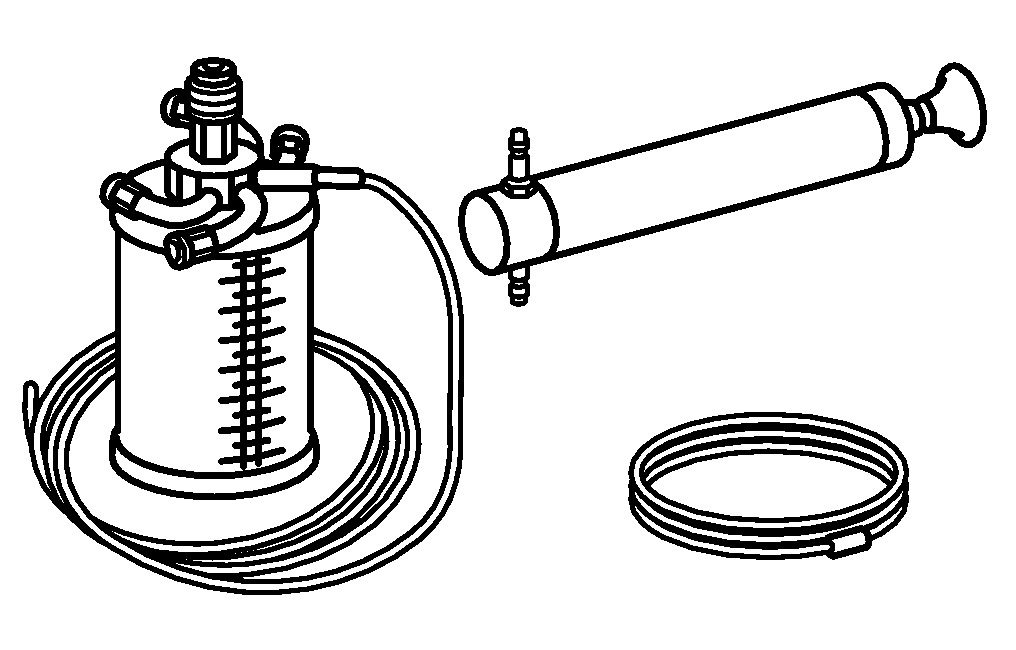
5 | Extract oil from power steering expansion reservoir | The area surrounding the separation point should be cleaned thoroughly before opening the hydraulic system. Even the smallest dirt particles, introduced into the hydraulic components, can lead to malfunctions and a total failure of the hydraulic system. | |
Hand pump | |||
6 | Remove air filter housing | Model 171.473 with engine 113.989 | |
Model 172.4 with engine 152.9 | |||
7 | Mount engine hoist | Model 171, 172 with engine 271 | |
Model 171 with engine 272 | |||
Engine hoist | |||
8 | Raise engine far enough until the | ||
9 | Remove both front wheels | ||
10.1 | Remove lower engine compartment paneling | Installation: Only install engine compartment paneling after leak check on the rack-and-pinion steering (15). | |
Model 171.4 | |||
Model 172.4 with gasoline engine | |||
10.2 | Remove lower bottom sections of soundproofing | Model 172.4 with diesel engine | |
11 | Remove underfloor paneling (4) | Model 171 | |
12 | Remove diagonal struts (3) | | |
13 | Remove bolt (11) of retaining plate (12) | | |
14 | Remove retaining plate (12) of oil lines from the rack-and-pinion steering (15) | Installation: Replace sealing rings. | |
15 | Pull oil lines out of the | The area surrounding the separation point should be cleaned thoroughly before opening the hydraulic system. Even the smallest dirt particles, introduced into the hydraulic components, can lead to malfunctions and a total failure of the hydraulic system. | |
Collect escaping hydraulic fluid in a container and seal connections with stop plugs. | |||
Installation: Install new sealing rings. | |||
Set of stop plugs | |||
16 | Detach electrical connection from SPS solenoid valve (Y10) or direct steering solenoid valve (Y10) | Model 171 with code (213) Speed-sensitive power steering), | |
17 | Remove cable tie on left underside of front axle carrier (1) and place electrical line to | Model 171 with code (213) Speed-sensitive power steering), | |
18 | Pry off tie rods (9) on left and rights steering knuckle | Model 171 | |
| |||
Thrust piece | |||
Puller | |||
Model 172 | |||
| |||
Thrust piece | |||
Puller | |||
19 | Remove bolts (17) and heat shield (16) | Model 171 with engine 113 Model 172 with engine 152, 276, 651 | |
20 | Detach steering coupling (8) from upper steering shaft | ||
21 | Detach left and right torque strut (13) from front axle carrier (1) | When unfastening the nut, always counterhold the bolt so that it does not turn. Otherwise the fixing lugs for the caster adjustment in the rubber mount will be sheared off when the repair kit is fitted. | |
On model 171 with engine 113 remove right bolt of strut rod (13) when the front axle carrier is lowered (1). | |||
Model 171 | |||
Model 171 | |||
Model 172 | |||
Model 172 | |||
Box wrench bit (model 171) | |||
22 | Detach left and right cross strut (14) from front axle carrier (1) | When unfastening the nut, always counterhold the bolt so that it does not turn. Otherwise the fixing lugs for the camber adjustment in the rubber mount will be sheared off when the repair kit is fitted. | |
Model 171 | |||
Model 171 | |||
Model 172 | |||
Model 172 | |||
Box wrench bit (model 171) | |||
23 | Detach bracket for oil line (6) of rack-and-pinion steering (15) from front axle carrier (1) | Model 171 | |
Model 172 | |||
24 | Remove bolts (10) from engine mount (7) | Model 171 with engine 271, 272 | |
Model 171 with engine 113 | |||
Model 172 | |||
25 | Support and secure the front subframe (1) with the transmission jack and transmission plate | Transmission jack gotis://H_00.10_01.0 Transmission platform gotis://A_25/35/49_02.0 | |
26 | Unscrew bolts (2) of front-axle carrier (1) | These bolts (2) are self-tapping bolts. Bolts (2) must not be removed using an impact wrench. Otherwise the thread in the longitudinal member may be damaged. | |
| |||
| Notes on bolted connections with self tapping screws | ||
27 | Pull the left and right front axle halves outwards and lower the front axle carrier (1) uniformly | Make sure that the front axle carrier (1) does not tilt out of the guide (5) when lowering. | |
28 | Check front axle carrier (1) for signs of damage, and replace front axle carrier (1) if necessary | ||
29 | Detach rack-and-pinion steering (15) from front axle carrier (1) | When replacing front axle carrier (1). | |
30 | Install in the reverse order | ||
31 | Fill power steering pump and bleed | ||
32 | Check oil level in expansion reservoir of power steering and correct if necessary | ||
33 | Perform wheel alignment check | Model 171 | |
Model 172 |
Engine suspension, engine mounts, engine supports
Number | Designation | Engine | Engine | ||
BA22.10-P-1006-01O | Bolt, front engine mount to front axle carrier | Nm | 35 | 35 | |
Engine mount, engine support (engine side)
Number | Designation | Model | |||
BA22.10-P-1002-03E | Bolt, front engine mount to front axle carrier | Nm | 35 | ||
Engine suspension, engine mounts, engine supports
Number | Designation | Engine | ||
BA22.10-P-1001-01S | Bolt, front engine mount to front axle carrier | Nm | 35 | |
Front axle carrier
Number | Designation | Model | Model | |
BA33.10-P-1005-01A | Bolt, front axle carrier to longitudinal member | Nm | 80 | 120 |
Wheel control, hub
Number | Designation | Model 171 | |||
BA33.20-P-1006-01E | Self-locking nut for cross strut on front axle carrier | Stage 1 | Nm | 80 | |
Stage 2 | ° | 120 | |||
BA33.20-P-1007-01E | Self-locking nut, torque strut to front axle carrier | Stage 1 | Nm | 80 | |
Stage 2 | ° | 120 | |||
BA33.20-P-1014-01E | Self-locking nut (repair kit) cross strut to front axle carrier | M1411510.9 | Stage 1 | Nm | 80 |
Stage 2 | ° | 120 | |||
M1412011.9 | Stage 1 | Nm | 100 | ||
Stage 2 | ° | 180 | |||
BA33.20-P-1015-01E | Self-locking nut (repair kit) strut rod to front axle carrier | M1411510.9 | Stage 1 | Nm | 80 |
Stage 2 | ° | 120 | |||
M1412011.9 | Stage 1 | Nm | 100 | ||
Stage 2 | ° | 180 | |||
Wheel location, hub
Number | Designation | Model | |||
BA33.20-P-1002-01Q | Self-locking nut, torque strut to front axle carrier | Stage 1 | Nm | 120 | |
Stage 2 | ° | 180 | |||
BA33.20-P-1003-01Q | Self-locking nut (repair kit) strut rod to front axle carrier | Stage 1 | M1412011.9 | Nm | 100 |
Stage 2 | ° | 180 | |||
BA33.20-P-1005-01Q | Self-locking nut for cross strut on front axle carrier | Stage 1 | Nm | 120 | |
Stage 2 | ° | 180 | |||
BA33.20-P-1006-01Q | Self-locking nut (repair kit) cross strut to front axle carrier | Stage 1 | M1412011.9 | Nm | 100 |
Stage 2 | ° | 180 | |||
Steering gear
Number | Designation | Model | Model | ||
BA46.20-P-1001-01F | Bolt, oil line retaining plate to rack-and-pinion steering | Nm | 18 | 18 | |
Power steering pump
Number | Designation | Model | Model 171 | Model 171 | ||
BA46.30-P-1014-01D | Bolt, power steering oil line to front axle carrier | Nm | 9 | 9 | 9 | |
Power steering pump
Number | Designation | Model | Model | ||
BA46.30-P-1015-01R | Bolt, high-pressure hose to major assembly carrier | Nm | 10 | - | |
Tie rod
Number | Designation | Model 171 | Model | ||
BA46.40-P-1001-01E | Self-locking nut, tie rod to steering knuckle | Stage 1 | Nm | 50 | 50 |
Stage 2 | ° | 60 | 60 | ||
Frame floor assembly
Number | Designation | Model 171 | Model | |
BA61.10-P-1006-01A | Self-locking bolt, front diagonal strut to frame floor or front axle carrier | Nm | 60 | 60 |


129 589 00 91 00
Holding device
Set of stop plugs
Puller
Thrust piece
124 589 03 33 00
129 589 01 21 00
140 589 00 63 00


210 589 00 71 00
Box wrench bit
Hand pump
Thrust piece
Puller
171 589 00 34 00
211 589 00 03 00
221 589 00 33 00

Engine lifting fixture
240 589 00 61 00
Odkazované dokumenty
- ah0000n000101a Upozornění k samopojistným šroubům a maticím
- ah0000p000701sf Upozornění ke šroubovým spojům se samotvarovatelnými šrouby
- ap4010p4050v Demontáž, montáž hnaných kol, v případě nutnosti přesazení
- ap4600p4611v Kontrola, vyrovnání hladiny oleje servořízení
- ar0910p1150ac Demontáž, montáž pláště vzduchového filtru
- ar0910p1150mmi
- ar3310p010001v
- ar3310p010001va
- ar3310p010003v
- ar4020p0200ew Provedení měření podvozku
- ar4020p0200v
- ar4610p8000v
- ar4620p0600v
- ar4630p0010v
- ar4640p020001v
- ar4640p020002cw Vytlačení, montáž kloubu spojovací tyče u čepu nápravy
- ar5430p100002edv Provedení nastavení u ovládacího systému
- ar5430p100002w
- ar6120p1105v
- ar6120p1105w
- ar6130p1001v
- ar8840p1000v
- ar9430p5300w
- as0000z001301a Nebezpečí poranění kůže a očí hydraulickou kapalinou vystřikující vlivem vysokého tlaku. Nebezpečí otravy při požití hydraulické kapaliny