Charge air pipe/charge air cooling
Número | Denominação | Engine 457.90, 457.91, 457.93, 457.92; 460.984 | |||
BA09.41-B-1005-01B | Retaining rod support attachment to the engine | M10 | Nm | 50 | |
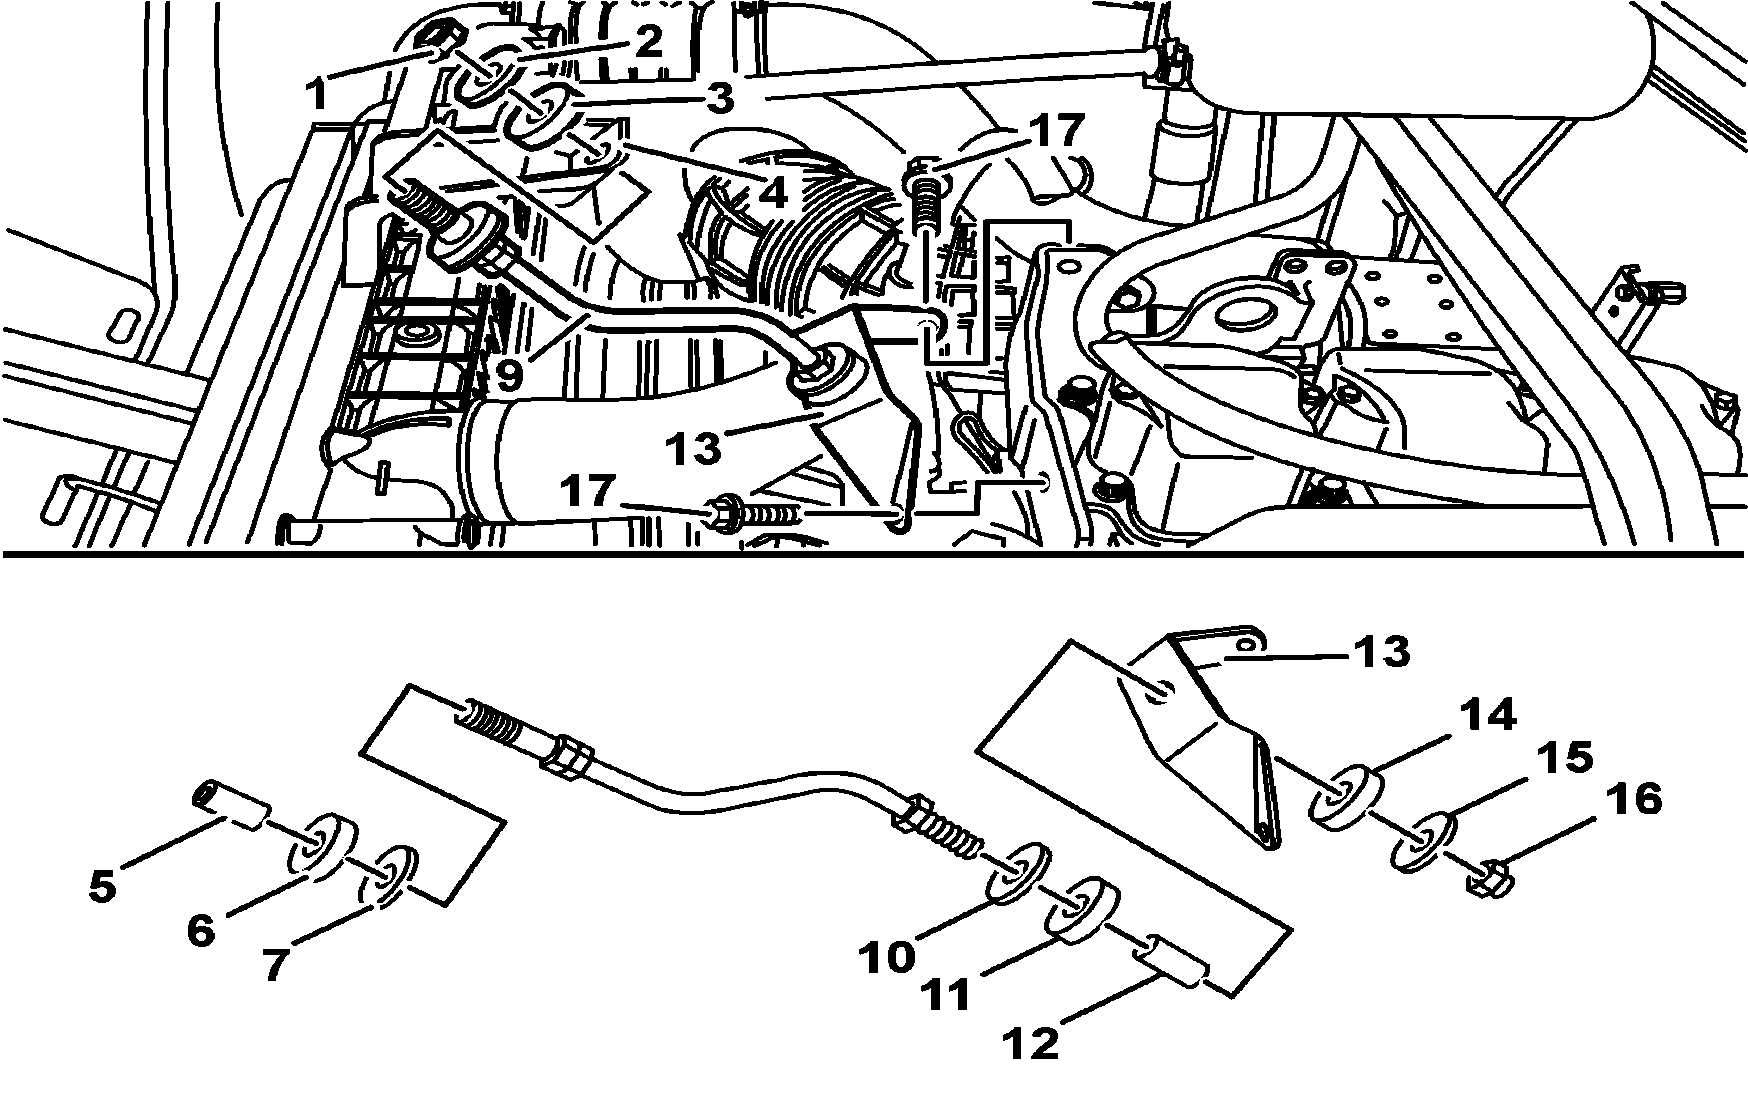
B09.41-0030-11
Removal
1 Remove nut (1), washer (2) and mounting (3).
2 Remove screws (17) and withdraw strut (9) with bracket (13).
3 Remove spacer tube (5), mounting (6), and washer (7).
4 Remove nut (16), washer (15), mounting (14), bracket (13), spacer tube (12), mounting (11), and washer (10).
Check condition of mounts, nuts, and the threads on both ends of the strut. Replace all damaged parts.
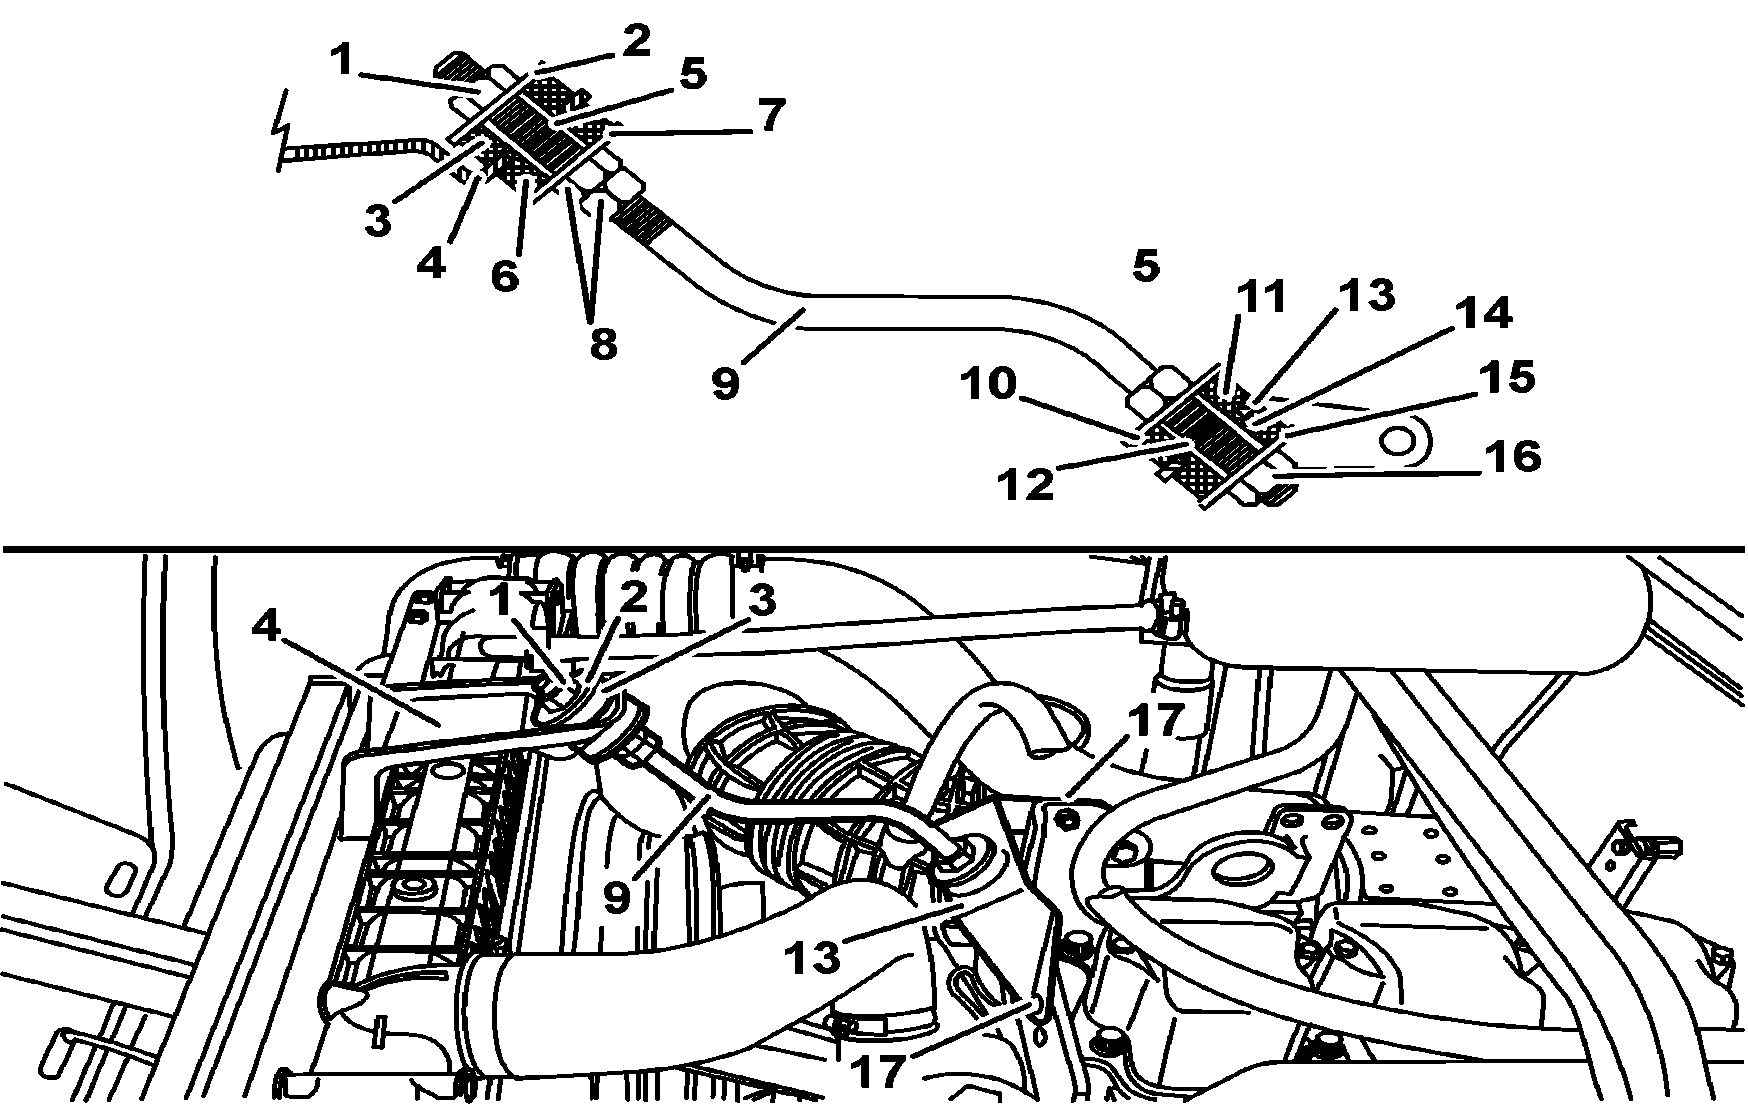
B09.41-0031-11
Installation
Observe mounting position of strut (9) on bracket (13) and installation position of both on the engine.
5 Install washer (10), mounting (11), spacer tube (12), bracket (13), mounting (14), washer (15), and nut (16) and tighten firmly on strut (9).
6 Install washer (7), mounting (6), and spacer tube (5) on strut (9).
7 Insert upper end of strut (9) into support (4), in a way to position bracket (13) correctly.
8 Install mounting (3), washer (2), and nut (1) and tighten firmly. Fasten bracket (13) with screws (17).
Air cooler and radiator must be firmly attached to their supports, brackets, and mountings before installing the strut. When installing the strut, take care not to move the radiator from its position. If needed, adjust with nuts (8).