
Shown on left rear door (2) |
1 | Adhesive foil |
1.1 | Adhesive bead |
2 | Rear door |
3 | Bolts |
4 | Bracket |
5 | Electrical connector |
6 | Electrical wiring harness |
7 | Electrical wiring harness |
8 | Cable |
S72.12-4516-06
Warning | Risk of injury caused by fingers being jammed or pinched when removing, installing or aligning hoods, doors, trunk lid/rear-end door or sliding roof. | No parts of the body or limbs should be within the operating area when the components are moving. | |
Topical note | Notes on carrying out repair work in the vehicle interior | ||
| Remove/install | ||
1 | Remove door trim from rear door (2) | ||
2 | Remove screws/bolts (3) and remove bracket (4) | ||
3 | Disconnect electrical connection (5) | ||
4 | Unclip electrical wiring harness (6) at retaining clip (arrow) from inner door panel | Clip remover | |
5 | Cut through adhesive bead (1.1) with sharp knife | | |
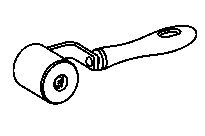
Installation: Press adhesive foil (1) down onto adhesive bead (1.1) with roller until there are no gaps around adhesive beads (1.1). | |||
Roller | |||
6 | Remove adhesive foil (1) from inner door panel; pass electrical wiring harnesses (6, 7) and control cable (8) through when removing adhesive foil (1) | | |
7 | Check adhesive foil (1) for damage | If damaged: | |
| |||
Install new adhesive foil (1). | |||
8 | Check adhesive bead (1.1) for damage | If damaged: | |
| |||
If adhesive bead (1.1) is damaged, replace only damaged section of adhesive bead (1.1). Clean adhesive surfaces and lay new adhesive bead (1.1) parallel to damaged adhesive bead (1.1). | |||
Cleaner | |||
Soft top frame sealing profile with metal core 35 m, SEALANT/butyl Bostik 1127 | |||
9 | Install in the reverse order | ||
| Check | ||
10 | Carry out function test on rear door speaker (2) |

168 589 05 63 00
Roller
452 589 01 63 00
Clip remover