

950 589 03 33 00
Pulling device
652 589 00 33 00
Pulling device
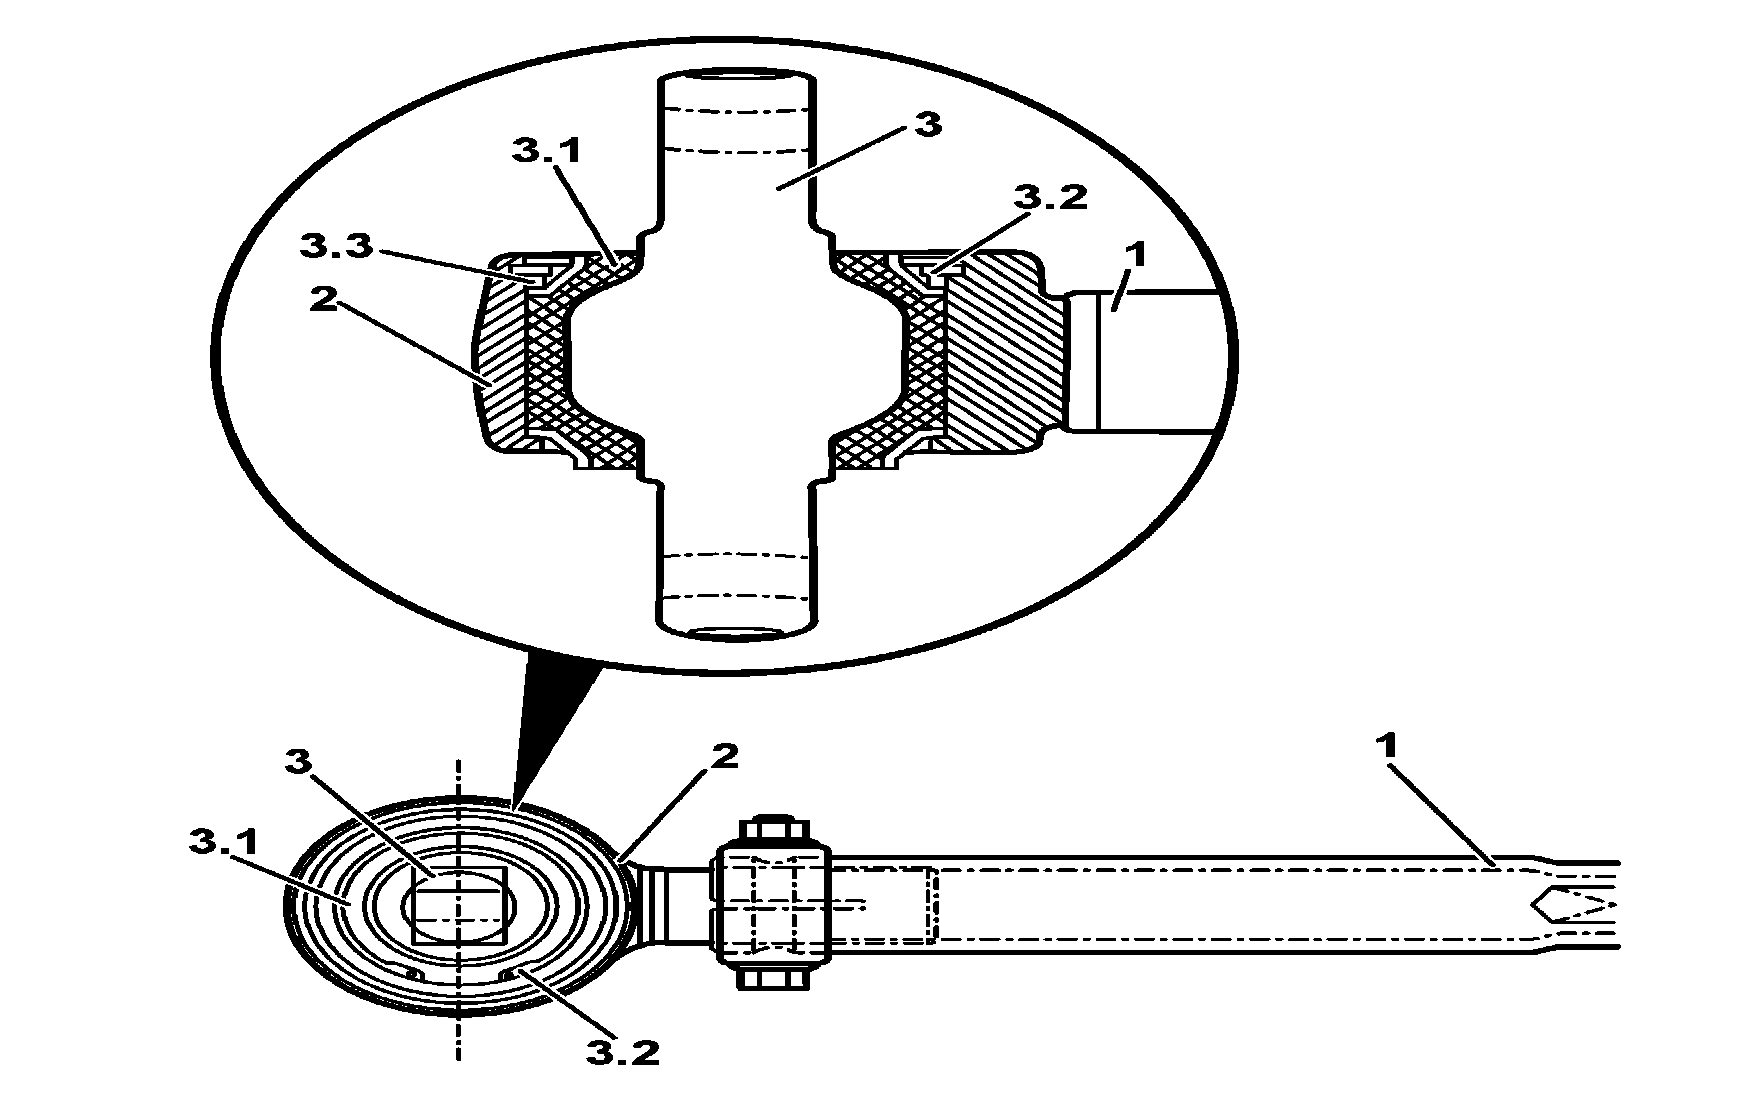
1 | Remove from adapter (eyelet) and tie bar (1) the external expander ring (elastic) (3.2) and internal expander ring (3.3). |
2 | Place the tie bar adapter on an appropriate base through the expander ring seat side. On the opposite side, using a press, remove elastic pad (3.1) along with linkage pin (3). |
3 | Clean thoroughly the seats of the rings and the mount. Apply a thin layer of Vaseline to the outer side of the new mount (3.1). |
4 | Place the adapter of tie bar (2) in a press and introduce the new pad (3.1) on the expander ring side. Make sure that the pad is installed in the correct position in relation to the position of the holes for the fixing screws located at the ends of the shaft (3). |
5 | Install the new lock rings, internal (3.3) and external (3.2). |
6 | Clean any remaining Vaseline so that the outside of the pad is clean and dry. |
Tie bar adapter linkage pad |
B33.20-0030-12
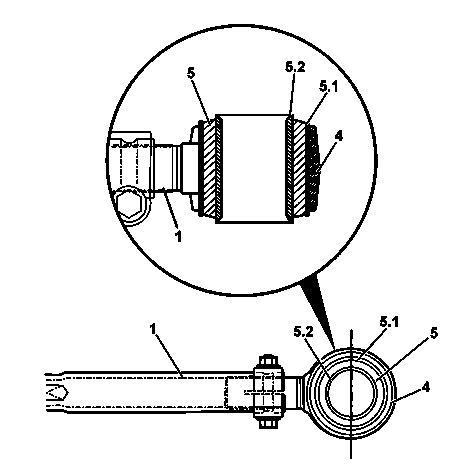
7 | Support the adapter (eye) (4) of the tie bar (1) on the device . Shim the tie bar so that it remains well leveled. |
8 | On the upper side, insert the removal device . Activate the press and remove the elastic bushing (5). |
9 | Clean the bushing well, remove any burrs. Apply a thin layer of Vaseline to the outer side of the housing. |
10 | With the tie bar well leveled, insert the new elastic bushing (5.1) using the press. Make sure that the bushing is installed centrally on the eye (4), that is, with the projections equalized on both sides. |
11 | Remove the device. Clean any remaining Vaseline so that the outside of the bushing is clean and dry. |
Tie bar adapter linkage pad elastic bushing |
B33.20-0031-12

12 | Remove adapter (eyelet) and tie bar (1) the external expander ring (elastic) (3.2) and internal expander ring (3.3). |
13 | Place the tie bar adapter on an appropriate base through the expander ring seat side. On the opposite side, using a press, carefully remove elastic pad (3.1) along with linkage pin (3). |
14 | Clean thoroughly the seats of the rings and the mount. Apply a thin layer of Vaseline to the outer side of the new pad (3.1). |
15 | Place the tie bar adapter (2) on a press and introduce the new pad (3.1) through the expander ring side. |
16 | Install the new lock rings, internal (3.3) and external (3.2). |
17 | Clean any remaining Vaseline so that the outer part of the pad, the conical part (3.B) and the thread for the castle nut (3.C) of the pivot shaft (3) are clean and dry. |
Pad with central articulation axis of the crossbar fixed to the front axle - vehicle 382.189 |
B33.20-0039-12