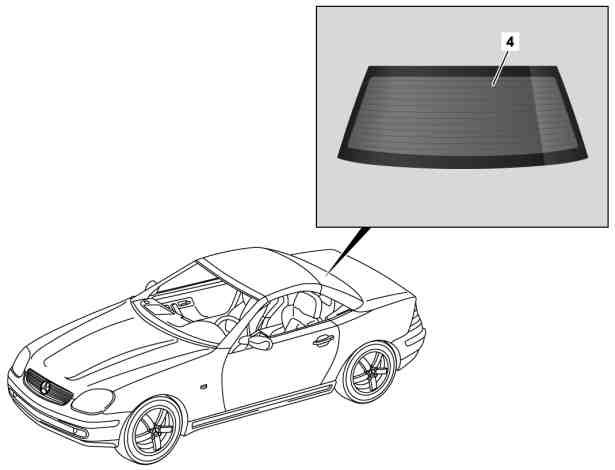
P67.20-0216-06
4 Rear window

P67.20-0221-06
1 Bolts
2 Holder
3 Frame seal
4 Rear window
5 Protective cover

P67.20-0226-06
3 Frame seal
4 Rear window
8 Nozzle
9 Adhesive bead
10 Rubber profile
11 Rubber blocks
Modification notes
| Removing | ||
Danger! | Risk of injury due to tear or warming up of cutting wire and through glass splinters when cutting out glued windows | Wear protective gloves and safety glasses. | |
| Notes on remove/install rear window | ||
1 | Prepare 1-component adhesive cartridge | ||
Intermediate piece | |||
Cartridge preheater, cartridge gun gotis://K_67.0_02.0 | |||
Repair kit | |||
2 | Remove C-pillar paneling on Vario roof | ||
3 | Remove paneling on rear of Vario roof | ||
4 | Disconnect electrical connections on rear window (4) | ||
5 | Remove sheet metal holders (2) on left and right on frame seal (3) | ||
6 | Remove frame seal (3) in area of rear window (4) | Always replace frame seal (3) | |
7 | Close Vario roof so that front arresting pins make contact and a sufficient gap is still present at the rear between the two roof halves | ||
8 | Generously line trunk area with protective cover (5) | Protective cover | |
9 | Cut out rear window (4) with Roll Out 2004 window removal tool | Roll out 2004 window removal tool gotis://K_67.0_01.0 | |
Suction lifting device gotis://K_67.0_03.0 | |||
10 | Remove rear window (4) from Vario roof with cup suction tools | Aid of helper required. | |
Suction lifting device gotis://K_67.0_03.0 | |||
| Install | ||
11 | Prepare Vario roof for installing rear window (4) | Allow primer to air-dry for a minimum of 10 minutes. | |
| General notes about painting the body flange in the glazing area | Pay attention to notes concerning the preparation of new parts such as the A-pillar, the roof or the side walls. | |
Cutting blade, straight, 35 mm blade length | |||
Window glazing device, FSC 1.6 gotis://K_67.0_01.0 | |||
Wet and dry vacuum cleaner gotis://P_00.12_06.0 | |||
Repair kit | |||
Repair kit | |||
Touch-up pencil | |||
Hepox 2-component EP primer filler 4017 (Spray Max) | |||
12 | Insert double-sided spacers | Use 7 mm spacers. | |
Do not remove protective foil on top side. | |||
13 | Prepare new rear window (4) for installation | ||
Repair kit | |||
Repair kit | |||
14 | Align rear window (4) on Vario roof | Aid of helper required. | |
Suction lifting device gotis://K_67.0_03.0 | |||
15 | Remove backing foil on spacers | ||
16 | Apply adhesive material to rear window (4) | Install rear window (4) within 10 minutes, otherwise adhesive force of adhesive material starts to decrease. | |
Height of glue bead approx. 13 mm. | |||
Intermediate piece | |||
Cartridge gun gotis://K_67.0_02.0 | |||
Repair kit | |||
Repair kit | |||
17 | Glue in rear window (4) | Open a side window in the vehicle to prevent the rear window (4) from being pressed outward by air pressure when the door is closed | |
Aid of helper required. The waiting time (drive-away time) is approx. 1 h calculated from the time the rear window (4) is installed. | |||
Suction lifting device gotis://K_67.0_03.0 | |||
18 | Fix in place rear window (4) on left and right rear Vario roof with two rubber blocks (11) to prevent slipping off. | Dimensions of rubber blocks (11) in mm: 201014, e.g. in repair kit | |
Repair kit | |||
Repair kit | |||
19 | Install frame seal (3) on Vario roof and fasten with blank holders (2) on left and right | ||
20 | Lift rubber lip (arrow) on rubber channel (10) over frame seal (3) with plastic wedge. | Long wedge | |
21 | Connect electrical connections on rear window (4) | ||
22 | Install paneling on rear of Vario roof | ||
23 | Install C-pillar paneling | ||
24 | Remove protective cover (5) from trunk | ||
25 | Remove rubber blocks (11) | ||
26 | Close Vario roof |


129 589 00 98 00
Intermediate piece
Protective cover
Long wedge
Cutting blade, straight, blade length 35 mm
115 589 03 59 00
000 589 86 63 00
202 589 17 63 00
Repair materials
Number | Designation | Order number |
BR00.45-Z-1015-02A | Repair kit, glazing, installing window, 2-component adhesive | A 220 670 00 93 |
BR00.45-Z-1089-02A | Repair kit, installing window, 1-component adhesive, replaced by: A 221 670 81 01 | A 221 670 21 01 |
BR00.45-Z-1012-07A | Primer stick | A 000 986 27 50 |
BR00.45-Z-1050-07A | Hepox 2-component EP primer filler 4017 (Spray Max) | Spies Hecker GmbH |
Powiązane dokumenty
- ah6720p200001t Wskazówki dotyczące wymontowania i zamontowania szyby tylnej
- ah9800p940806a Ogólne wskazówki dotyczące lakierowania kołnierza nadwozia w obszarze szyb
- ar6710p100003p Przygotowanie szyby do wstawienia
- ar6710p100008p Nanoszenie kleju
- ar6710p100011sx Wycinanie szyb za pomocą przyrządu Roll-Out
- ar6710p100012sx Przygotowanie naboju kleju jednoskładnikowego
- ar6720p300002g
- ar6720p300003g
- ar6720p300004g
- ar6720p514502g
- ar6830p4360g
- ar6830p4500g
- as6700z000401a Niebezpieczeństwo zranienia w wyniku pęknięcia lub rozgrzania się drutu tnącego oraz skaleczenia odłamkami szkła przy wycinaniu wklejanych szyb.