AR27.10-P-0500VA | Remove/install transmission with torque converter | 7.2.12 |
TRANSMISSION 722.6 in MODEL 171

P27.10-2141-08
1 Transmission
2 Screw
3 Rear engine crossmember
4 Screw
14 Retaining clamp
15 Shift rod
16 Range selector lever
20 Propeller shaft
20V Front flex disk
W49 Ground (transmission)

P27.10-2142-08
1 Transmission
6 Heat shield
7 Electrical connector
8 Screw
9 Torque converter
Modification notes
25.6.10 | Value modified: self-locking nut, flexible coupling to transmission and front propeller shaft, M10 | ||
Value modified: self-locking nut, flexible coupling to transmission and front propeller shaft, M12 |
| Remove/install | ||
| Notes on self-locking nuts and bolts | ||
| Before starting work the area around the oil cooler lines must be thoroughly cleaned in the area around the separation points on the transmission (1). Even the smallest dirt particles in the hydraulic components can lead to malfunctions and a total failure of the transmission (1) | ||
1 | Move selector lever into position "N" | ||
2 | Release parking brake | ||
3 | Open engine hood | ||
4 | Detach ground line from battery | ||
| Notes on battery | ||
5 | Remove oil filler pipe | ||
| |||
| |||
6 | Lift vehicle on vehicle lift. | ||
7 | Remove bottom engine compartment paneling | ||
8 | Remove heat shield (6) and disconnect electrical connector (7) on electric controller unit | ||
| |||
| |||
9 | Detach retaining clamp (14) of shift rod (15) | Installation: Install new retaining clamp (14). | |
10 | Detach shift rod (15) at range selector lever (16) of transmission (1) | ||
11 | Remove front flexible coupling (20V) | If the fitted sleeves are jammed: | |
Loosen fitted sleeves in front flexible coupling (20V). | |||
| Prepare drift for loosening fitted sleeves in flexible couplings. | ||
| |||
12 | Remove catalytic converter | ||
13 | Detach torque converter (9) from driven plate | Do not use an impact wrench or compressed-air tool, otherwise the threads in the torque converter (9) will be damaged. | |
Crank engine at crankshaft center bolt in direction of rotation of engine. | |||
| |||
| |||
14 | Press torque converter (9) evenly off driven plate using long wedge | Do not damage the torque converter (9) and driven plate. | |
| |||
15 | Support transmission (1) with transmission lifter and lash down securely | ||
16 | Remove bolts (2, 4) and remove rear engine crossmember (3) with rear engine mount. | Check rear engine mount for wear and damage, replace if necessary | |
Installation: Screw in bolts (2) of rear engine crossmember (3) by hand in order not to damage the tapped holes in the underbody. | |||
Installation: Fasten ground (transmission) (W49) to rear engine mount. | |||
| |||
| |||
If a new transmission (1) is to be used, the ground line on the transmission housing must be modified. | |||
| |||
17 | Detach right and left oil cooling line from transmission (1) and engine oil pan | Do not bend or kink oil cooling lines. | |
Seal connections with plugs. | |||
Installation: Replace O-rings. | |||
| |||
| |||
| |||
18 | Drain transmission oil | When replacing the transmission (1) and before repair work. | |
If transmission oil is burnt or interspersed with abrasive particles: | |||
Drain transmission oil from the transmission oil pan and flush oil cooler and oil cooling lines. | |||
Installation: Replace sealing ring of oil drain screw. | |||
| |||
19 | Remove bolts (8) | | |
20 | Detach transmission (1) and take out downwards | Secure torque converter (9) to prevent it from falling out. | |
Installation: Align the threaded holes of the torque converter (9) and holes of the driven plate with each other. | |||
21 | Remove torque converter (9) | If necessary | |
Installed height of torque converter | |||
Multipurpose paste | |||
| |||
| Checking | ||
22 | Check tapped holes in torque converter (9) | Check tapped holes for damage and replace torque converter (9) if necessary. | |
23 | Install in the reverse order | ||
24 | Fill transmission (1) with transmission oil | When replacing the transmission (1) or if transmission oil is drained off. | |
25 | Check oil level in automatic transmission (1); correct if necessary | ||
26 | Perform basic programming | ||
27 | Read out fault memory with STAR DIAGNOSIS and erase if necessary | ||
28 | Perform transmission adaptation | A transmission adaptation must be carried out after exchanging or repairing the transmission (1). | |
Danger! | Risk of accident caused by vehicle starting off by itself when engine is running. Risk of injury caused by contusions and burns during starting procedure or when working near the engine as it is running | Secure vehicle to prevent it from moving by itself. | |
29 | Perform engine test run and check transmission (1) for function and leaks |
Torque converter test values
Number | Designation | Transmission | ||
BE27.20-P-1001-01B | Installed height of torque converter | Distance from transmission housing | mm | 7 (-2) |
Oil pan, automatic transmission
Number | Designation | Trans-mission 722.6 except 722.628/ | |
BA27.10-P-1003-03A | Bolt, oil filler pipe to cylinder head | Nm | 8 |
BA27.10-P-1004-03A | Bolt, oil filler pipe to transmission housing | Nm | 8 |
Torque converter
Number | Designation | Trans-mission 722.6 | |||
BA27.20-P-1002-01C | Bolt, torque converter to drive plate | Straight threaded connection | M8 | Nm | 42 |
Angled threaded connection | Stage 1 | Nm | 4 | ||
Stage 2 | Nm | 30 | |||
Stage 3 | ° | 90 | |||
Engine suspension, engine mounts, engine supports
Number | Designation | Engine | ||
BA22.10-P-1003-01O | Bolt, rear engine crossmember to body | Nm | 50 | |
BA22.10-P-1008-01O | Bolt, rear engine mount to transmission | Nm | 50 | |
Housing
Number | Designation | Transmission | ||
BA27.40-P-1008-01A | Bolt, automatic transmission to engine | M1040 | Nm | 39 |
M1090 | Nm | 39 | ||
M12 | Nm | - | ||
BA27.40-P-1013-01A | Bolt, ground line to transmission housing | Nm | 20 | |
BA27.40-P-1014-01A | Bolt, heat shield to transmission housing | Nm | 11 | |
BA27.40-P-1019-01A | Bolt, leaf spring to transmission housing | Nm | 8 | |
Propeller shaft
Number | Designation | Model | ||
BA41.10-P-1001-01A | Self-locking nut, flexible coupling to transmission or front propeller shaft | M10 | Nm | - |
M12 | Nm | 68 | ||
Transmission oil cooling
Number | Designation | Trans-mission 722.6 in model 170, 171, 203, 209, 210, 215, 219, 220, 230, 240 | ||
BA27.55-P-1002-01B | Banjo bolt or union nut, oil cooler line to torque converter and transmission housing | Stage 1 | Nm | 5 |
Stage 2 | ° | 90 | ||
Hexalobular bolt | Nm | - | ||
BA27.55-P-1008-01B | Bolt, oil cooler line retaining clamp to oil pan | Nm | 8 | |
Oil pan, automatic transmission
Number | Designation | Trans-mission 722.6 except 722.628/ | |
BA27.10-P-1001-03A | Oil drain screw to oil pan | Nm | 20 |

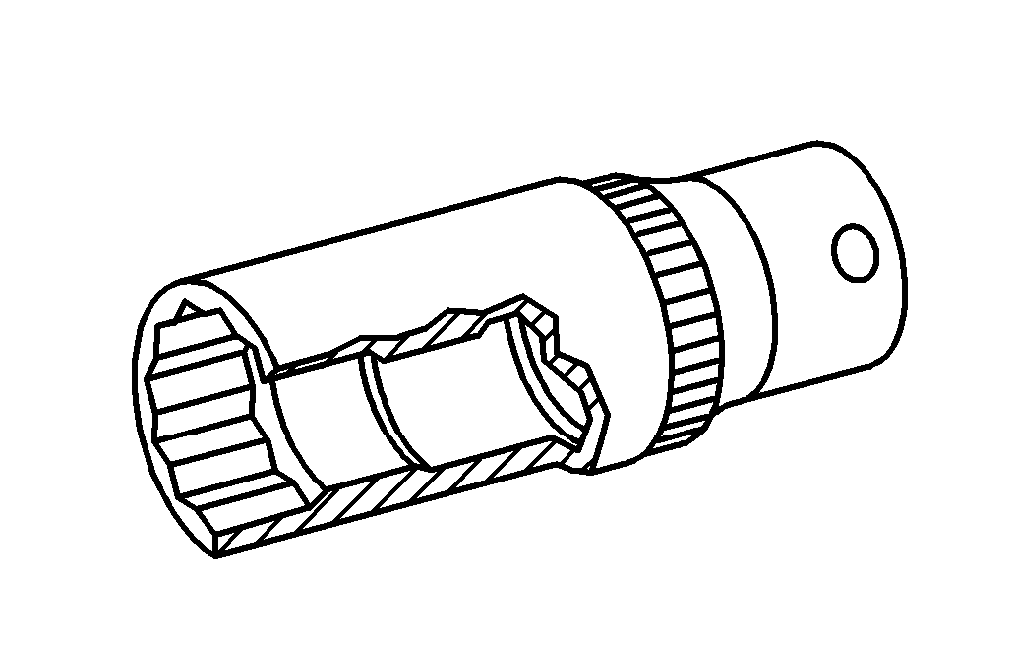


129 589 00 91 00
Long wedge
Set of stop plugs
Wrench socket
Grab handle
001 589 65 09 00
115 589 03 59 00
168 589 00 62 00
Repair materials
Number | Designation | Order number |
BR00.45-Z-1009-06A | Multipurpose paste | A 000 989 80 51 10 |
참조 문서
- ah0000n000101a 자가 잠금식 볼트와 너트 관련 지침
- ah5410p000101a 배터리 관련 지침
- ah5410p000101a
- ar0019p0200v
- ar0060p1000v 차량 들어 올리기, 정비대 위에 놓기
- ar2210p1160vk
- ar2700p0100ac 자동 변속기의 오일 레벨 점검, 필요한 경우 적절히 조절
- ar2710p050004v 오일 주입관 탈, 장착
- ar2720p010001va 토크 컨버터를 드라이브에서 탈, 장착
- ar2720p050001p 토크 컨버터 탈, 장착
- ar2740p070001v 변속기의 차폐판 탈, 장착
- ar2755p0001v
- ar2760p0990va 시프트 로드 탈, 장착 및 조정
- ar4110p005002v
- ar4110p005009v 가변 디스크의 가이드 슬리브 분리
- ar4910p5500vk
- ar5410p0003v
- ar6120p1105v
- ar8840p1000v 엔진 후드 열기, 수직으로 세우고, 닫기
- as0000z000501a 엔진이 작동 중인 상태에서 급발진에 의한 사고 위험 시동 또는 구동 중인 엔진 근처에서 작업할 때 차량에 부딪히거나 열에 의한 상해 위험
- wf5850p411001a
- wf5850p411001a