
P88.85-2105-07
1 Sealing profile
1.1 Shaped part
2 Triangular window
1.2 Sealing rail
1.3 Window guide rail

P88.85-2103-09
1 Sealing profile
1.1 Shaped part
1.2 Sealing rail
3 Retaining rail
4 Pushbuttons
5 Upper side paneling
12 Clamp
13 Clip
14 Window stay
15 Screw
6 Waistline trim strip
7 Adhesive tape
8 Bottom side paneling
9 Screw
10 Screw
11 Rear seat side bolster

P88.85-2104-09
1 Sealing profile
1.1 Shaped part
1.2 Sealing rail
14 Window stay
16 Screw
1.3 Window guide rail
2 Triangular window
3 Retaining rail
| Removing | ||
| The sealing profile (1) forms a unit with the shaped part (1.1), the sealing rail (1.2), the window guide rail (1.3) and the triangular window (2) and should be replaced as such. | ||
1 | Loosen left and right upper side paneling (5)and lay down to side with seatbelt installed | ||
2 | Release rear seat backrest and fold down | ||
3 | Unscrew bolt (9) from bottom side paneling (8) | ||
4 | Press rear seat side bolster (11) to side until bolt (10) can be removed | ||
5 | Unscrew bolt (10) from bottom side paneling (8) | ||
6 | Unclip bottom side paneling (8) from clips (12) and then clips (13) from side wall inner section | | |
7 | Pivot bottom side paneling (8) in upper area toward front until bolt (15) can be unscrewed from window divider (14) | ||
8 | Unscrew bolt (15) from window divider (14) | ||
9 | Remove trim strip beltline (6) from side wall paneling starting at front | | |
10 | Separate shaped part (1.1) attached to B-pillar with adhesive tape (7) | ||
11 | Pull in (arrow C) on shaped part (1.1) out of B-pillar | ||
12 | Remove retaining clips (arrow A) from side wall paneling | | |
13 | Simultaneously lift shaped part (1.1) with sealing rail (1.2) upward until it is just of the front of the triangular window (2) and pry out of side wall inner section | | |
14 | Carefully pull window guide rail (1.3) out of window divider (14) | ||
15 | Unscrew bolt (16) from window divider (14) | ||
16 | Carefully guide window divider (14) out of sealing profile (1) | Observe correct installation position. | |
17 | Carefully remove window divider (14) from window channel | Do not scratch window divider (14). | |
18 | Unclip push buttons (4) from A-pillar | | |
19 | Loosen sealing profile (1) up to triangular window (2) from retaining rail (3) | ||
20 | Pull sealing profile (1) with triangular window (2) toward front out of mounting rail (3) and side wall paneling and remove sealing profile (1) with triangular window (2). | ||
21.1 | Smooth sealant residues on B-pillar (area D) with assembly wedge | When reinstalling old sealing profile (1). | |
| |||
21.2 | Remove sealant residues from B-pillar (area D) | When replacing sealing profile (1). | |
Tar remover | |||
22.1 | Smooth sealant residues on body flange (area E) with assembly wedge | When reinstalling old sealing profile (1). | |
| |||
22.2 | Remove sealant residues on body flange (area E) | When replacing sealing profile (1). | |
Tar remover | |||
23 | Prepare sealing profile (1) for installation | When reinstalling old sealing profile (1). | |
Allow primer to flash off for at least 90 s, apply primer only once and do not touch with bare fingers, otherwise the adhesive force of the new adhesive strip (7) is not ensured. Attach new adhesive tape (7) within one hour to shaped part (1.1), otherwise the adhesive force of the new adhesive tape (7) on the shaped part (1.1) is not ensured. | |||
Adhesive tape | |||
Primer 4298 UV | |||
Cleaner | |||
Hot air blower | |||
24 | Prepare window divider (14) for installation | Observe position of stop ring in relation to retaining ring, otherwise the function of the tolerance compensation element is not ensured. | |
| Install | ||
25 | Insert sealing profile (1) with triangular window (2) into retaining rail (3) and side wall paneling and slide toward rear | Ensure that sealing profile (1) and triangular window (2) are seated correctly in side wall paneling to prevent leakage | |
26 | Moisten window divider (14) at top and side pointing toward triangular window (2). | Antifriction agent | |
27 | Install window separator bar (14) | Do not scratch window divider (14). | |
When installing window divider (14) ensure that the stop ring does not twist. Ensure that window divider (14) is seated correctly in sealing profile (1). | |||
28 | Screw bolt (16) into window divider (14) and tighten | ||
29 | Adjust window divider (14) | ||
| |||
30 | Moisten window guide rail (1.3) with lubricant and install in window divider (14) | Antifriction agent | |
31 | Clean bonding area of adhesive tape (7) on | Allow cleaner to flash off for at least 60 s. | |
Cleaner | |||
32 | Install sealing rail (1.2) on side wall inner section | ||
33 | Install shaped part (1.1) on B-pillar | Ensure that shaped part (1.1) is seated correctly on B-pillar | |
34 | Moisten pin (arrow C) on shaped part (1.1) with lubricant and press into B-pillar | Antifriction agent | |
35 | Hook retaining clip (arrow A) into side wall paneling | ||
36 | Lift shaped part (1.1) in area of adhesive tape (7) until protective foil can be removed from adhesive tape (7) | ||
37 | Remove protective foil from adhesive tape (7) and press adhesive tape (7) with shaped part (1.1) to body | Ensure that shaped part (1.1) is seated correctly on B-pillar | |
38 | Roll shaped part (1.1) onto B-pillar with roller in area of adhesive tape (7) | | |
39 | Position sealing profile (1) on A-pillar and fasten to A-pillar with push buttons (4) | ||
40 | Insert sealing profile (1) with inner side into retaining rail (3) | ||
41 | Moisten outer side of sealing profile (1) with lubricant | Antifriction agent | |
42 | Roll sealing profile (1) into retaining rail (3) with roller | | |
43 | Install trim strip beltline (6) on side wall paneling starting at rear | Ensure that trim strip beltline (6) is seated correctly. | |
44 | Clip bottom side paneling (8) into side wall inner section and clips (12) with clips (13) | Ensure that lower side paneling (8) is seated correctly. | |
45 | Press rear seat side bolster (11) to side until bolt (10) can be screwed in | ||
46 | Screw in bolt (10) | ||
47 | Screw in bolt (9) | ||
48 | Fold back rear seat backrest | Ensure that rear seat side bolster (11) is seated correctly. | |
49 | Install upper side paneling (5) |


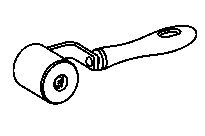

129 589 03 21 00
Roller
Feeler gauge
Mounting wedge
Roller
110 589 03 59 00
168 589 05 63 00
171 589 06 63 00
Repair materials
Number | Designation | Order number |
BR00.45-Z-1099-02A | Adhesive tape/Acrylic Plus PT 1100 | A 008 989 20 85 |
BR00.45-Z-1125-02A | Primer 4298 UV | A 007 989 96 71 10 |
BR00.45-Z-1025-04A | Cleaner | A 005 989 19 71 |
BR00.45-Z-1010-06A | Lubricant, rubber assembly 1 l | A 000 989 03 67 |
Referenced documents
- ar6730p400012ec Prepare rear side window divider for installation
- ar6730p400013ec Adjust rear side window divider
- ar6830p4780ec Remove/install side paneling in rear
- ar8885p200001ec Prepare sealing profile on roof frame for installation