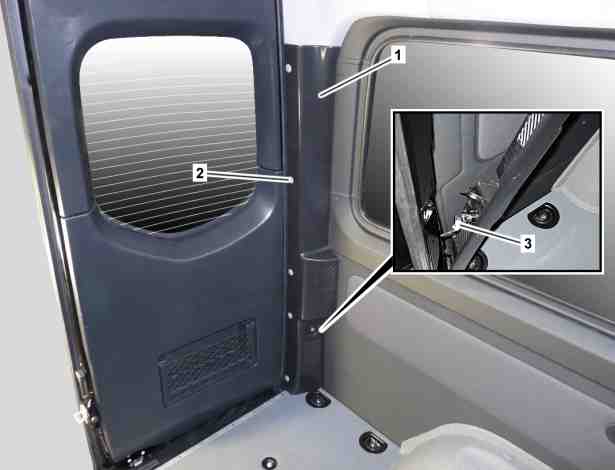
Shown on model 907.7 |
1 | D-pillar paneling |
2 | Expansion rivets (5 pcs.) |
3 | Electrical connector |
D68.30-2513-76
D68.30-2514-79
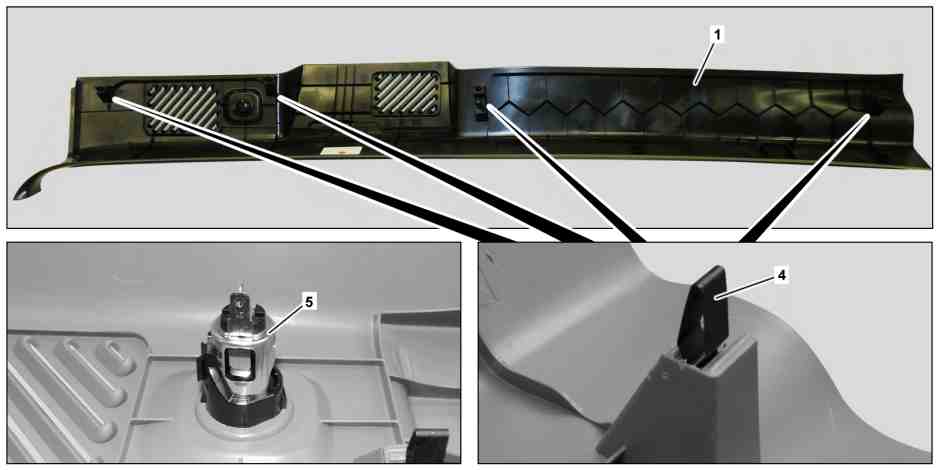
Shown on model 907.7 |
1 | D-pillar paneling | 4 | Mounting clip | 5 | 12V socket |
Topical note | Notes on carrying out repair work in the vehicle interior | ||
Topical note | Information on preventing damage to electronic components due to electrostatic discharge | ||
| Remove/install | ||
1 | Remove left or right grab handle from D-pillar. | Model 907.6/7 | |
2 | Remove expansion rivets (2). | ||
3 | Unclip D-pillar trim (1) from top to bottom until electrical connector (3) is accessible. | If installed. | |
Long wedge | |||
4 | Disconnect electrical connector (3) from 12 V socket (5) and remove D-pillar trim (1) to the rear. | If installed. | |
5 | Remove 12 V socket (5) from D-pillar trim (1). | If installed when installing new D-pillar trim (1). | |
| Check | ||
6 | Check retaining clips (4) for damage and correct seating. | If a retaining clip (4) is not correctly positioned in mount on D-pillar trim (1), | |
| |||
Correctly position retaining clip (4). | |||
If a retaining clip (4) is damaged, | |||
| |||
Replace retaining clip (4). | |||
7 | Install in the reverse order | ||
| Check | ||
8 | Perform function test of the 12 V socket (5). | If installed. |

115 589 03 59 00
Long wedge
Referenced documents
- ah5400p000101a Information on preventing damage to electronic components due to electrostatic discharge
- ah6800n000101s Notes on carrying out repair work in the vehicle interior
- ar5410d1009ts Remove/install 12 V socket