
P68.30-3765-08
1 | Refrigeration compartment | 4 | Trunk floor | |
2 | Bolts | 8 | Rear trunk paneling | |
3 | Bracket | 9 | Retaining clips |
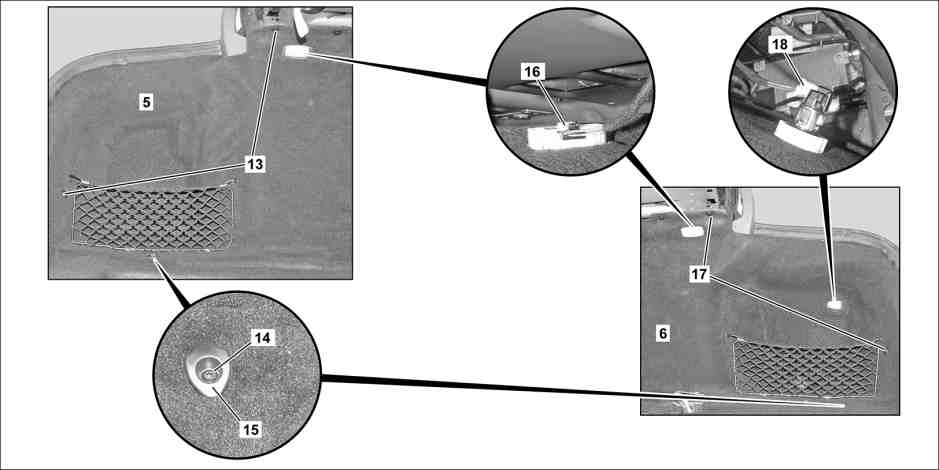
P68.30-3766-09
5 | Left luggage compartment paneling | 15 | Bracket | |
6 | Right luggage compartment paneling | 16 | Electrical connector | |
13 | Retaining clips | 17 | Retaining clips | |
14 | Screw | 18 | Electrical connector |
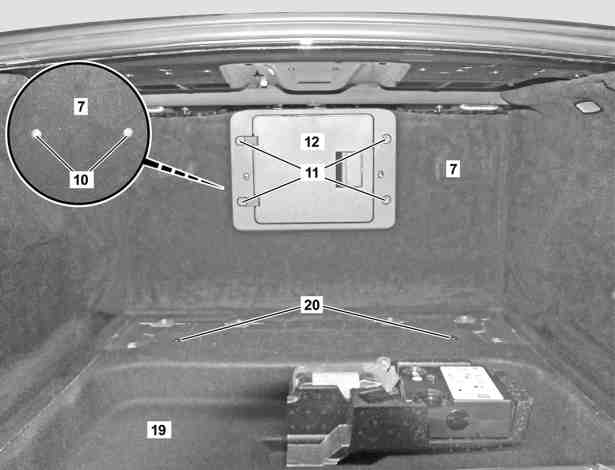
7 | Front trunk paneling |
10 | Retaining clips |
11 | Bolts |
12 | Cover |
19 | Lower trunk paneling |
20 | Retaining clips |
P68.30-3767-06
Danger ! | Risk of injury. Moving parts can pinch, crush or, in extreme cases even sever extremities. | No parts of the body or limbs should be within the operating area of mechanical components when moving components.Model 217.3 | |
| Notes on sensor system for trunk lid opening/closing | Model 217.3 | |
| Remove/install | ||
1 | Remove refrigeration compartment (1) |
| |
2 | Unscrew bolts (2) from brackets (3) | ||
3 | Remove trunk floor (4) | ||
4 | Remove subwoofer |
| |
5 | Remove retaining clips (9) and unclip rear trunk paneling (8) upward | ||
6.1 | Remove retaining clips (10) | Model 217.3 | |
6.2 | Unscrew bolts (11) and remove cover (12) | Model 217.3 | |
7 | Remove front trunk paneling (7) | ||
8 | Remove retaining clips (13) | ||
9 | Unscrew bolt (14) from bracket (15) on left trunk paneling (5) | ||
10 | Detach left trunk paneling (5) and disconnect electrical connector (16) | ||
11 | Remove left trunk paneling (5) | ||
12 | Remove retaining clips (17) | ||
13 | Unscrew bolt (14) from bracket (15) on right trunk paneling (6) | ||
14 | Detach right trunk paneling (6) and disconnect electrical connectors (16, 18) | ||
15 | Remove right trunk trim (6) | ||
16 | Remove vehicle tool insert | ||
17 | Remove retaining clips (20) | ||
18 | Remove lower trunk paneling (19) | ||
19 | Install in the reverse order |
Henviste dokumenter
- ah8061p000101a Oplysninger om HANDS-FREE ACCESS
- ar8262p7841lc
- ar8661p1010lc
- as0000z000901a Fare for personskade som følge af klemning af legemsdele, i værste fald fare forafskæring af legemsdele ved indgreb i mekanikken