
P27.10-2187-09
1 | Oil cooling line | 4 | Heat shield | 7 | Bolts | ||
2 | Oil cooling line | 5 | Electrical connector | 9 | Bolts | ||
3 | Screw | 6 | Bolts | 10 | Bolts |
Topical note | Notes on self-locking nuts and bolts | ||
| Remove/install | ||
1 | Remove engine cover | ||
2 | Detach ground line from battery |
| |
Topical note | Notes on battery | ||
MODEL 209 | |||
3 | Remove right air filter housing | ||
4 | Remove bottom sections of soundproofing | ||
5 | Remove catalytic converter | ||
6.1 | Remove diesel particulate filter | Model 203, 209 with engine 642 with transmission 722.9 | |
6.2 | Remove center exhaust pipe | Model 203, 209 with engine 642 with transmission 722.9 | |
7 | Drain transmission oil at oil pan | Installation: Replace seal. | |
Drain screw to oil pan | |||
If the transmission oil is burnt or contains wear particles, the oil cooling lines (1, 2) and the oil cooler must be flushed out: | |||
| |||
Flush oil line and oil cooler | |||
8 | Unscrew bracket for oil cooling lines (1, 2) at right and left from oil pan | Bracket to oil pan top section | |
9 | Disconnect oil cooling lines (1, 2) from transmission | | |
Record plug | |||
10 | Remove bolt (3) | ||
11 | Pull heat shield (4) out of guide and remove | ||
12 | Disconnect electric plug connection (5) from transmission | ||
13 | Support transmission using transmission plate and telescopic lifter | ||
| 000 588 10 62 00 Support plate | ||
| 000 588 11 62 00 Major assembly mount | ||
14 | Remove rear engine cross member with engine mount | To do so, remove screws/bolts (6, 7). | |
Do not detach engine mount from rear engine cross member. | |||
MODEL 203Bolt/nut, rear engine crossmember to body | |||
MODEL 203Bolt or nut, rear engine mount to transmission | |||
MODEL 209Bolt, rear engine support to frame floor assembly | |||
MODEL 209Bolt/nut, rear engine mount to bracket or transmission | |||
15 | Detach front propeller shaft from transmission | ||
When mounting: | |||
| |||
Mount front propeller shaft to transmission | |||
Grease quantity | |||
Self-locking nut, flexible coupling to transmission or front propeller shaft | |||
16 | Detach flexible coupling to front propeller shaft | To be able to remove the flexible coupling to the front propeller shaft, the transmission must be lowered far enough that the flexible coupling is accessible. | |
17 | Unclip shift rod from transmission | | |
18 | Remove screw/bolts (10) | ||
To do this remove the cover on the transmission bell. | |||
Bolt, torque converter to driver spider | |||
Long wedge | |||
Socket wrench bit | |||
19 | Remove bolts for transmission to oil pan and crankcase | Bolt, automatic transmission to engine | |
20 | Remove transmission downwards at an angle using telescopic lifter and transmission plate | Secure torque converter to prevent it from falling out. | |
21 | Remove torque converter | If necessary | |
Installed height of torque converter | |||
Multi-purpose paste | |||
Handles | |||
Parallel rest | |||
22 | Remove corrosion from crankshaft | ||
Assembly cleaner | |||
Multi-purpose paste | |||
| Check | ||
23 | Check threaded unions in driver spider | If the threaded unions are damaged and loose, the driven plate spider must be replaced. | |
24 | Install in the reverse order | ||
25 | Fill transmission, check transmission oil level and correct if necessary | ||
26 | Perform basic programming |
| |
MODEL 209 | |||
27 | Read out fault memory using the diagnostic system and clear if necessary | ||
| |||
28 | Perform transmission adaptation using diagnostic system | After replacement or repair of transmission | |
29 | Reset data on service life of torque converter lockup clutch using diagnostic system | After replacing torque converter | |
Warning | Risk of accident from vehicle starting off by itself when engine running. Risk of injury (bruises and burns) resulting from working on the engine while it is being started or when it is running. | Secure vehicle to prevent it from starting off by itself. Wear closed and snug-fitting work clothes. Do not touch hot or rotating parts. | |
30 | Perform engine test run and check transmission for proper function and leak tightness |


126 589 04 31 00
Parallel rest
115 589 03 59 00
Long wedge
168 589 00 62 00
Handles
129 589 00 91 00
Record plug
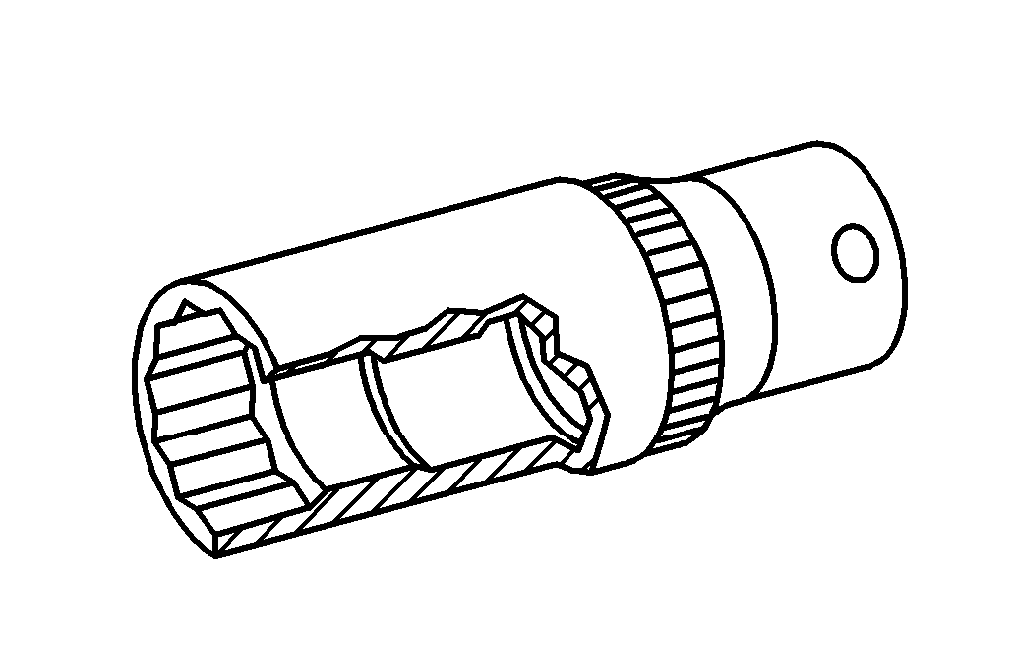
001 589 65 09 00
Socket wrench bit
Odkazované dokumenty
- ad0000p200004a Připojení STAR DIAGNOSIS, načtení chybové paměti
- ad0000p200004a
- ah0000n000101a Upozornění k samopojistným šroubům a maticím
- ah5410p000101a
- ah5410p000101a Upozornění k akumulátoru
- ar0019p0200p
- ar0019p0200q
- ar0110p2405pi Demontáž, montáž krytu motoru
- ar0320p100001a Odstranění koroze z klikového hřídele
- ar0910p1150pi Demontáž, montáž pláště vzduchového filtru
- ar1440p1000pi Demontovat, namontovat filtr sazí vznětového motoru
- ar2700p0270w Naplnit automatickou převodovku olejem
- ar2720p010001a Odšroubování, přišroubování měniče momentu u unašeče
- ar2720p050001w Vyjmutí, nasazení měniče momentu
- ar2755p0001pi
- ar4110p005002pi
- ar4110p005007pi
- ar4910p5500pi
- ar4910p7000pi
- ar5410p0003p
- ar5410p0003q Odpojení, připojení ukostřovacího kabelu akumulátoru
- ar9430p5300p
- as0000z000501a Nebezpečí úrazu při samovolném rozjetí vozidla při běžícím motoru. Nebezpečí poranění pohmožděním a popálením při výkonech prováděných během startování nebo při běžícím motoru
- ws0100p0092b
- ws2600p3309b