Charge air pipe/charge air cooling
Number | Designation | Engine | ||
BA09.41-N-1001-01H | Clamp of charge air hose to charge air pipe | M5 | NM | 8 |
M6 | NM | 10 | ||
T09.41-0029-01
Remove, Install
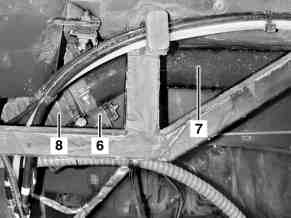
1 Detach charge air hose (8) from charg air pipe (7) and from charge air pipe of charge air manifold and take off charge air hose (8).
Installation: Inspect tight fit of hose clamp.
2 Slacken bracket (6) at charge air pipe (7).
Removal: Slacken pipe bracket sufficiently to enable the charge air pipe to be pulled out of the bracket in step 5.
T09.41-0028-01
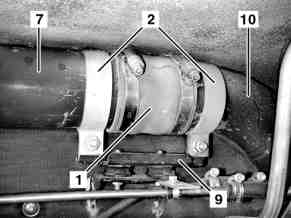
3 Slacken hose clamp of charge air hose (1) at charge air pipes (7, 10).
Installation: Inspect tight fit of hose clamp.
4 Remove clamps (2) from bracket (9).
5 Slip charge air hose (1) and securing clamps (2) off charge air pipes (7, 10) and remove charge air pipe (7).
Installation: Inspect tight fit of hose clamp.

T09.41-0031-01
6 Detach charge air hose (1) from charge air pipe (10) and bottom charge air pipe of charge air cooler and slip off at both charge air pipes.
Installation: Inspect tight fit of hose clamp.
7 Detach pipe bracket (6) from bracket (11) and from charge air pipe (10) and slip it off charge air pipe (10). Run charge air pipe (10) out to the rear.
8 Install in reverse sequence.