Repair materials
Number | Designation | Order number |
BR00.45-Z-1071-02A | Adhesive tape roll, gray Tesa tape, 50 meters 0.3X50, 236 mm | A 001 989 17 85 |
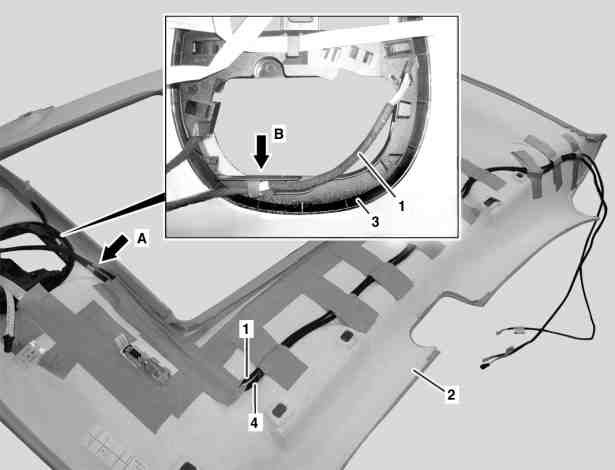
P68.30-3072-06
Shown with code (414) Electric glass tilting/sliding roof
1 Route microphone array wiring harness (1) starting at overhead control panel retaining frame (3) as illustrated.
The microphone array wiring harness (1) thereby makes direct contact to the overhead control panel wiring harness (4) over the entire length.
The microphone array wiring harness (1) has a green marking
(arrow A) for the excess length on the overhead control panel retaining frame (3). The marking (arrow A) should be located at the edge of the overhead control panel retaining frame (3) as illustrated. The yellow marking is located on the retainer tab (arrow B) as illustrated
2 Fasten microphone array wiring harness (1) to headliner (2) with strips of adhesive tape, approx. 10 cm long.
The strips of adhesive tape should have a distance of at least approx. 12 cm to the left exterior contour of the headliner (2). Otherwise the left windowbag may be restricted.
Press on strips of adhesive strips firmly, otherwise the microphone array wiring harness (1) can detach itself from the headliner (2).
Glue strips of adhesive tape to present strips of adhesive tape on the mount for the overhead control panel wiring harness (4).