
D72.10-A002-79
Shown on right front door (2) except code XM4 (acoustic package) |
1 | Frame seal | 2 | Front door | 3 | Retaining clips (x 16 ) |

Shown on model 907 as from April 1, 2020 with code XM4 (acoustic package) on right front door (2) |
1 | Frame seal |
2 | Front door |
4 | Mounting clip |
D72.10-A003-76
Warning | Risk of injury caused by fingers being jammed or pinched when removing, installing or aligning hoods, doors, trunk lid/rear-end door or sliding roof. | No parts of the body or limbs should be within the operating area when the components are moving. | |
| Remove/install | ||
1 | Release sealing frame (1) from the front door (2) (arrows A, arrow B). | Installation: Detach carrier foil and press sealing frame (1) onto the bonding surface (arrow B). | |
2 | Release sealing frame (1) from the front door (2) (area C). | Model 907, 910 | |
Installation: Detach carrier foil and press sealing frame (1) onto the bonding surface (area C) with roller. | |||
Roller | |||
3 | Unclip retaining clip (4). | Model 907 as of 4/1/20, 910 as of 4/1/20 | |
Clip remover | |||
4 | Unclip sealing frame (1) from the retaining clips (3) and remove from the front door (2). | | |
Model 907, 910 | |||
Clip remover | |||
5 | Check retaining clips (3) for damage. | If damage is present, | |
| |||
Replace damaged retaining clips (3). | |||
6 | Check retaining clip (4) for damage. | Model 907 as of 4/1/20, 910 as of 4/1/20 | |
If damage is present, | |||
| |||
Replace the retaining clip (4). | |||
7 | Clean contact surfaces of the sealing frame (1) on the front door (2). | Cleaner | |
8 | Install new tape on the bonding surface (arrow B). | Adhesive tape/Acrylic Plus PT 1100 | |
9 | Install in the reverse order. |
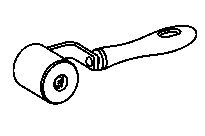

168 589 05 63 00
Roller
452 589 01 63 00
Clip remover
Powiązane dokumenty
- as0000z001101a Niebezpieczeństwo zranienia przez zakleszczenie lub zmiażdżenie palców podczas demontażu, montażu i prac regulacyjnych przy pokrywach, drzwiach i oknie dachowym.