AR72.20-P-3650PC | Remove/install liftgate handle molding | 15.11.11 |
MODEL 203.7## #E with CODE (809) Model year 2009

P72.20-2772-07
1 Handle strip
2 Rear-end door
5 Surface conditioning disk
3 Protective covering
4 Roller
| Removing | ||
1 | Heat handle strip (1) with heat gun and press off of rear-end door (2) with assembly wedge and remove. | Carefully press off and remove handle strip (1) from rear-end door (2), otherwise the paint on the rear-end door (2) can be damaged. | |
The handle strip (1) is damaged during removal and must be replaced. | |||
| |||
Electric plastic hot air blower | |||
2 | Remove glue residues from rear-end door (2) with surface conditioning disk (5). | Drill | |
| Notes on removing adhesive residues and foils on paint and metal surfaces with surface conditioning disks | ||
3 | Clean bonding surface on rear-end door (2). | Bonding surface should be free of grease and dust, otherwise adherence of the handle strip (1) is not ensured. | |
Observe drying time for cleaning agent | |||
Cleaner | |||
| Install | ||
4 | Remove protection foils at rear of handle strip (1). | ||
5 | Position handle strip (1) at rear-end door (2) and glue on. | ||
6 | Pull wide protective covering (3) over roller (4) | If the roller (4) is used without protective covering (3) when accomplishing the following step, the handle strip (1) can be damaged. | |
| |||
| |||
7 | Roll on handle strip (1) a number of times with roller (4) from center to left and right. | Tightly roll on handle strip (1) (minimum roll-on force 75 N), otherwise the adhesive force of the handle strip (1) starts to decrease. The protective covering (3) on the roller (4) must be absolutely clean, otherwise the handle strip (1) can be damaged when rolling on. | |
| |||
|
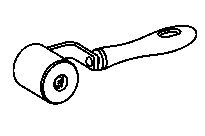


168 589 05 63 00
Protective covering
Roller
Mounting wedge
110 589 03 59 00
221 589 00 98 00
Repair materials
Number | Designation | Order number |
BR00.45-Z-1025-04A | Cleaner | A 005 989 19 71 |
Referenced documents
- ah0000p001301ak Notes on removing adhesive residues and foils on paint and metal surfaces with surface conditioning disks