P68.30-3889-09
Remove tension cable
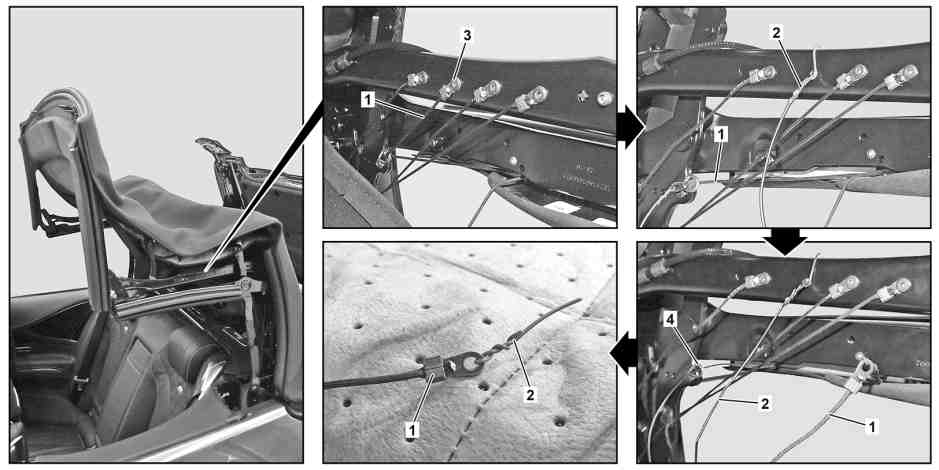
1 | Provide 7 thin electrical lines (2) for right soft top side in various colors. |
2 | Carefully knock rivet (3) off of tension cable (1) on soft top mechanism. |
3 | Fasten electrical line (2) on hole for rivet (3) in soft top mechanism. |
4 | Fasten electrical line (2) to tension cable (1). |
5 | Pull tension cable (1) out guide eyes (4) and simultaneously pull in electrical line (2). |
6 | Cut electrical line (2) from tension cable (1) so that a piece remains on the tension cable (1). |
7 | Fasten electrical line (2) drawn-in so that it cannot slip out of the guide eyes (4). |
Do not actuate soft top mechanism. |
8 | Repeat procedure for all tension cables. |

Install tension cables
9 | Fasten tension cable (1) on electrical line (2) assigned according to color. |
10 | Pull electrical line (2) out of guide eyes (4) and simultaneously pull in tension cable (1). |
11 | Remove electric line (2) from soft top mechanical components and tensioning cable (1). |
12 | Rivet tension cable (1) to soft top mechanism. |
13 | Repeat procedure with all tension cables (1). |
P68.30-3890-06
P68.30-4020-09
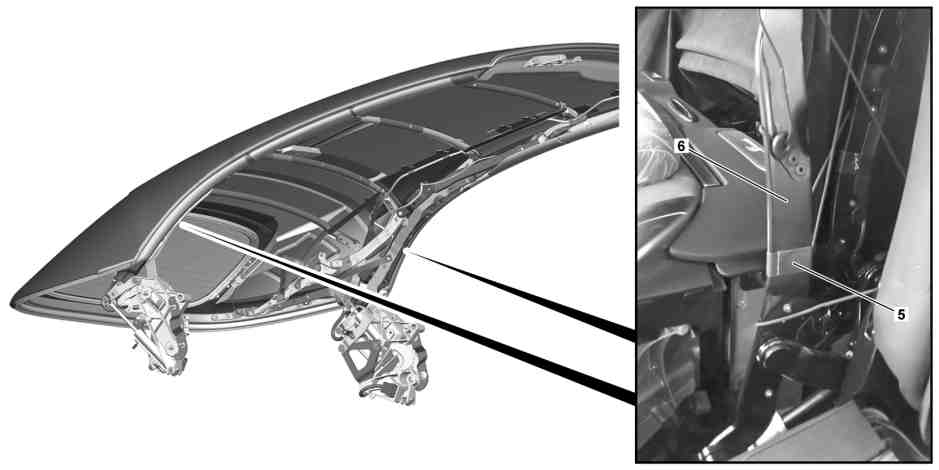
14 | Fix tensioning cable in place with fabric tape (5) on control arm (6). |
Always secure, even if this was previously not realized. |
The tensioning cable length that can move freely and thus the loop formation are thereby reduced. |