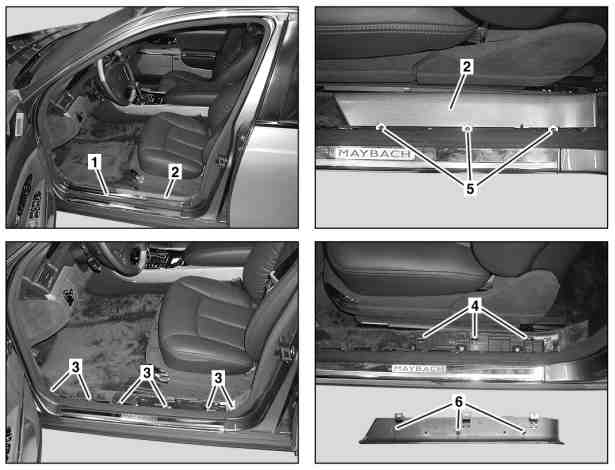
1 | Door sill |
2 | Trim strip |
3 | Retaining clips |
4 | Retaining clips |
5 | Bolts |
6 | Fastening pins |
P68.30-2603-06
| Remove/install | ||
Topical note | Notes on carrying out repair work in the vehicle interior | ||
Notes on replacing trim strips in vehicle interior | |||
1 | Remove the door sill (1) with the assembly wedge | Place the assembly wedge directly on the retaining clips (3). | |
Installation: Insert the door sill (1) into the retaining clips (3) first of all, then press it down evenly. | |||
Mounting wedge | |||
2 | Unscrew the screws (5) and push the trim strip (2) down carefully with the assembly wedge | Place the assembly wedge directly on the fastening pins (6). | |
Installation: Insert the trim strip (2) with fastening pins (6) into the retaining clips (4) first of all, then press it down evenly. | |||
Mounting wedge | |||
3 | Install in the reverse order |

110 589 03 59 00
Mounting wedge
Referenced documents
- ah6800n000101s Notes on carrying out repair work in the vehicle interior
- ah6800p000201h Notes on replacing trim strips in vehicle interior