Torque converter
Number | Designation | Trans-mission 722.9 | |||
BA27.20-N-1002-01F | Bolt, torque converter to drive plate | Straight threaded connection | M8 | Nm | 42 |
Angled threaded connection | Stage 1 | Nm | 4 | ||
Stage 2 | Nm | 30 | |||
Stage 3 | ° | 90 | |||

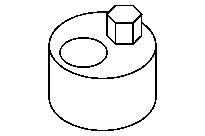
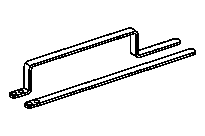
651 589 02 40 00
Counterholder
Retaining lock
Counterholder
651 589 00 40 00
651 589 08 40 00
Do not use an impact wrench or air-powered tool for removing or tightening the bolts. The threaded inserts of the drive plate may otherwise be damaged.
Without code (H08) High-performance air conditioning:
To crank the engine and to release or tighten the bolts on the torque converter use the counterholder 651 589 08 40 00.
With code (H08) High-performance air conditioning
To crank the engine use the counterholder 651 589 00 40 00.
To release or tighten the bolts on the torque converter use the retaining lock.
The work procedure is shown by way of an example on the vehicle without code (H08) High-performance air conditioning.

D27.20-1116-06
Unbolt
1 Remove cover (1) from access opening of transmission (2).
2 Apply counterholder (3) to bolts of belt pulley/vibration damper (4) and turn crankshaft in direction of engine rotation until the bolt (5) of the torque converter (6) is visible at the access opening.
3 Unscrew bolt (5).
Aid of helper required.
Hold crankshaft in place using counterholder (3).
4 Remove remaining bolts (5) in the same manner.
The torque converter (6) is fixed in place with a bolt (5) each at the four points of the clutch plate. The bolts (5) are mounted offset to each other by approx. 90°.

D27.20-1117-12
Checking
5 Check threaded inserts (arrows) in the drive plate (7) for damage and loose seat, replace drive plate (7) if necessary.
The threaded inserts (arrows) in the drive plate (7) can only be checked with the transmission removed.
D27.20-1116-06
Bolting on
6 Align drive plate and torque converter (6) with each other.
7 Use a suitable tool to press the torque converter (6) up against the torque converter drive plate, screw in the bolt (5) manually and tighten to 1st stage tightening torque.
Replace bolt (5).
8 Screw in remaining bolts (5) consecutively by hand and tighten crosswise to 1st stage tightening torque.
Replace bolts (5).
9 Tighten all bolts (5) crosswise as per the 2nd stage tightening torque.
Have assistant hold crankshaft in place using counterholder (3) on the belt pulley/vibration damper (4).
10 Tighten bolts (5) crosswise as per the 3rd stage tightening torque.
Have assistant hold crankshaft in place using counterholder (3) on the belt pulley/vibration damper (4).
11 Remove counterholder (3).
12 Mount cover (1) to access opening of transmission (2).