83-5542 Removal and installation of burner unit
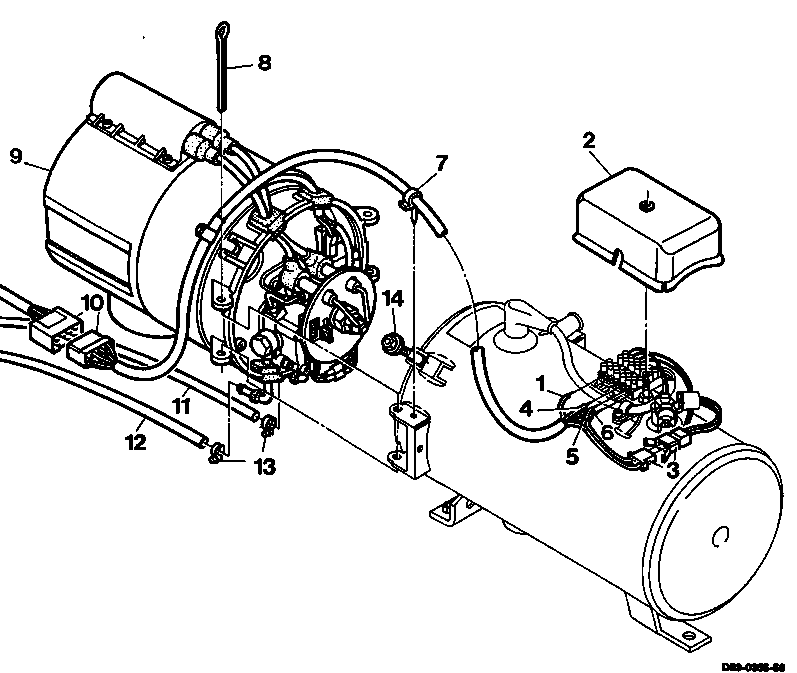
DBW 2010 heater unit
1 Purple cable | |
2 Protective cap | |
3 Plug connection | |
4 Blue cable | |
5 White cable | |
6 Orange cable | |
7 Cable holder | |
8 Hinge pin | |
9 Burner unit | |
10 Plug connection | |
11 Fuel suction line | |
12 Fuel return line | |
13 Clamp | |
14 Hexagon nut |
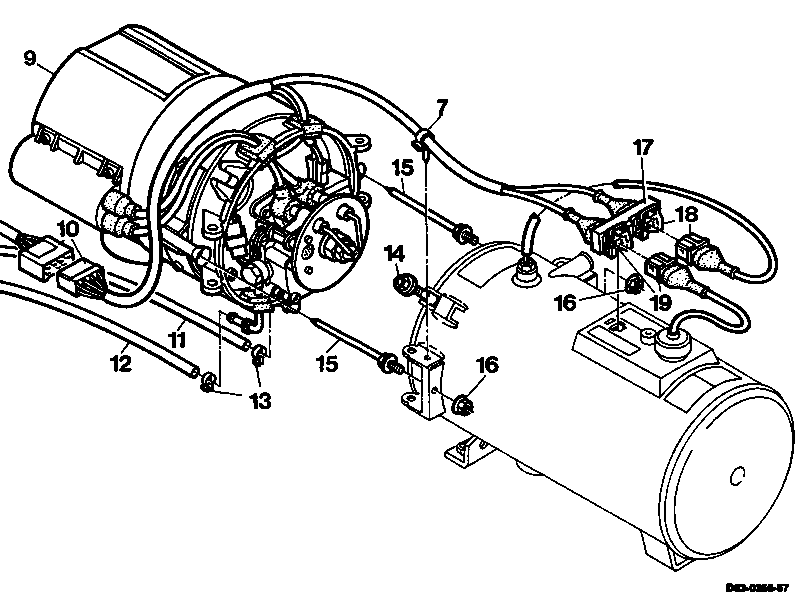
DBW 2012 heater
7 Cable holder | |
9 Burner unit | |
10 Plug connection | |
11 Fuel suction line | |
12 Fuel return line | |
13 Clamp | |
14 Hexagon nut | |
15 Centering pin | |
16 Hexagon nut | |
17 Holder | |
18 Plug connection | note color. |
19 Plug connection | note color. |

Removal, installation
-------------------------------
1 Disconnect battery.
2 Disconnect plug connection (10).
3 Remove fuel suction line (11) and fuel return line (12) on heater unit.
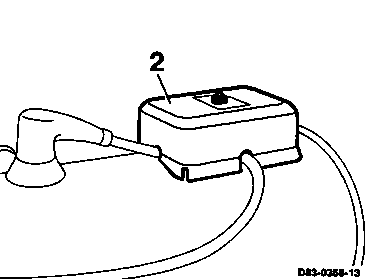
Work steps 4 to 9 for DBW 2010
4 Remove protective cap (2).
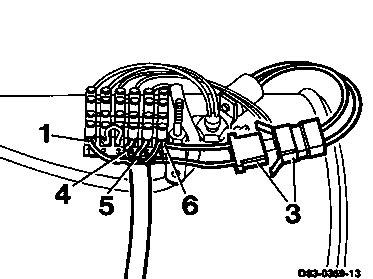
5 Disconnect plug connection (3) for blower thermostat.
6 Note cable colors corresponding to the numbers on the terminal block.
7 Disconnect purple (1), blue (4), white (5) and orange (6) cables from the terminal block.
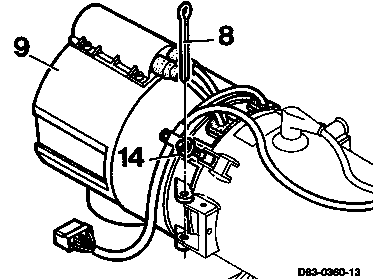
8 Remove hinge pin (8).
9 Loosen hexagon nuts (14) and turn clip outwards, remove burner unit (9).
Work steps 10 to 12 for DBW 2012
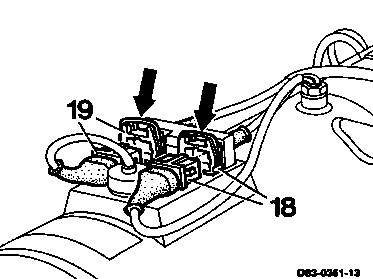
10 Press clips (arrows) downwards and disconnect plug connection (18) for temperature sensor and (19) for thermal fuse.
Installation note
Note colors of plug connections.

11 Raise tab (20) and remove holder (17) in direction of arrow.
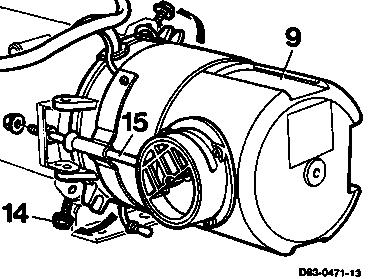
12 Loosen hexagon nuts (14) and turn clip outwards, remove burner unit (9).
Note
If necessary, remove centering pin (15).
13 Install parts in reverse sequence.