42 - 0845 Removal and installation of hydraulic unit
|
Tightening torque Nm
Retaining screw of brake line to hydraulic unit |
14 |

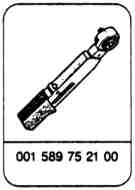
Special tools

Removal
1 With the ignition switched off, disconnect ground cable at the battery.
2 Detach brake lines on the hydraulic unit. Seal connections and lines with blind plugs.
Caution
The hexagon socket bolts on the hydraulic unit must not be slackened.

3 Unscrew fixing screw for cover. Remove cover.

4 Unlock locking device for multiple plug and detach plug.

5 Disconnect additional ground cable.
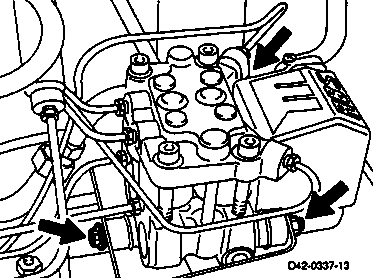
6 Unscrew hexagon nut and remove hydraulic unit from bracket.
7 Check damping rubbers for wear or damage and replace if required.
Only store hydraulic unit upright.
Installation
1 Install hydraulic unit in bracket and fasten with hexagon nuts.
2 Connect additional ground strap.
3 Connect brake lines to hydraulic unit and tighten using . (14 Nm)
Caution
Do not confuse brake lines.
001 589 75 21 00
000 589 75 03 00

Vehicle with diagonal brake circuit split
Model designation 667
1.1 = from brake master cylinder, intermediate piston circuit
1.2 = from brake master cylinder, plunger circuit
2.1 = to left-hand front wheel brake
2.2 = to right-hand front wheel brake
2.3 = to right-hand rear wheel brake
2.4 = to left-hand rear wheel brake
Vehicle with TT brake circuit split
Model designation 667 (with optional equipment code A50); 668 - 670
1.1 = from brake master cylinder, intermediate piston circuit
1.2 = from brake master cylinder, plunger circuit
2.1 = to left-hand front wheel brake
2.2 = to left-hand rear wheel brake
2.3 = to right-hand front wheel brake
2.4 = to right-hand rear wheel brake

4 Fit multiple connector. Engage locking device.
5 Fasten cover to hydraulic unit using the screw.
6 Bleed brake system and check for leaks.
(42 - 0016)
7 Connect ground cable to the battery.
8 Perform test program. (Refer to Diagnosis Manual - Transporter T1/T2 volume 1)