
P88.50-2688-06
1 Cover
2 Trunk lid
3 Adhesive tape strips
4 Screw
5 Eraser disc
6 Protective covering
7 Roller
8 Mercedes star
E19/1 Left license plate lamp
E19/2 Right license plate lamp

P88.50-2689-08
1 Cover
9 Height arrest

P88.50-2692-01
1 Cover
2 Trunk lid
A Guide dimension
| Removing | ||
| If the paneling (1) is replaced due to paint and body work, ensure that there are no paint shoulders or masking shoulders on the assembly point (bonding surface) on the trunk lid (2). If this is not observed, water can penetrate between the trunk lid (2) and the paneling (1). | ||
1 | Open trunk lid (2) | ||
2 | Install adhesive tape strips (3) on trunk lid (2) as illustrated. | To protect paint on trunk lid (2) when removing and installing paneling (1) later. | |
3 | Remove lenses from left license plate lamp (E19/1) and right license lamp (E19/2) | ||
4 | Remove screws/bolts (4) | ||
5 | Heat paneling (1) along bonding surface with heat gun, simultaneously press off of trunk lid (2) with mounting wedge and remove. | Carefully remove paneling (1) from trunk lid (2) and remove to prevent damaging paint on trunk lid (2). | |
Paneling (1) is damaged during removal and must be replaced. | |||
| |||
Hot-air gun | |||
6 | Remove glue residues from trunk lid (2) with eraser disc (5) | Removal disk, Ø 100 mm with fixing shank, 3M Deutschland GmbH D-41453 Neuss | |
Drill | |||
| Notes on removing adhesive residues and foils on paint and metal surfaces with surface conditioning disks | ||
7 | Clean bonding surface on trunk lid (2) | Bonding surface must be free of grease and dust, otherwise the adhesive force of the paneling (1) starts to decrease and leakage can occur. | |
Observe drying time for cleaning agent | |||
Cleaner | |||
| Install | ||
8.1 | Cut off height arrest (9) with suitable tool, e.g. sharp knife or side cutter pliers. | On vehicles up to vehicle identification end number | |
Carefully cut off height arrest (9). Danger of damaging paneling (1) | |||
9.1 | Position paneling (1) on trunk lid (2), align according to reference dimension (A) and glue on. | On vehicles up to vehicle identification end number | |
Carefully position paneling (1) on trunk lid (2) to prevent damaging paint on trunk lid (2). When checking reference dimension (A) with feeler gauge, mask feeler gauge with thin adhesive tape, e.g. tesa tape, to protect against paint damage. | |||
Reference dimension (A): approx. 0.5 mm on bottom joint between paneling (1) and trunk lid (2). | |||
9.2 | Position paneling (1) on trunk lid (2) and glue on | On vehicles up to vehicle identification end number | |
Carefully position paneling (1) on trunk lid (2) to prevent damaging paint on trunk lid (2). | |||
10 | Pull protective covering (6) over roller (7) | If the roller (7) is used without protective covering (6) when accomplishing the following step, the paneling (1) or the trunk lid (2) can be damaged. | |
Use wide protective covering (6). | |||
| |||
| |||
11 | Roll paneling (1) onto trunk lid (2). | Tightly roll on paneling (1) (minimum roll-on force 75 N), otherwise the adhesive force of the paneling (1) starts to decrease and leakage can occur. The protective covering (6) on the roller (7) must be completely clean, otherwise the paneling (1) or the trunk lid (2) can be damaged when rolling on. | |
Roll paneling (1) several times from center to left and right sides. Finally roll paneling (1) at center in area below Mercedes star (8) over a length of approx. 20 cm. | |||
| |||
| |||
12 | Tighten bolts (4) | ||
13 | Install lenses for left license plate lamp (E19/1) and right license lamp (E19/2) | ||
14 | Close trunk lid (2) |
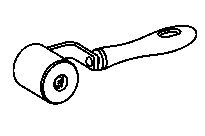


168 589 05 63 00
Protective covering
Roller
Mounting wedge
110 589 03 59 00
221 589 00 98 00
Repair materials
Number | Designation | Order number |
BR00.45-Z-1025-04A | Cleaner | A 005 989 19 71 |
Henviste dokumenter
- ah0000p001301ak Oplysninger om fjernelse af rester af klæbemiddel og folie på lak- og metaloverflader med gummivalse