
P72.10-3394-09
Shown on MODEL 204.0 |
1 | Frame seal | 4 | Front door | 7 | Insert | ||
2 | Mirror triangle paneling | 5 | Spacer strips | ||||
3 | Window frame paneling | 6 | Roller |
Danger ! | Risk of injury caused by fingers being jammed or pinched when removing, installing or aligning hoods, doors, trunk lid/rear-end door or sliding roof. | No parts of the body or limbs should be within the operating area when the components are moving. | |
| Remove | ||
1 | Wind crank window fully down | ||
2 | Unclip mirror triangle paneling (2) | Allow mirror triangle covering (2) with built-in loudspeaker to hang on connected electrical line. | |
3 | Remove window frame paneling (3) | ||
4 | Remove sealing frame (1) from front door (4) | ||
5 | Remove adhesive residues from front door (4) and clean gluing surface with adhesive removal disc | ||
| Notes on removing adhesive residues and foils on paint and metal surfaces with surface conditioning disks | ||
Bonding surface must be free of grease and dust. | |||
Cleaner | |||
| Install | ||
6 | Loosen spacer strips (5) approx. 2 cm at one end of the new door frame seal (1) | ||
7 | Glue sealing frame (1) to front door (4) starting at center of lower door edge | The spacer strips (5) on the sealing frame (1) should make contact over the entire length with door paneling, without gap. | |
8 | Cut protrusion off o sealing frame (1) at bottom of door | Cut off protrusion so that there is no gap between the two ends of sealing frame (1). Do not cut off protrusion at end of sealing frame (1) where the insert (7) protrudes. | |
9 | Assemble both ends of sealing frame (1) | ||
10 | Firmly roll on sealing frame (1) with roller (6) | Roller | |
11 | Completely remove spacer strips (5) from sealing frame (1) starting at detached end | ||
12 | Install window frame paneling (3) | ||
13 | Install mirror triangle paneling (2) | ||
14 | Close crank window |
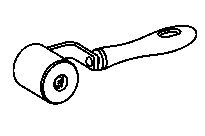
168 589 05 63 00
Roller
Henviste dokumenter
- ah0000p001301ak Oplysninger om fjernelse af rester af klæbemiddel og folie på lak- og metaloverflader med gummivalse
- as0000z001101a Fare for personskade pga. fastklemning eller knusning af fingre ved af-, påmontering og indstillingsarbejde på motorhjelm og bagklap, døre, dæksler og soltag.