AR09.41-B-1311I | Remove/install charge air pipe | 12.02.16 |
Cumbustion engine 372, 374, 376, 377 with Vehicle 364, 382, 384, 386, 682, 688, 693, 694, 695
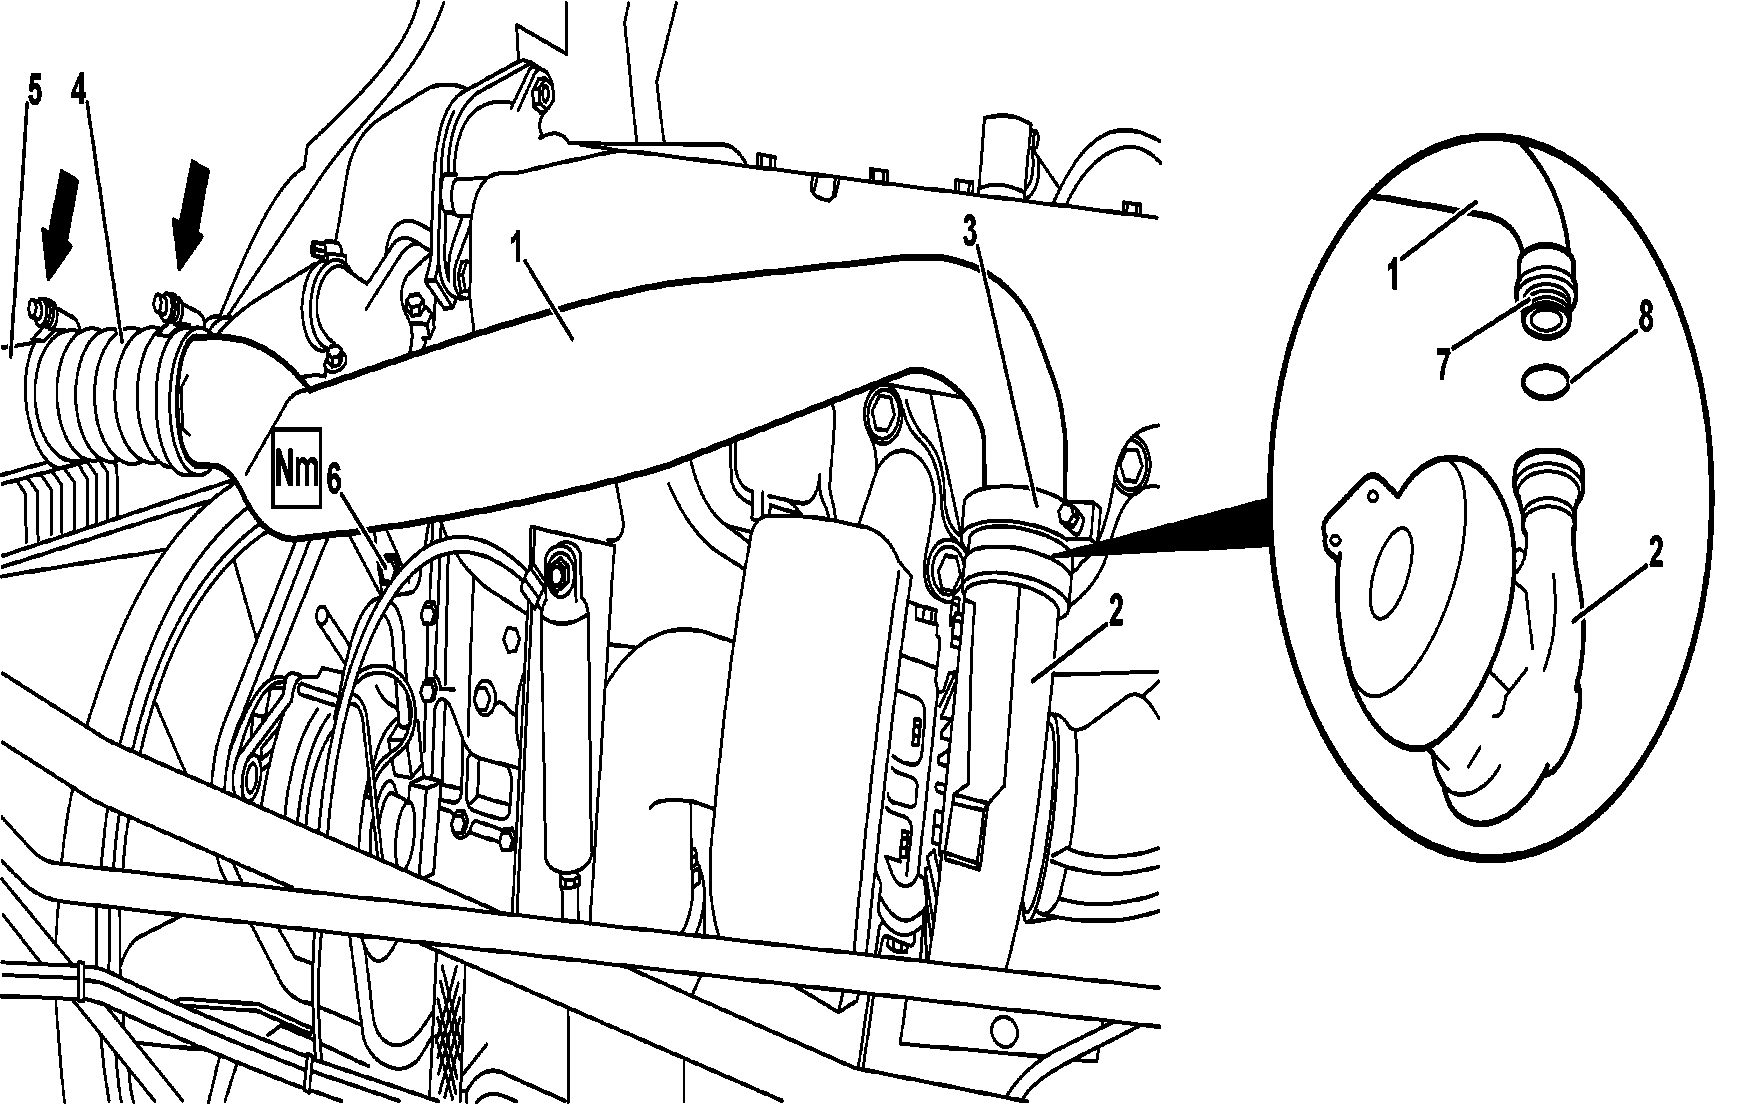
B09.41-0016-08
1 Pipe from turbocharger to charge-air cooler
2 turbocharger
3 Clamp with internal channel
4 Red color flexible hose
5 Charge-air cooler pipe
6 Bracket fastening bolt
7 Pipe fitting opening
8 Sealing ring
| Remove and install | ||
Danger! | Risk of accidents due to vehicle moving when the engine is started. Risk of injuries by pinching or suffer burns when working while the engine started or when the vehicle is moving | Assure vehicle against unintentional move. Use tight fitting and closed work clothes. Do not touch heated or running parts. | |
1 | Disconnect the battery lead | Unscrew the negative lead bolt at the side rail, avoid removal at battery post terminals. | |
2 | Tilt the cab. | ||
3 | Loosen the two of the red color flexible hose (4) | Installing: Check the clamps and the flexible pipe (red color) and clamps for condition, should it be necessary, replace them. | |
4 | Remove the bolt (6) with the nut and washer from the pipe fastening bracket | | |
5 | Loosen and remove the clamp with internal channel (3) at the outlet of the turbocharger (2) | Installing: Check the clamp for condition, should it be necessary, replace them. | |
6 | Remove the pipe (1) from the turbocharger | Be careful so no object falls inside the turbocharger, close the outlet with a suitable plug. | |
7 | Remove the sealing ring (8) from the fitting opening (7) of the pipe | Installing: Install a new sealing ring lubricated with neutral petroleum jelly. | |
Before installing the pipe, check the inside walls for cleaning. | |||
8 | Install in reverse order | ||
9 | Run the engine and check for eventual leaks |
Charge air pipe/charge air cooling
Número | Denominação | Engine 372.9; 374.9; 376.9 except for gas engines | |||
BA09.41-B-1001-01A | Fastening of the clamps on the inlet and outlet flexible hoses | Nm | 10 | ||
Produtos para reparos
Número | Denominação | Número de pedido |
BR00.45-B-1001-06A | Vaseline | - |