72 - 1051 Removing, installing and adjusting hinged door

1 Hinged door
2 Door trim panel
3 Armrest
4 Cross-head screw
5 Rosette
6 Cover cap Up to veh. end no.: P 039 688
7 Cross-head screw Up to veh. end no.: P 039 688
8 Window crank handle As of veh. end no.: P 039 689
Modified crank handle
9 Rosette
10 Serrated washer Replace
11 Countersunk screw 25 Nm
12 Dowel sleeve Replace Up to veh. end no.: P 074 652
13 Pin As of veh. end no.: P 074 653
14 Lock washer Replace As of veh. end no.: P 074 653

Removing
1 Remove cover cap on crank handle attachment point or take off top section of window crank handle.
2 Unscrew crank handle or release and remove together with rosette.
Previous version up to veh. end no.: 039 688
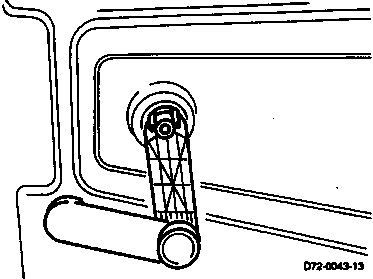
Modified version as of veh. end no.: 039 689
Note
The crank handles are not interchangeable because the crank mechanisms have been modified.

3 Pull off rosette for inside door handle and unscrew armrest.
4 Pull off door trim panel.
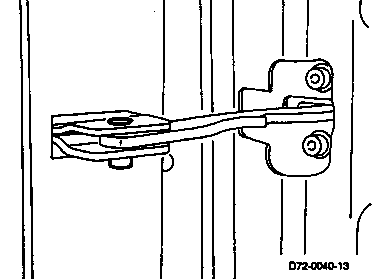
5 Drive out dowel sleeve in door arrester using a drift.
Previous version

6 Pull off lock washer (14) and remove arrester pin (13).
Modified version
13
14

7 Pull off cover caps and unscrew hinge fixtures behind.
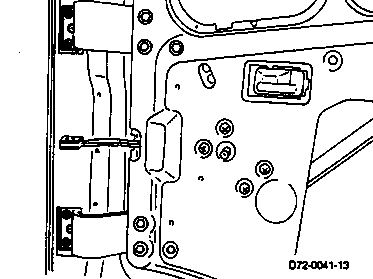
8 Secure door to prevent it falling and remove with hinges attached.
Installing and adjusting
1 Position door, align roughly and secure by tightening one screw in each hinge.
2 Fasten door arrester to A-pillar using a new dowel sleeve.
Previous version
3 Insert arrester bolt (13) and secure using a new lock washer (14).
Modified version
13
14

4 Align striker pin with lock and tighten slightly.
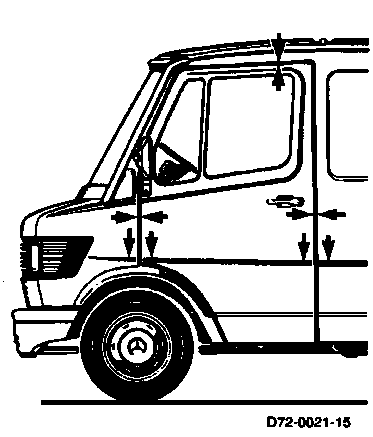
5 Close door. Adjust bead pattern, gap width and installation depth. The gap must measure approx. 6.5 0.5 mm all the way round.
6 The door bead must be properly aligned with those on the A and B-pillars.
7 The installation depth at the A-pillar must be between flush and 1 mm recessed to prevent wind noise.
8 Adjust the installation depth of the door on the lock side so that it is flush with the B-pillar by moving the striker pin.
Note
If the shoulder of the striker pin strikes the rotary tumbler of the lock when the door is closed, inserts (available through the parts service) must be added behind the striker pin.

9 Check cellular rubber strips for damage and correct adhesion. Replace if necessary.

10 Install cover caps.
11 Attach door trim panel.
Note
To prevent the penetration of water, the plastic flap on the reverse of the trim panel should be positioned behind the inside door panel.
12 Press on rosette for inside door handle. Screw on armrest.
13 Press on window crank handle and tighten screw or lock in place. Press on cover.
Previous version
Modified version